Initialization
You only have to do the following initialization tasks when you are setting up your TechFolio for the very first time.
Join GitHub
To get started with TechFolios using this Quick Start, all you need is an account at GitHub. You don't need to download any software or even know how to use git. Everything you need to do for this Quick Start can be done in a browser.
If you haven't already, sign up for GitHub and verify your email address. Choose your username wisely, as that will become part of the URL to your portfolio site.
Keep your username professional and close to your real name: "the3Gr8est" might seem super clever to you right now, but will be awkward and embarrassing to you during an interview next year. Restrict yourself to lowercase characters, numbers, and hyphens to make it simple to remember. Uppercase adds unnecessary confusion. Don't make your username location-specific: "philip-at-manoa" will be confusing if you move next year to San Francisco.
If you decide your current GitHub username could use some improvement, it is very easy to change your GitHub username to something more professional.
Before proceeding, login to your GitHub account.
Copy the template
In this step, you'll make your personal copy of the TechFolio template.
GitHub makes changes to their user interface quite frequently. We try to keep these screenshots up to date, but your browser might display something slightly different. Let us know if things look really different.
First, go to https://github.com/techfolios/template:
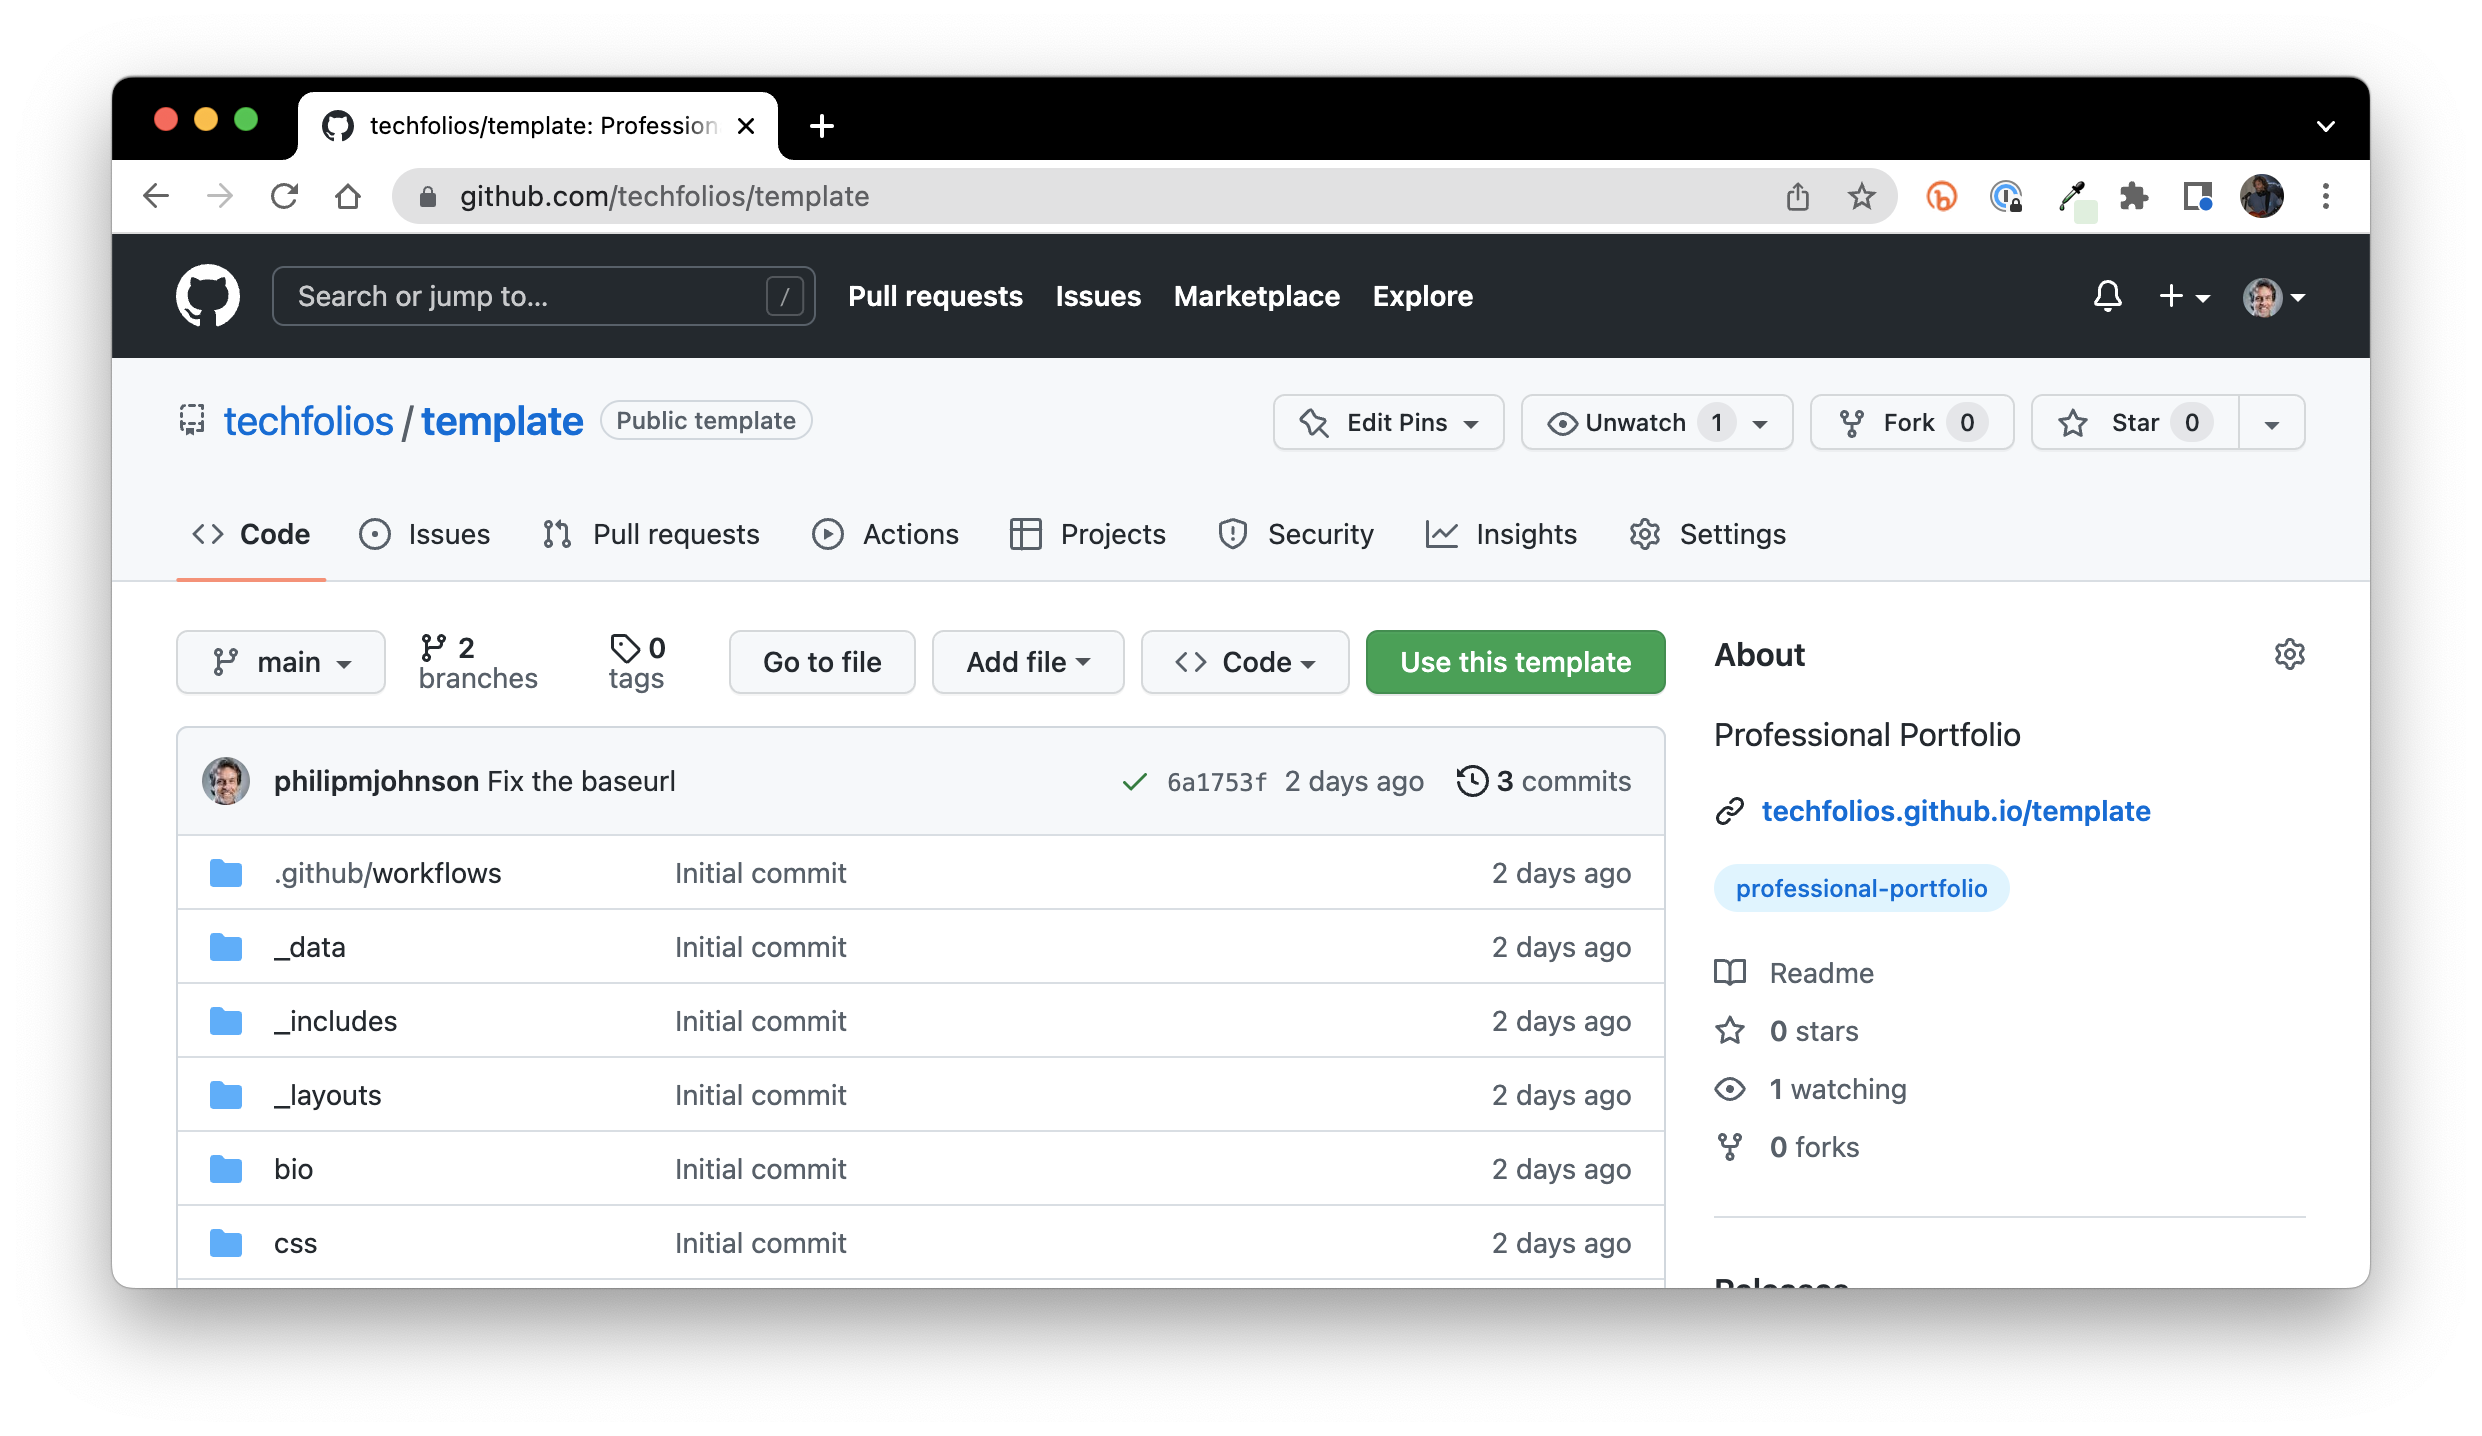
Click the Use this template button, then select "Create a new repository". (If you don't see the "Use this template" button, make sure you are signed in to GitHub.) Select your account as the "Owner", and specify the repository name as your account name plus ".github.io". It should look similar to this:
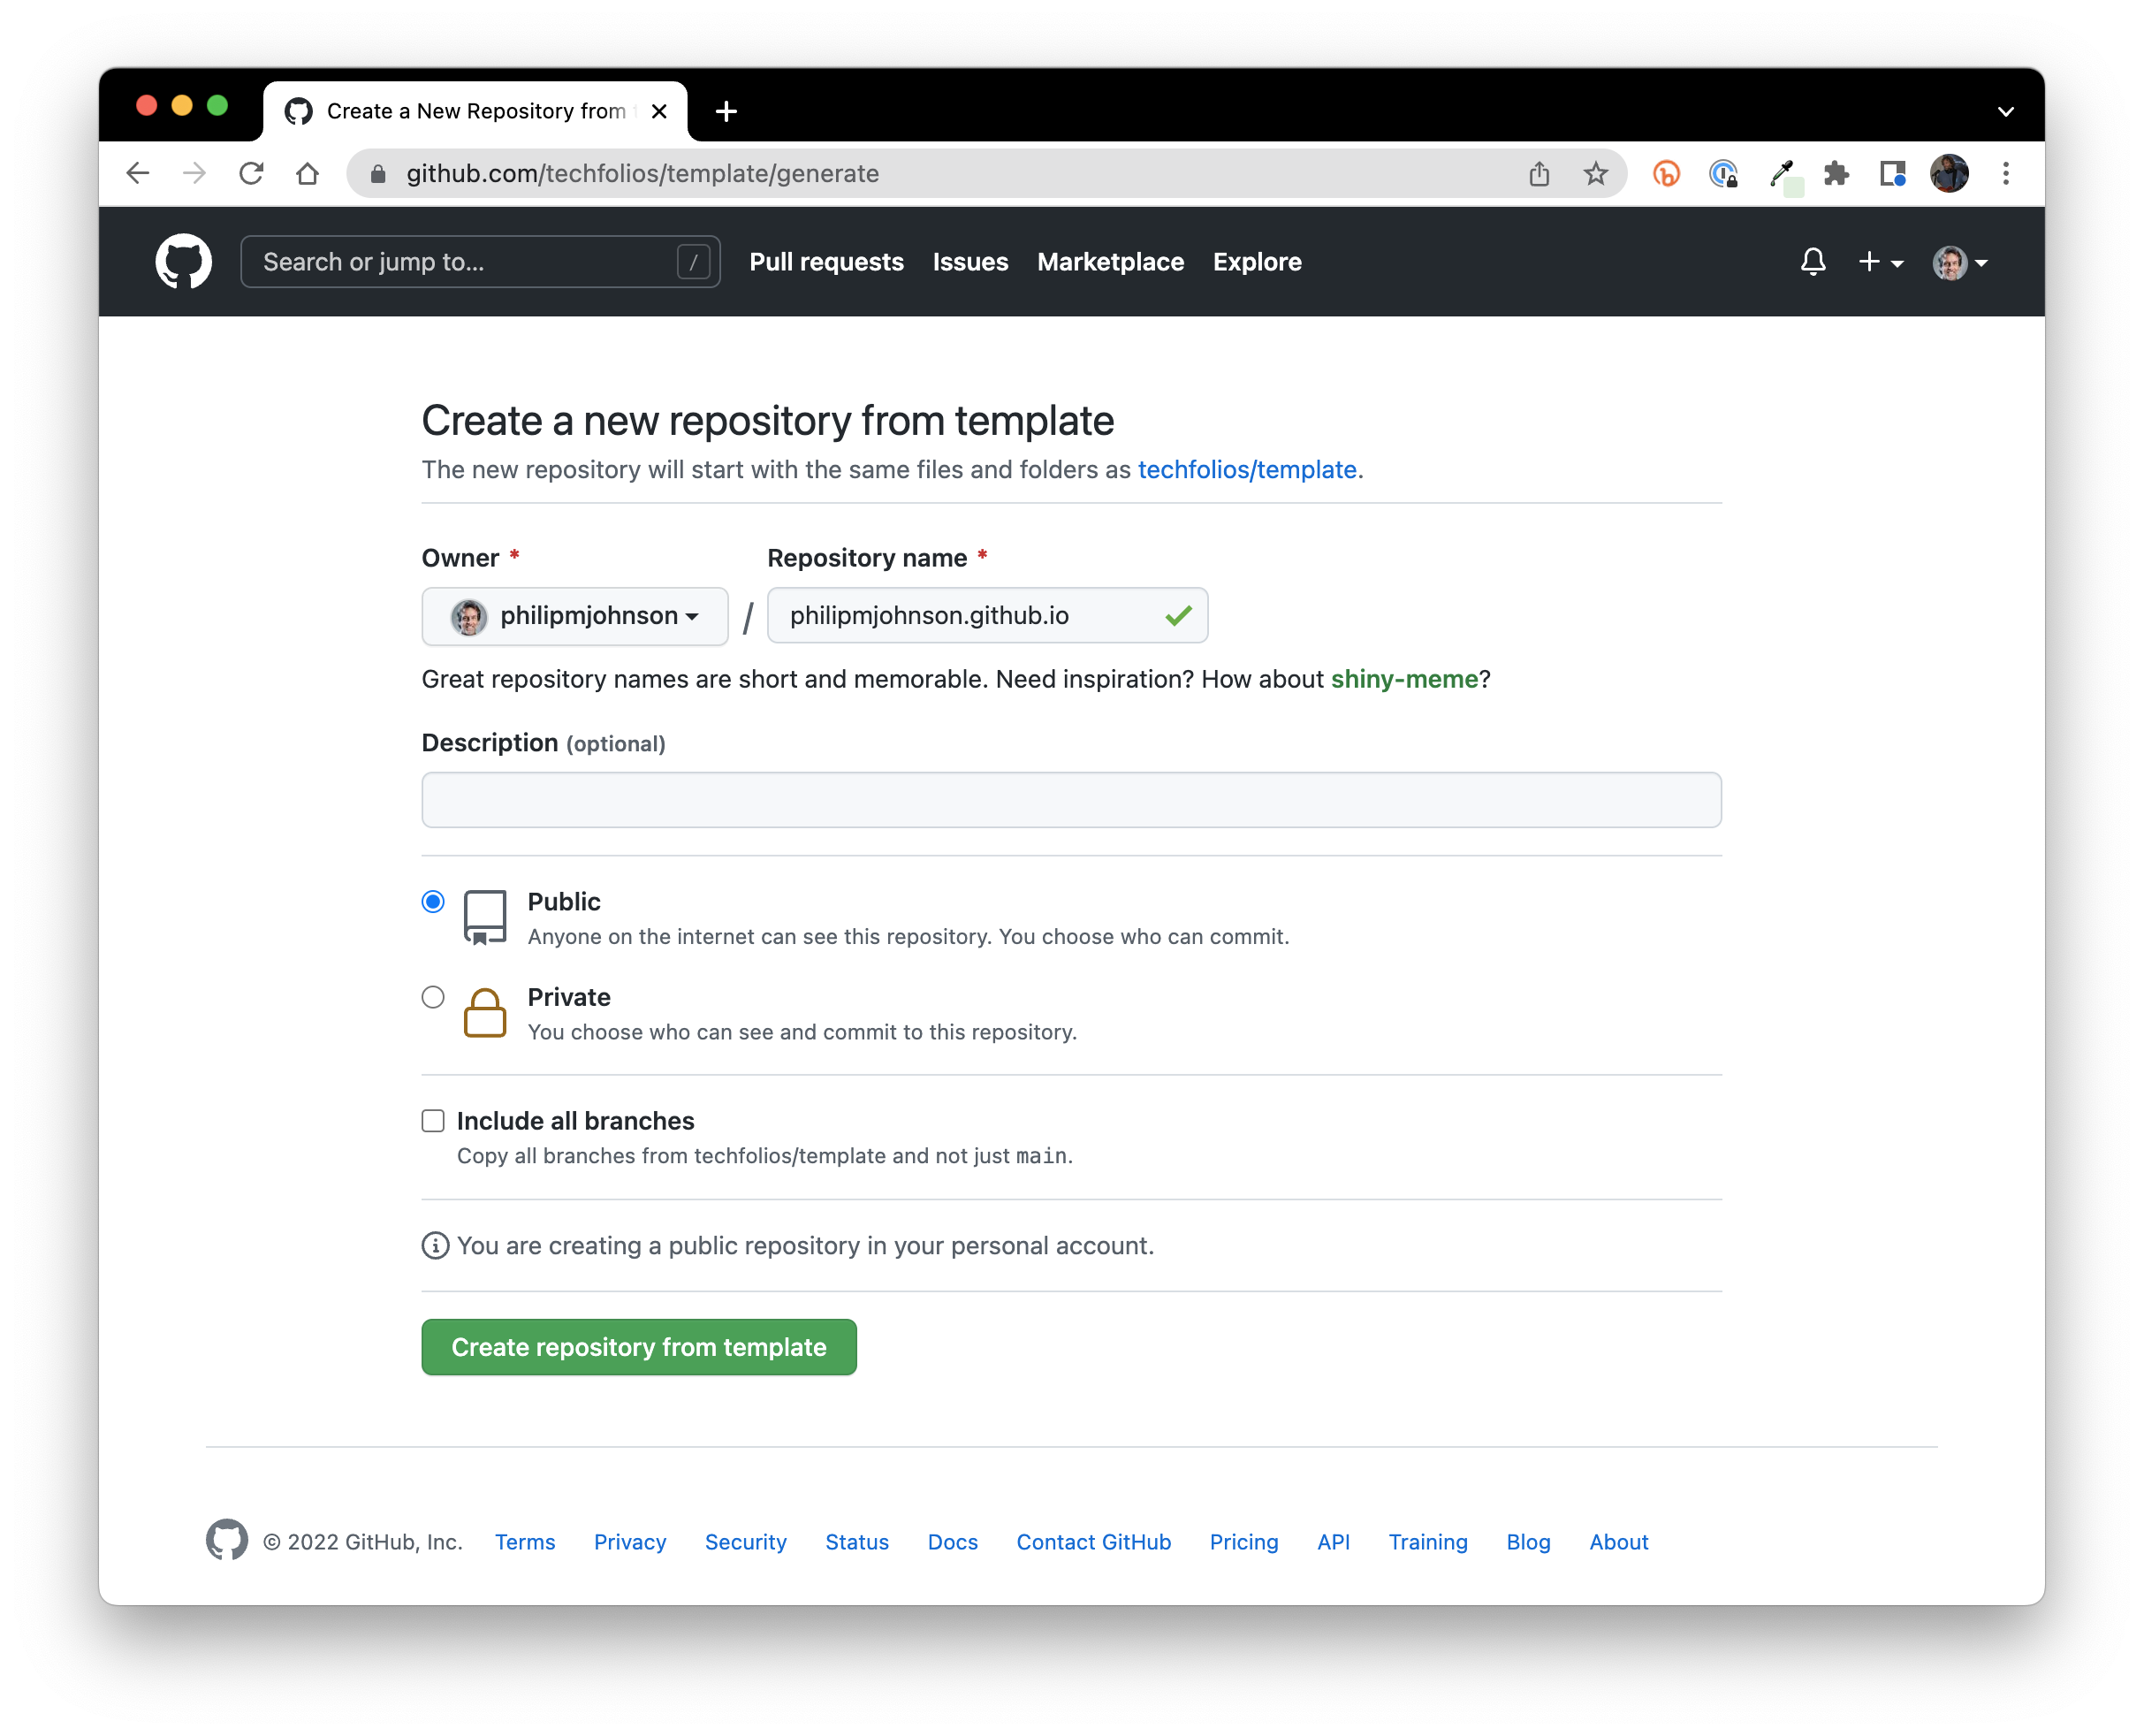
Then press the Create repository button. GitHub will make a new copy of the template in your account and display a page like this:
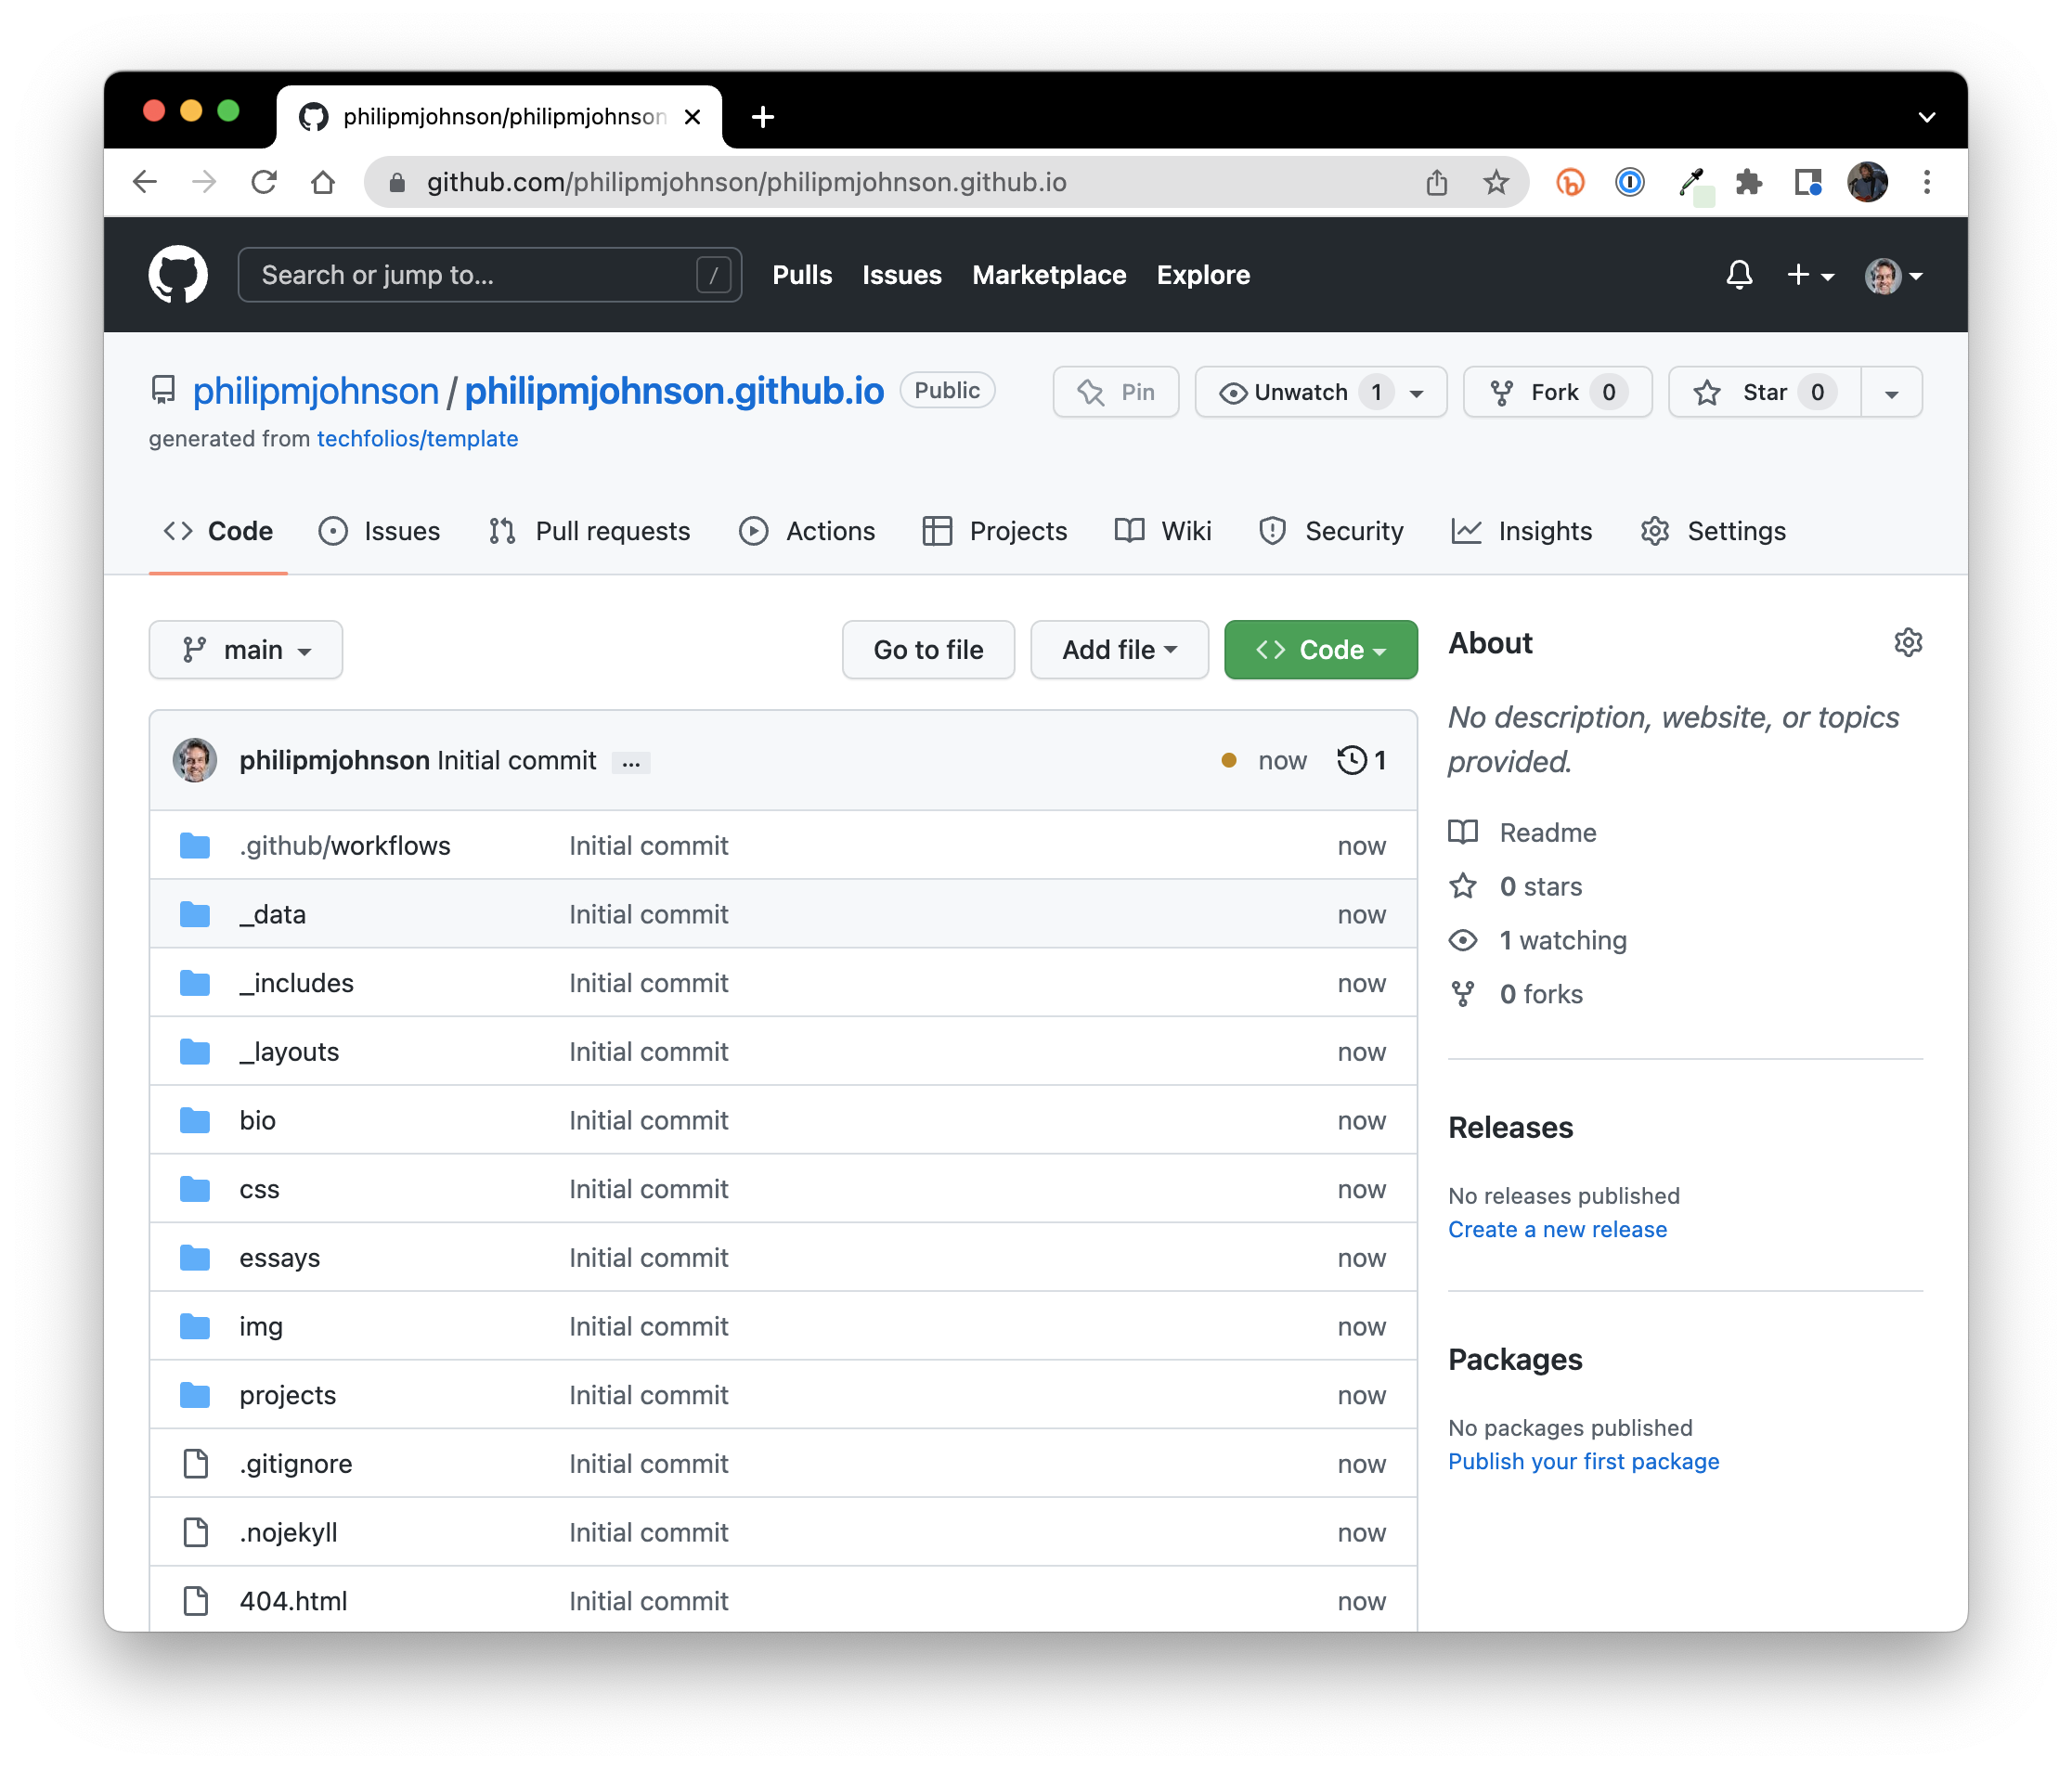
Make sure the repository name is correct. As you can see in this example, since my GitHub username is "philipmjohnson", the repository name must be "philipmjohnson.github.io". If the first part of the repository name does not match your GitHub username exactly, then you need to rename your repository right now to make it match. Click on the Settings link to rename your repo, it's easy to fix.
Now let's fix the "About" section to link to your portfolio. Click on the gear icon next to the "About" label, which brings up a dialog box. Add "Professional Portfolio" as the description, add "https://USERNAME.github.io" (where USERNAME is your username) as the website, and (if you want) add "professional-portfolio" as a topic. The result should look like this:
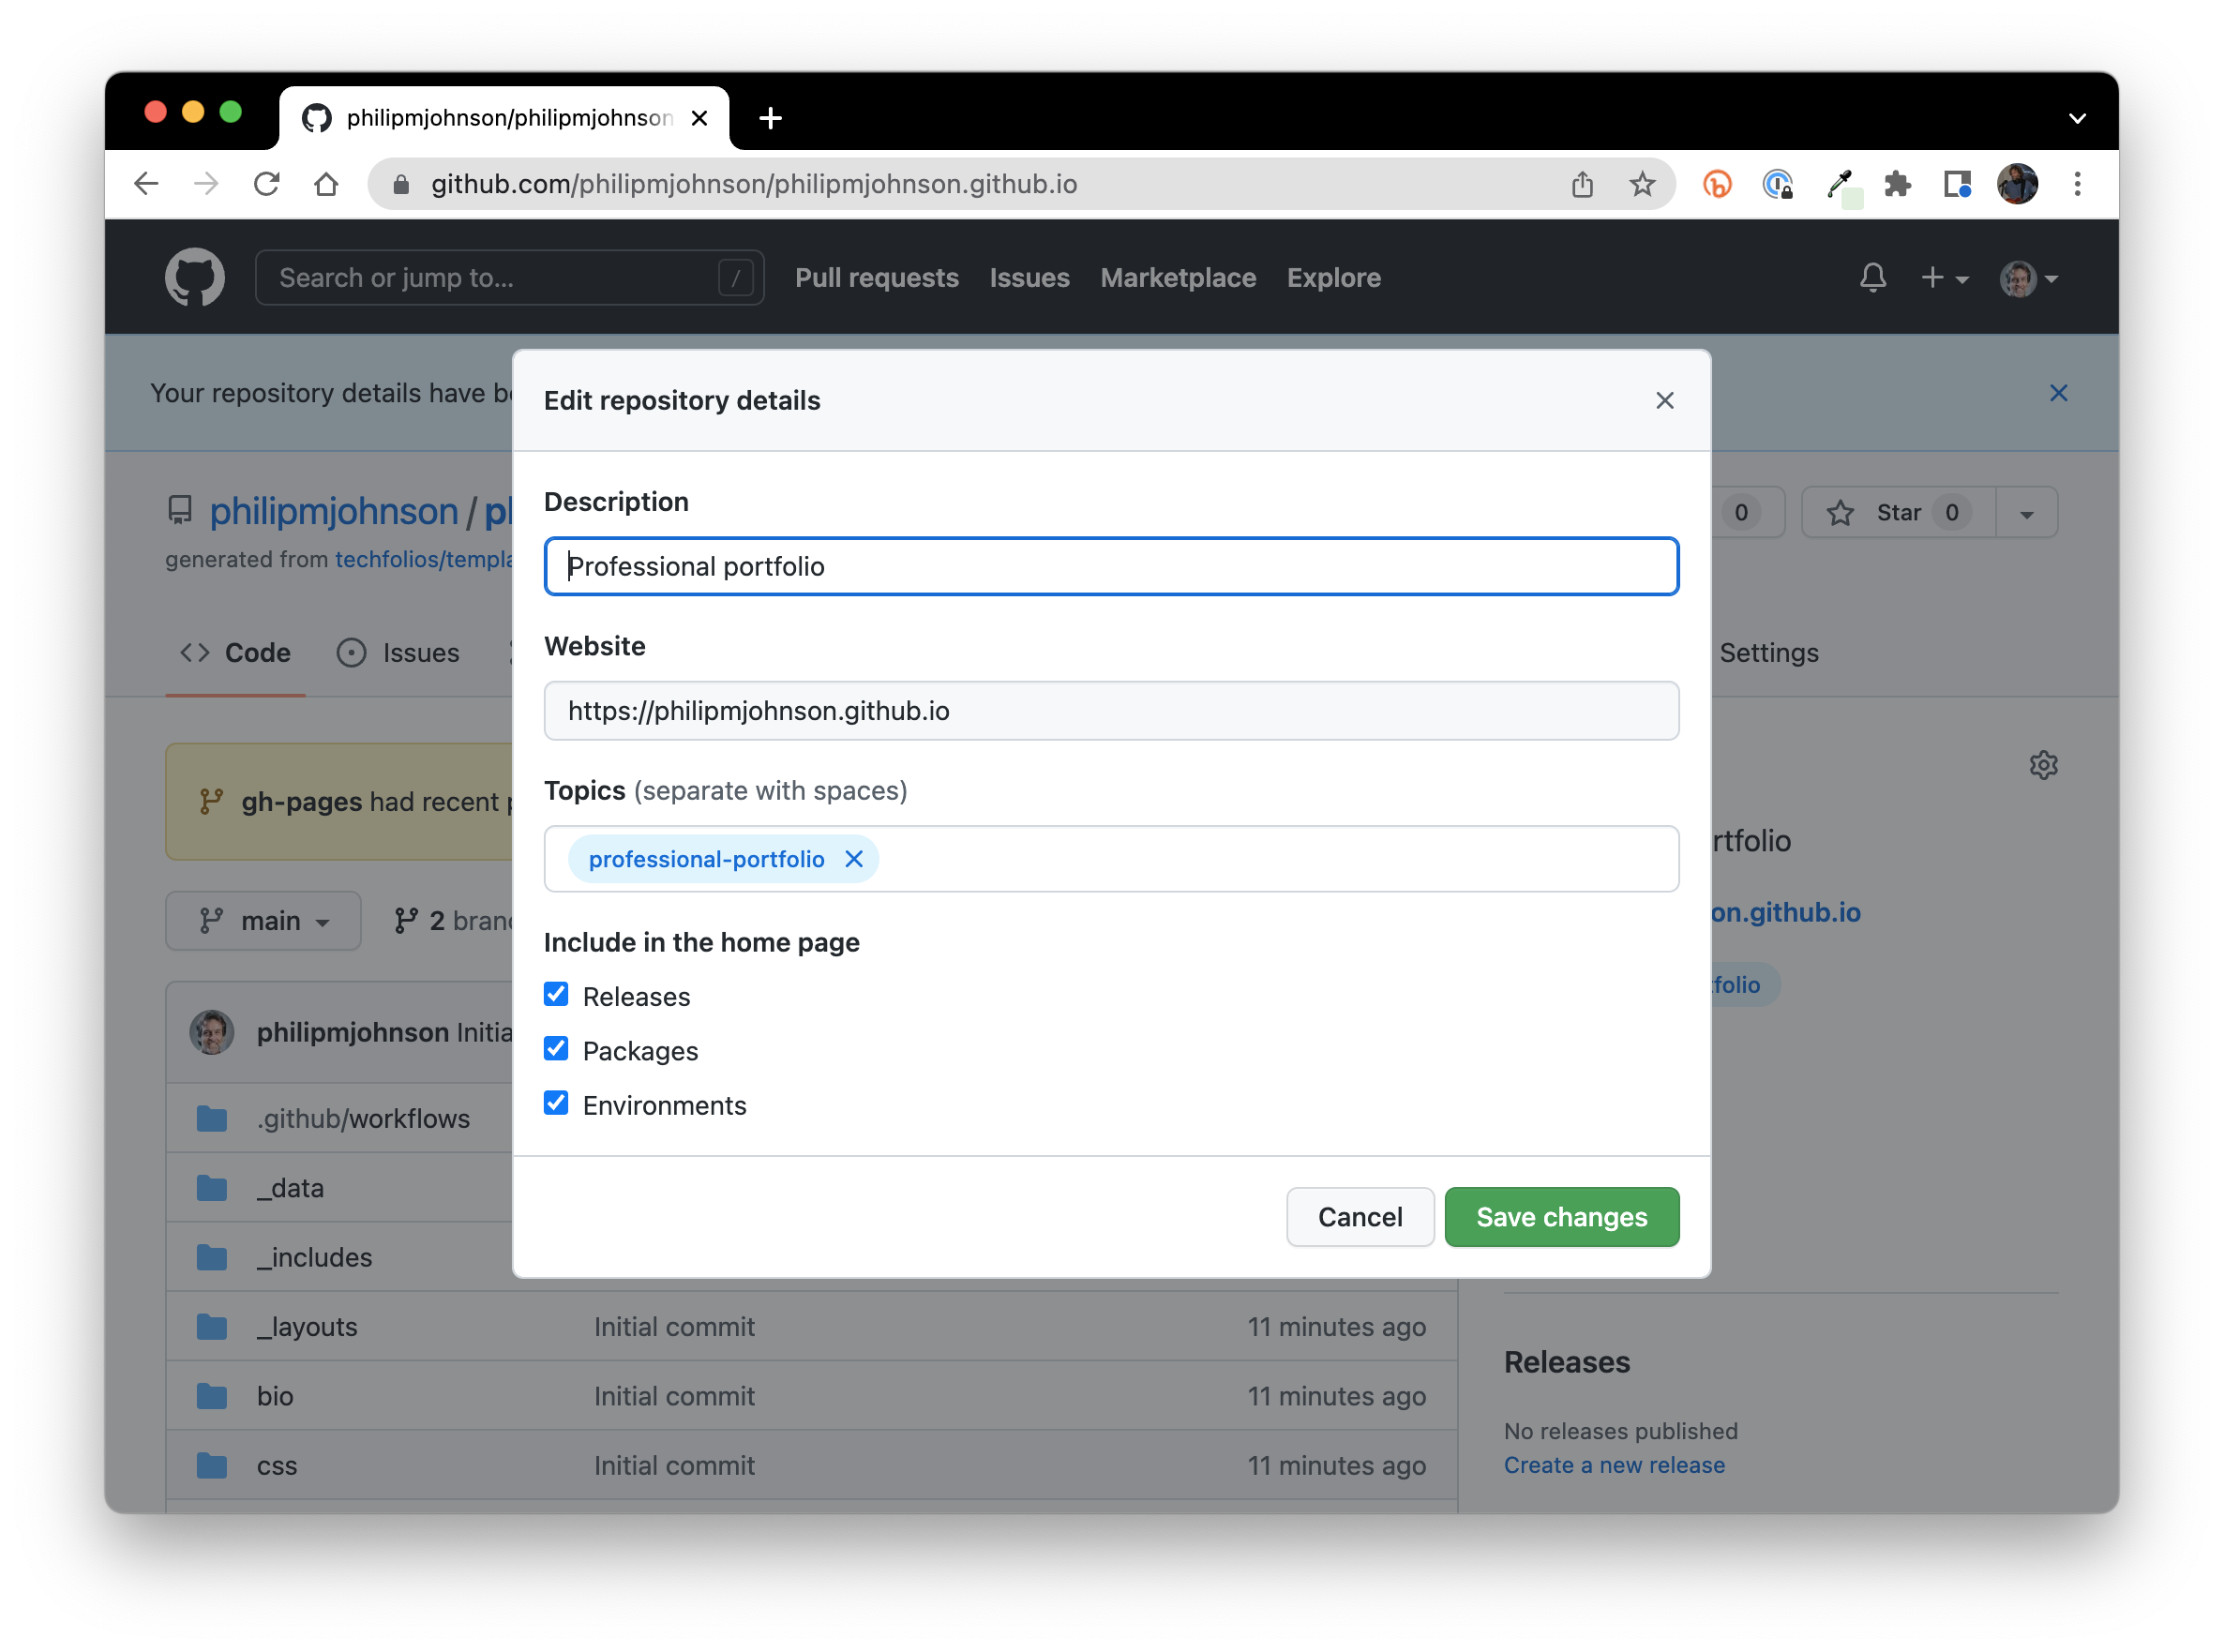
After saving the changes, you'll have a convenient link to your professional portfolio on the home page for this repo.
Set workflow permissions to "Read and write"
Now click on the Settings tab near the top of the window, then Actions and General in the left sidebar to display the Actions permissions page:
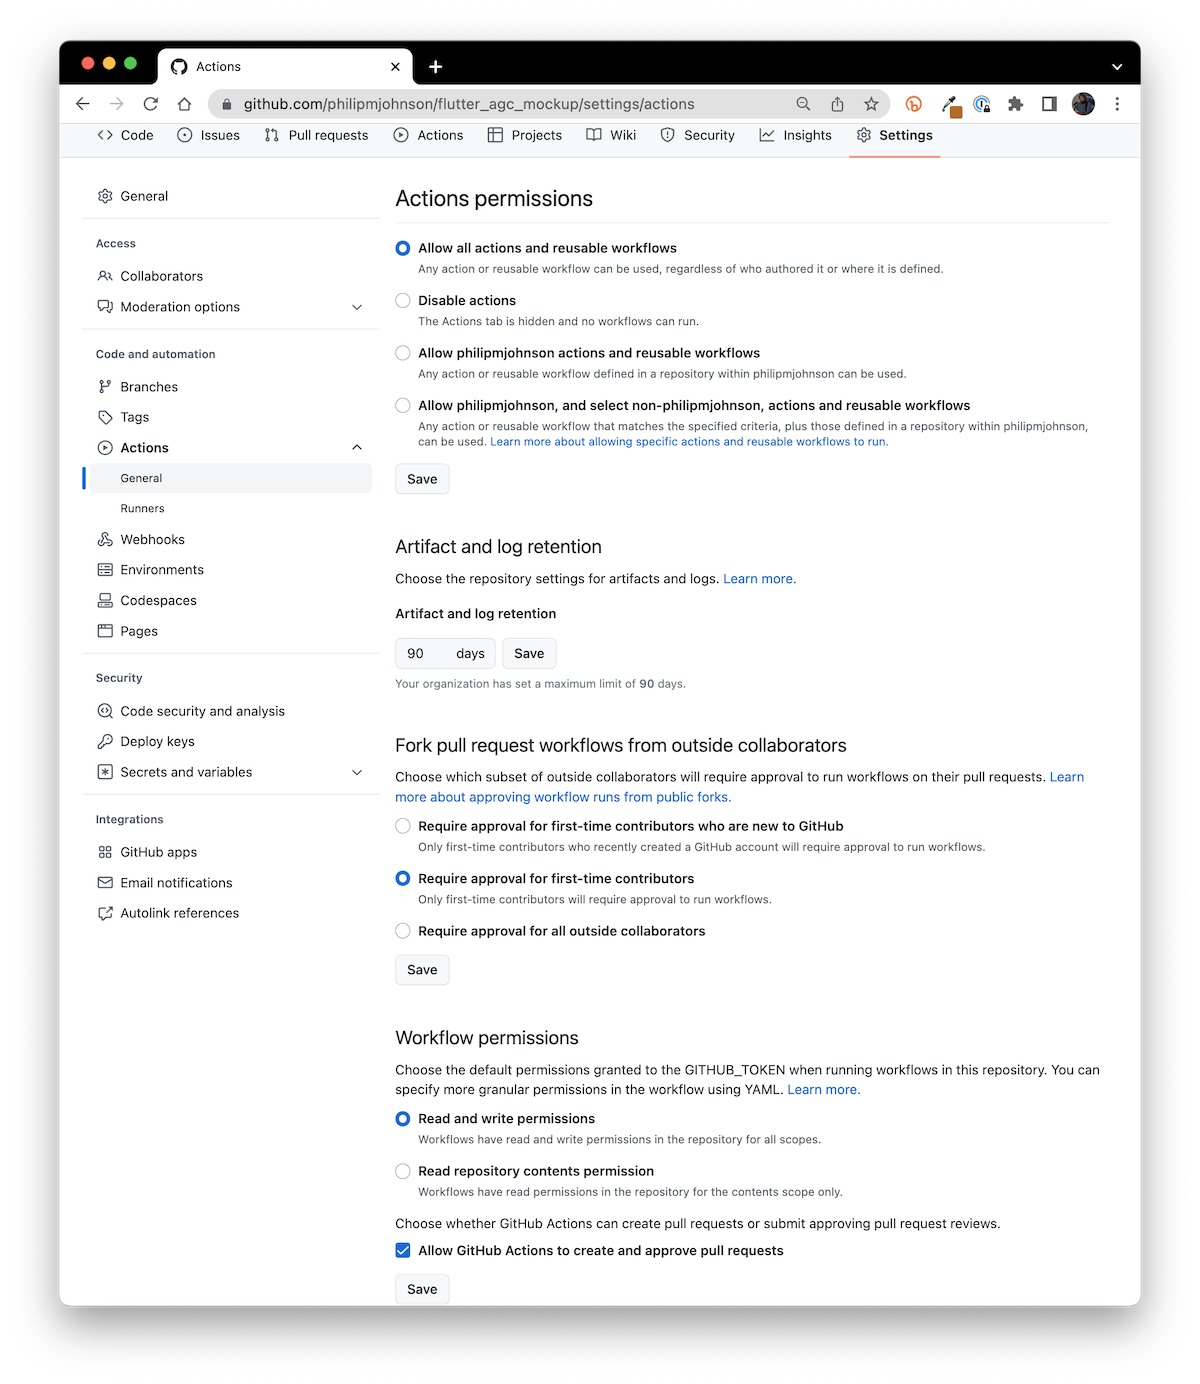
Check that Workflow permissions is set to "Read and write permissions". If not, click the radio button and press "Save". Also, make sure the box is checked for "Allow GitHub Actions to create and approve pull requests".
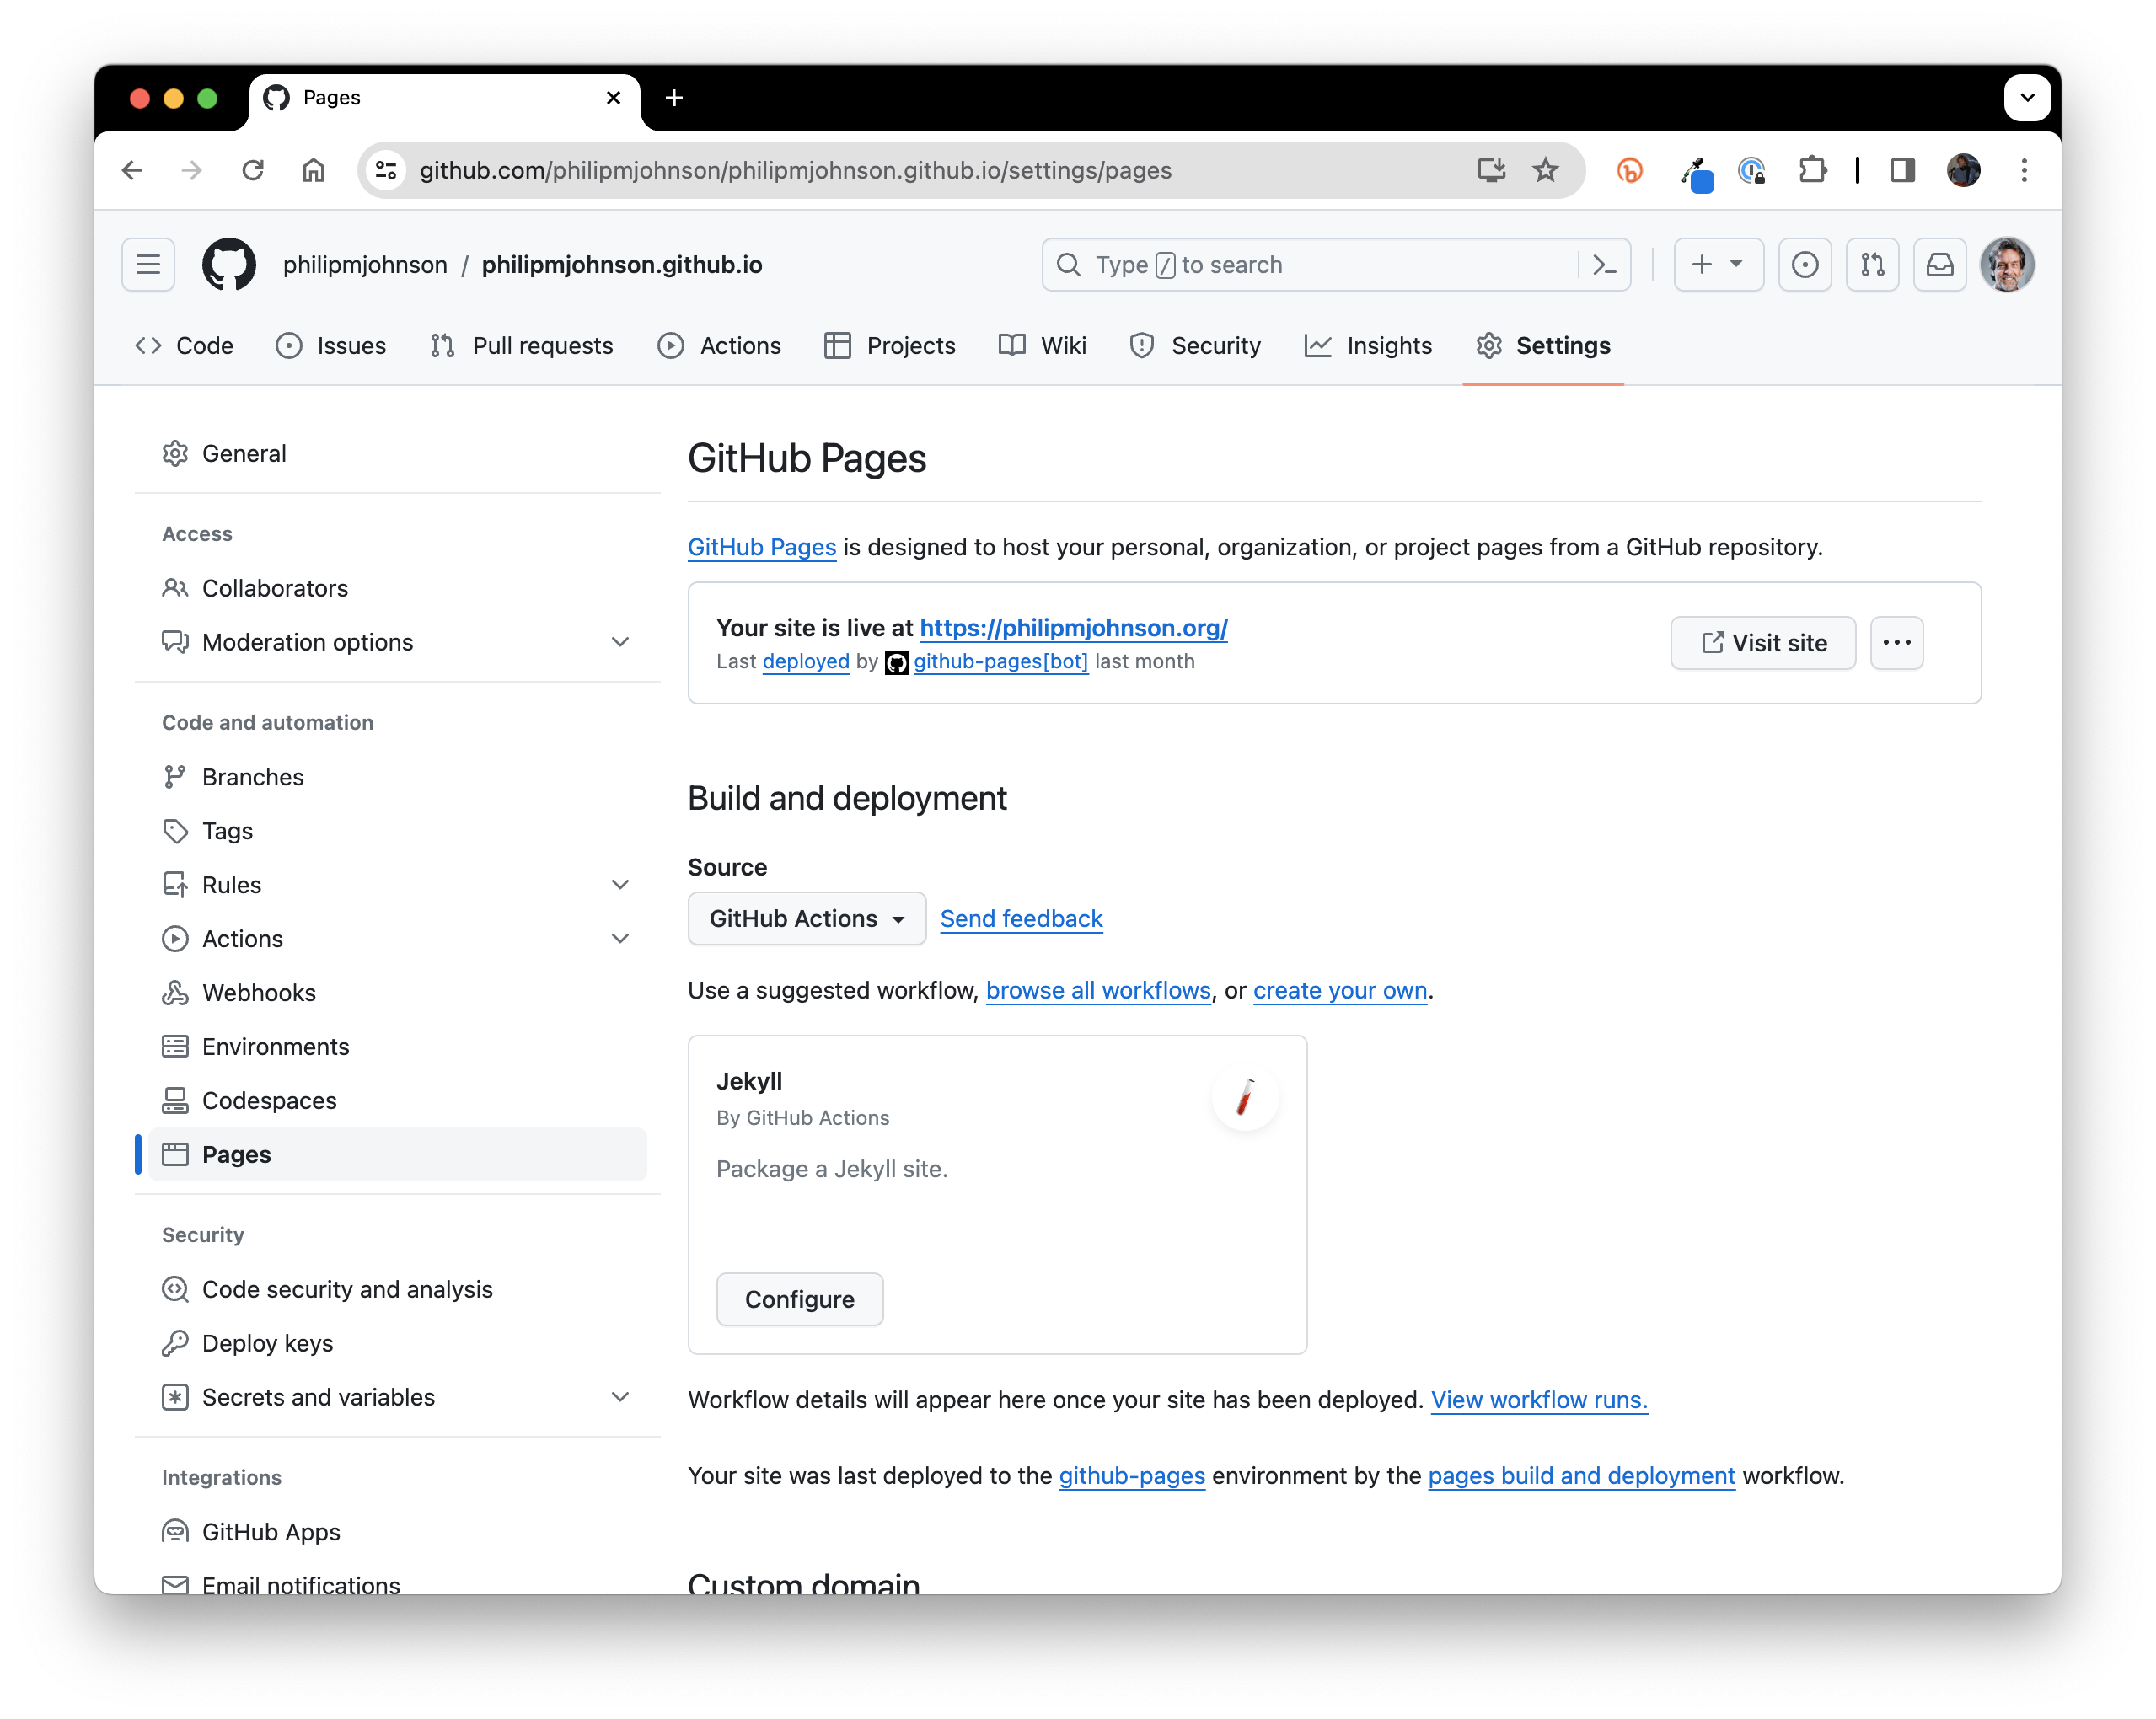
Select GitHub Actions for deployment
Next, click on the Pages link in the left sidebar, and make sure the "GitHub Actions" is selected as the "Source" for Build and Deployment:
Configure _config.yml
Now that your repository is set up, we can start editing the template files to make this professional portfolio your own.
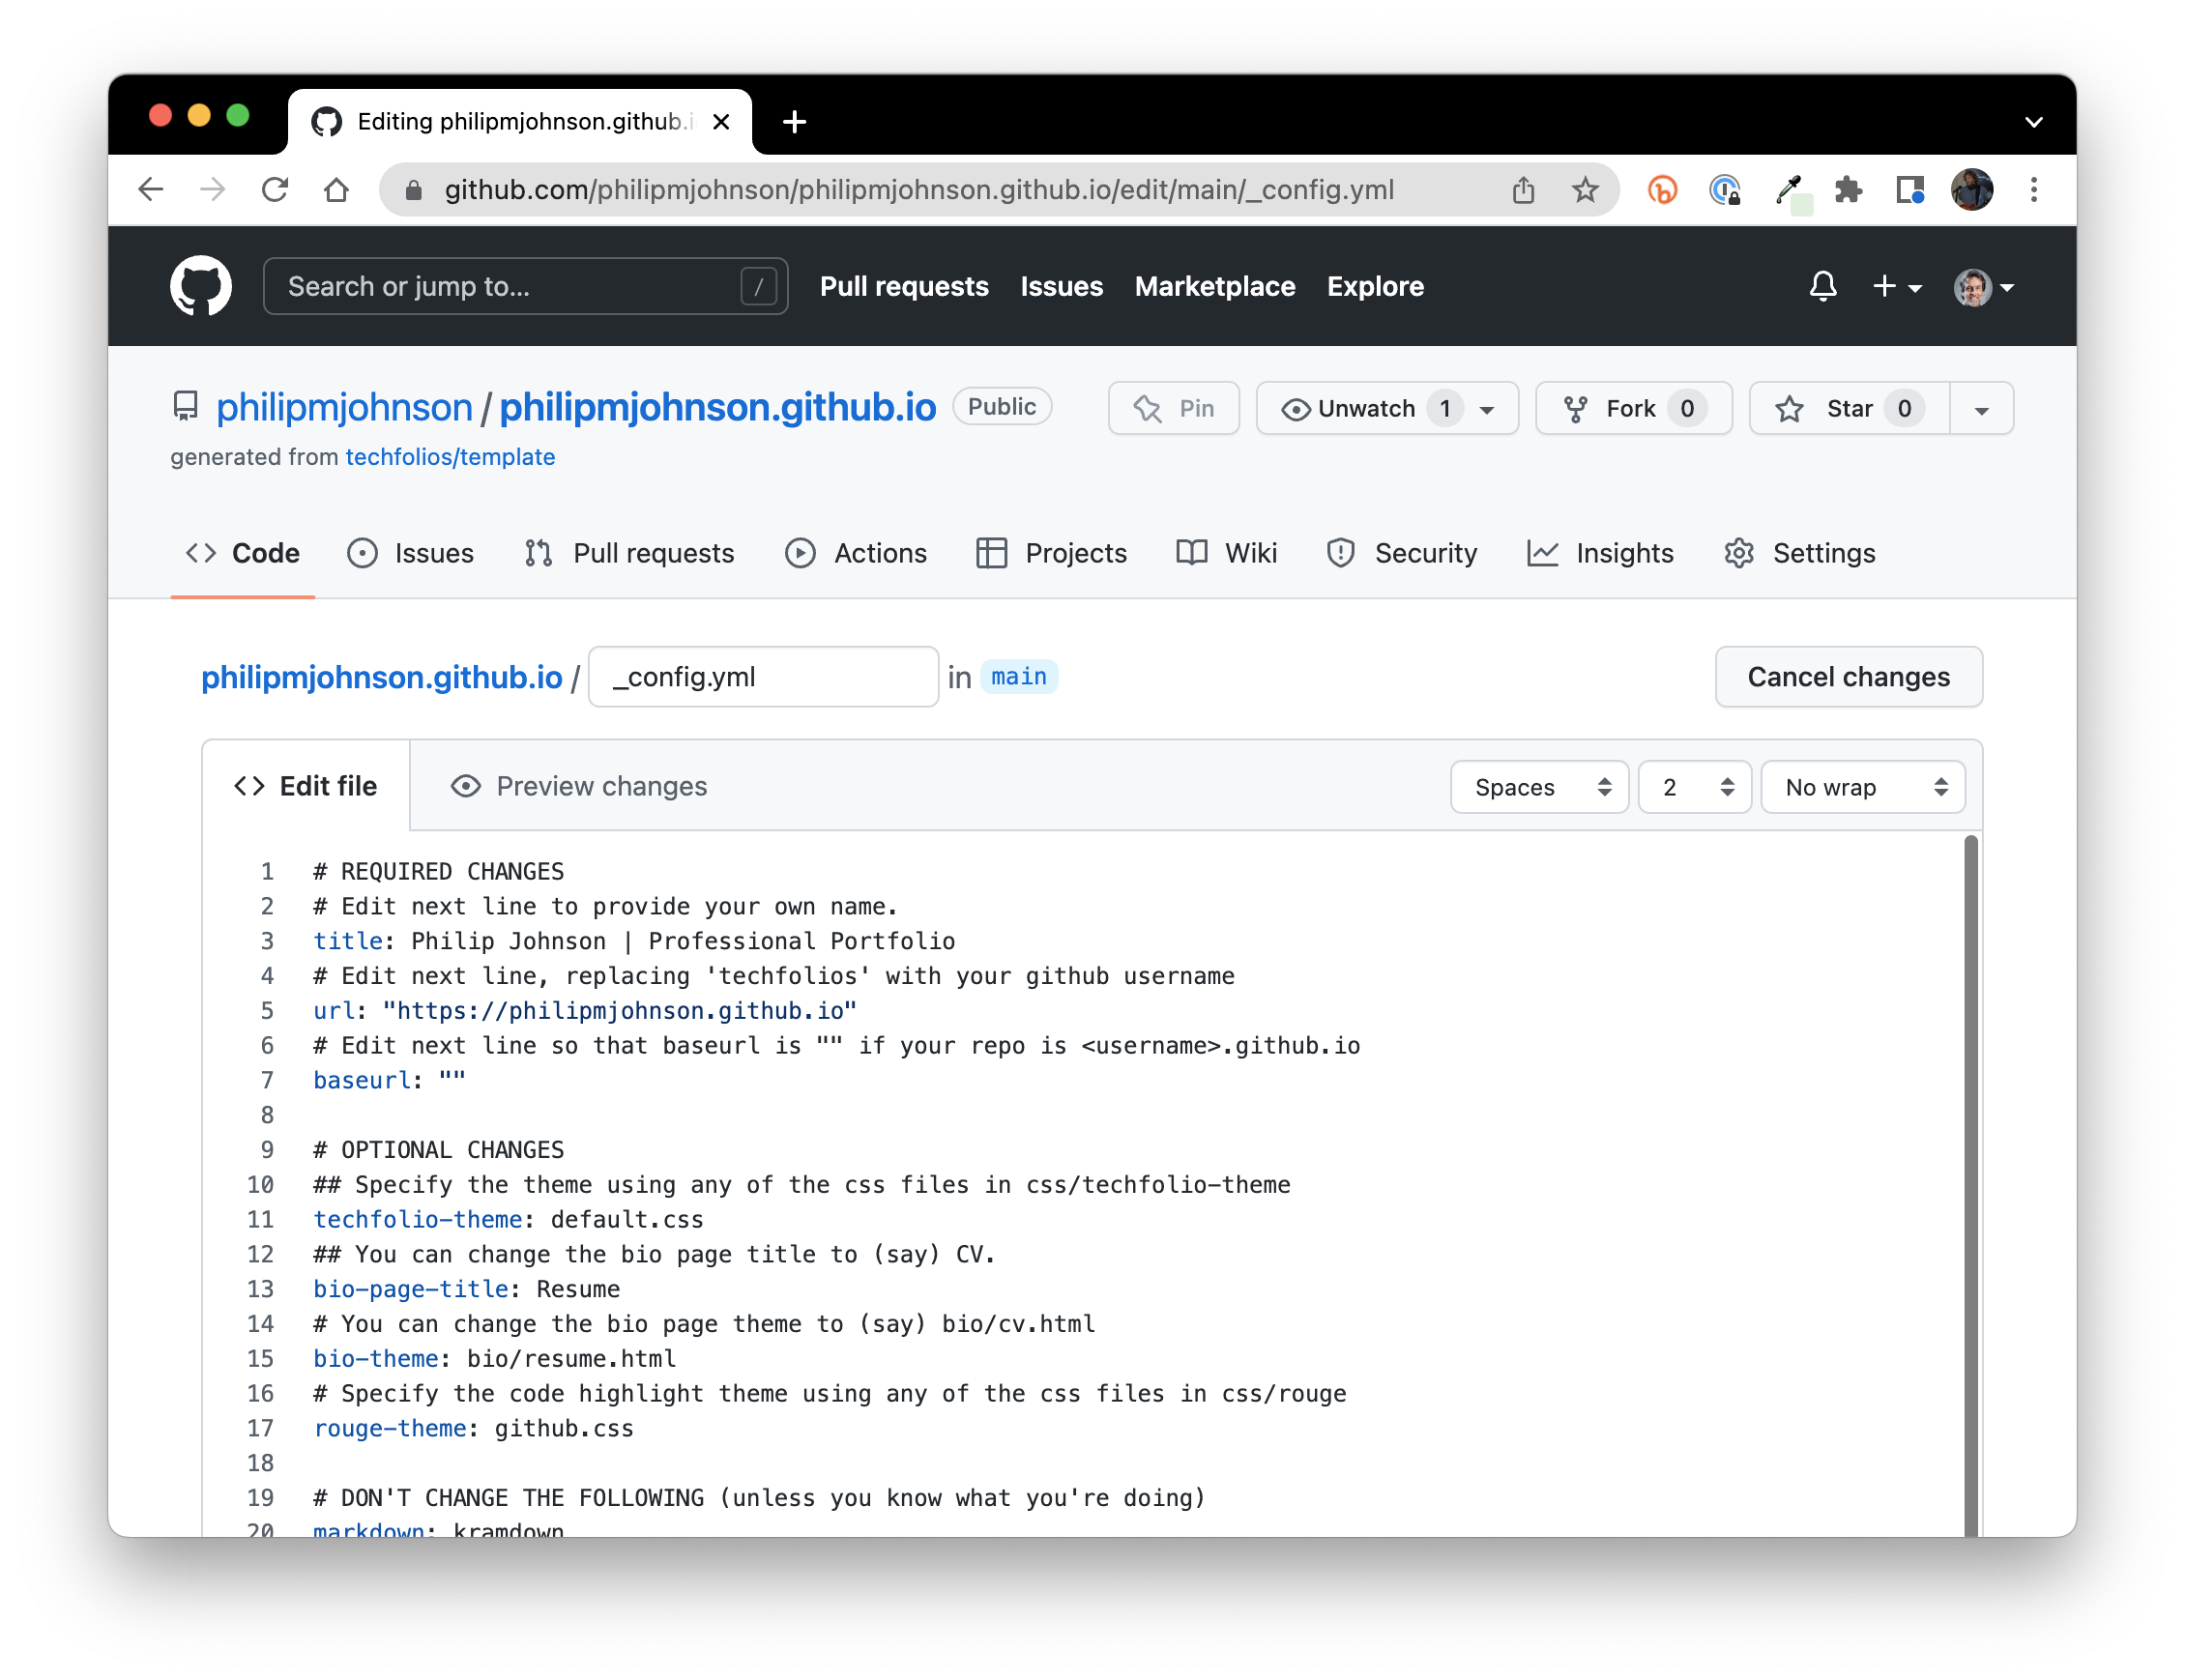
Scroll down the repository home page until you find the file named "_config.yml", and click on it, which will bring up a page that looks like this:
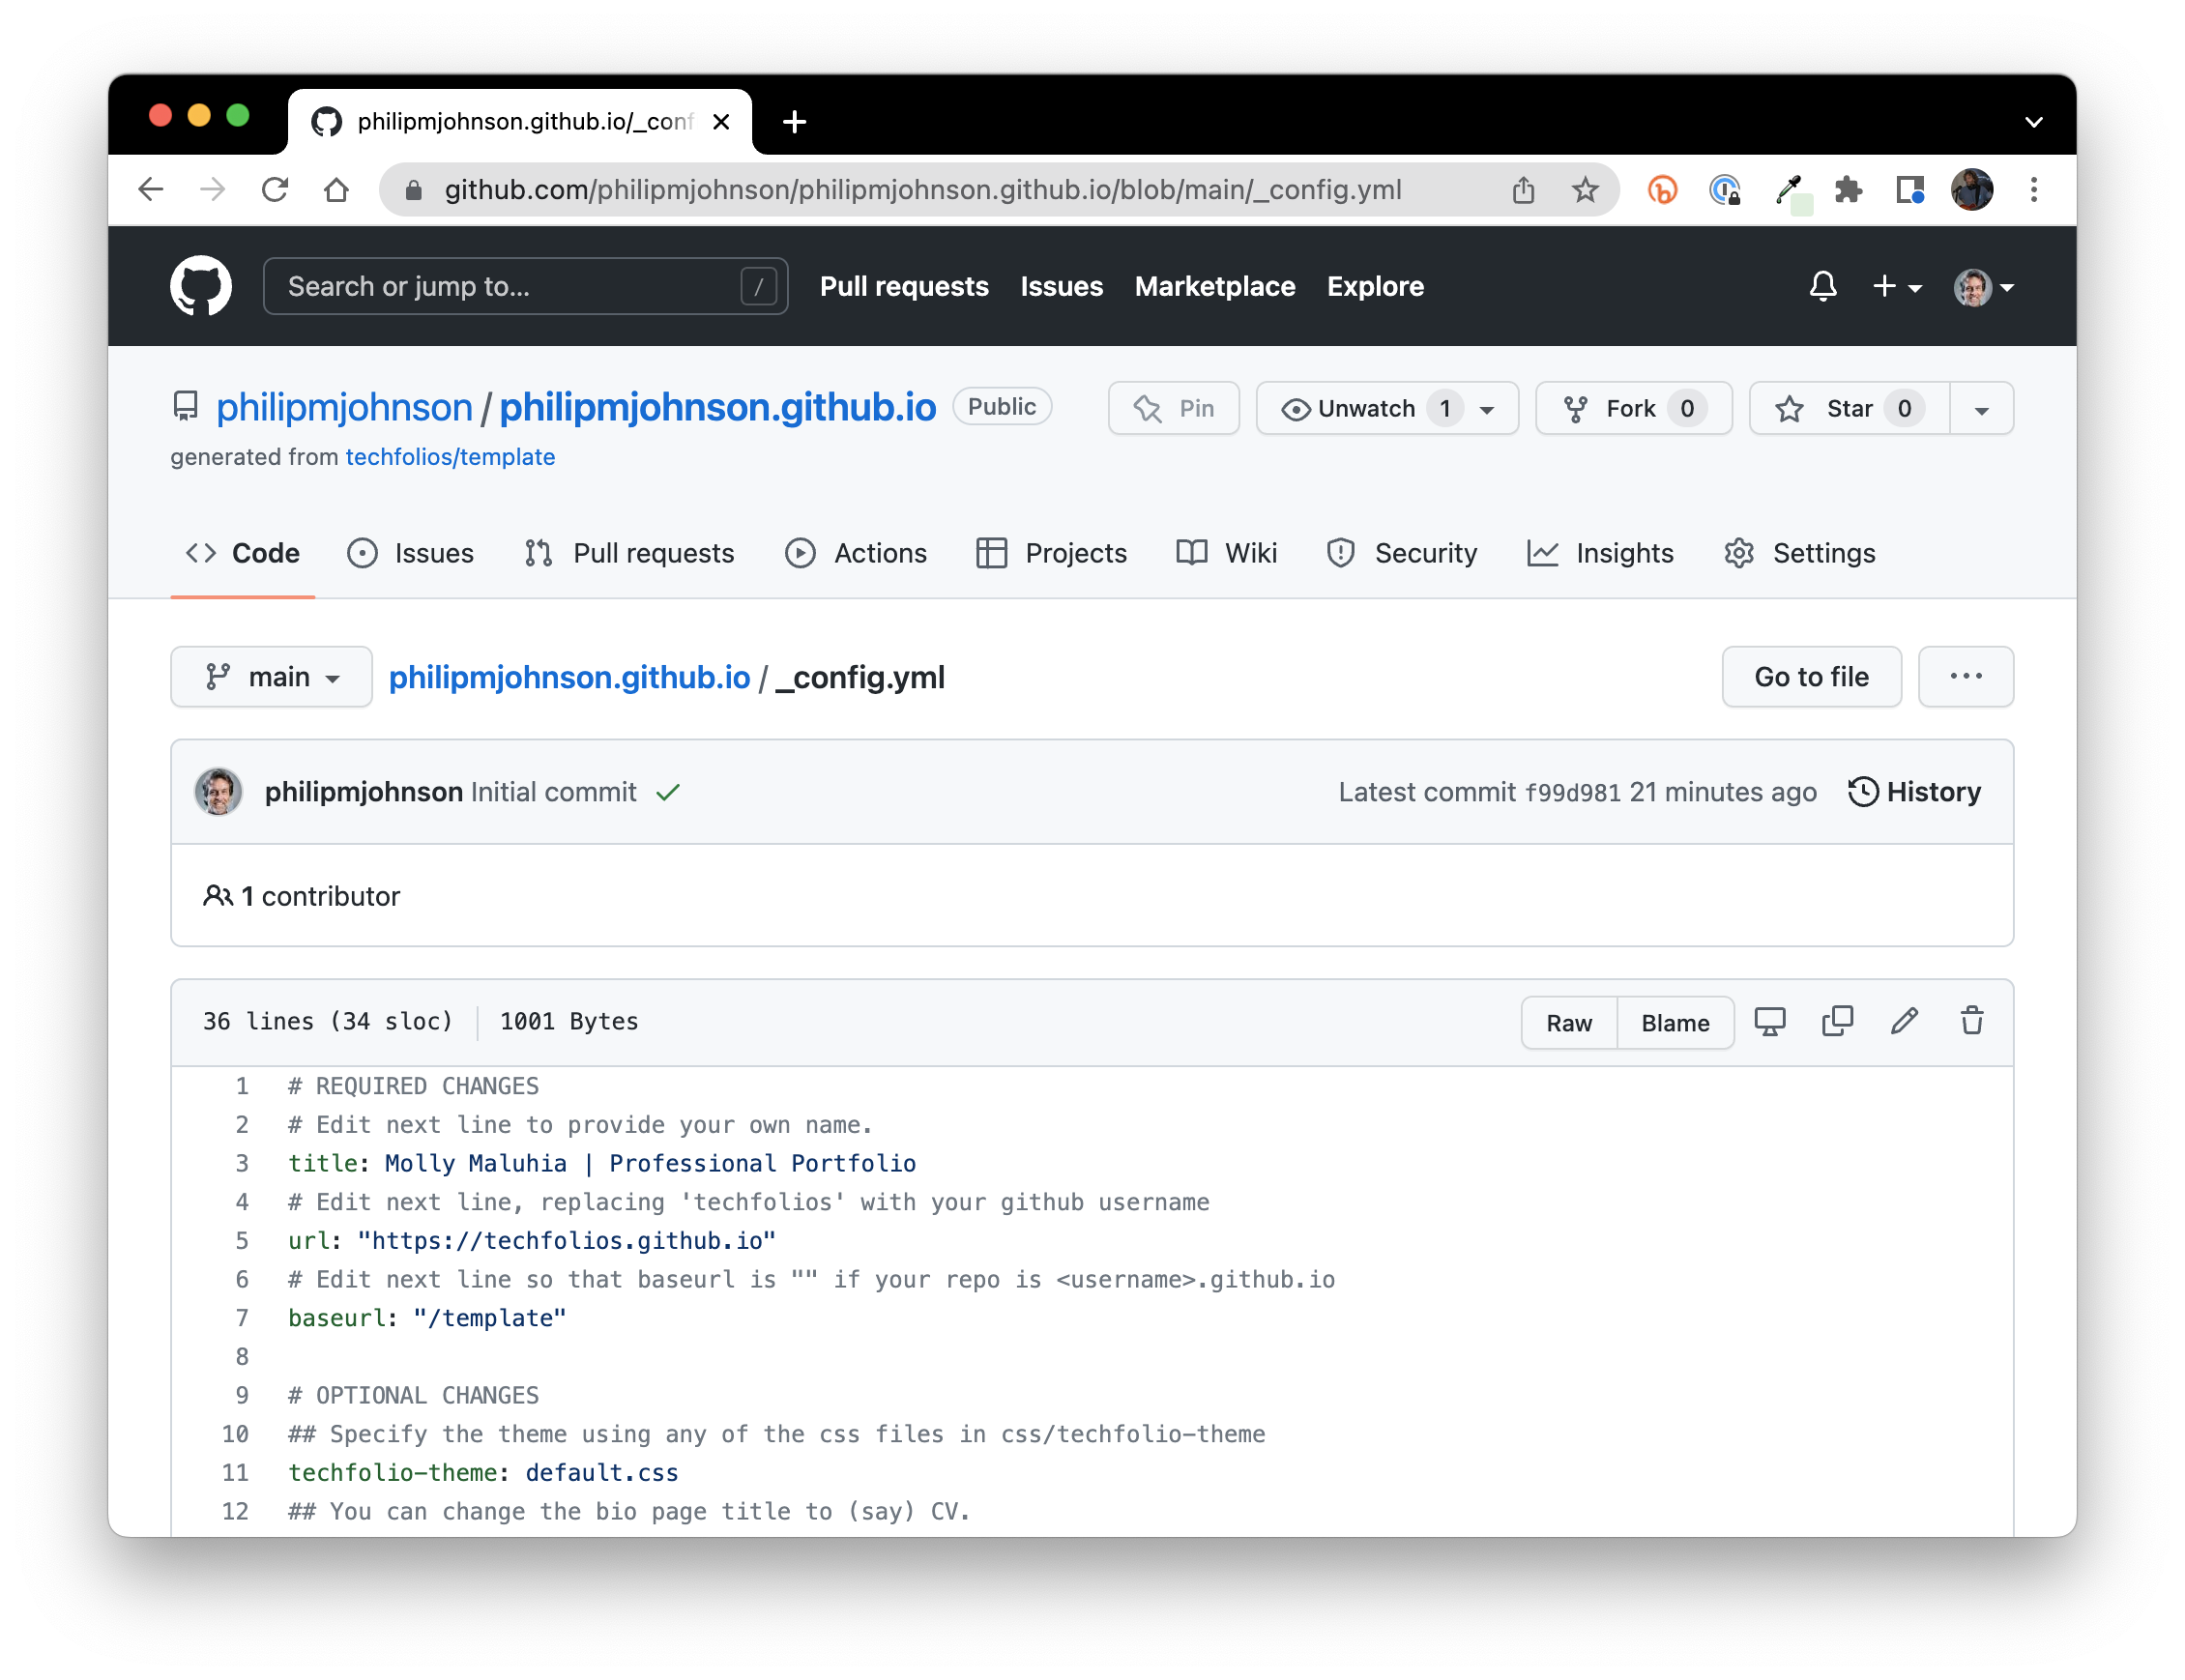
Click the pencil icon on the right hand side to edit the file:
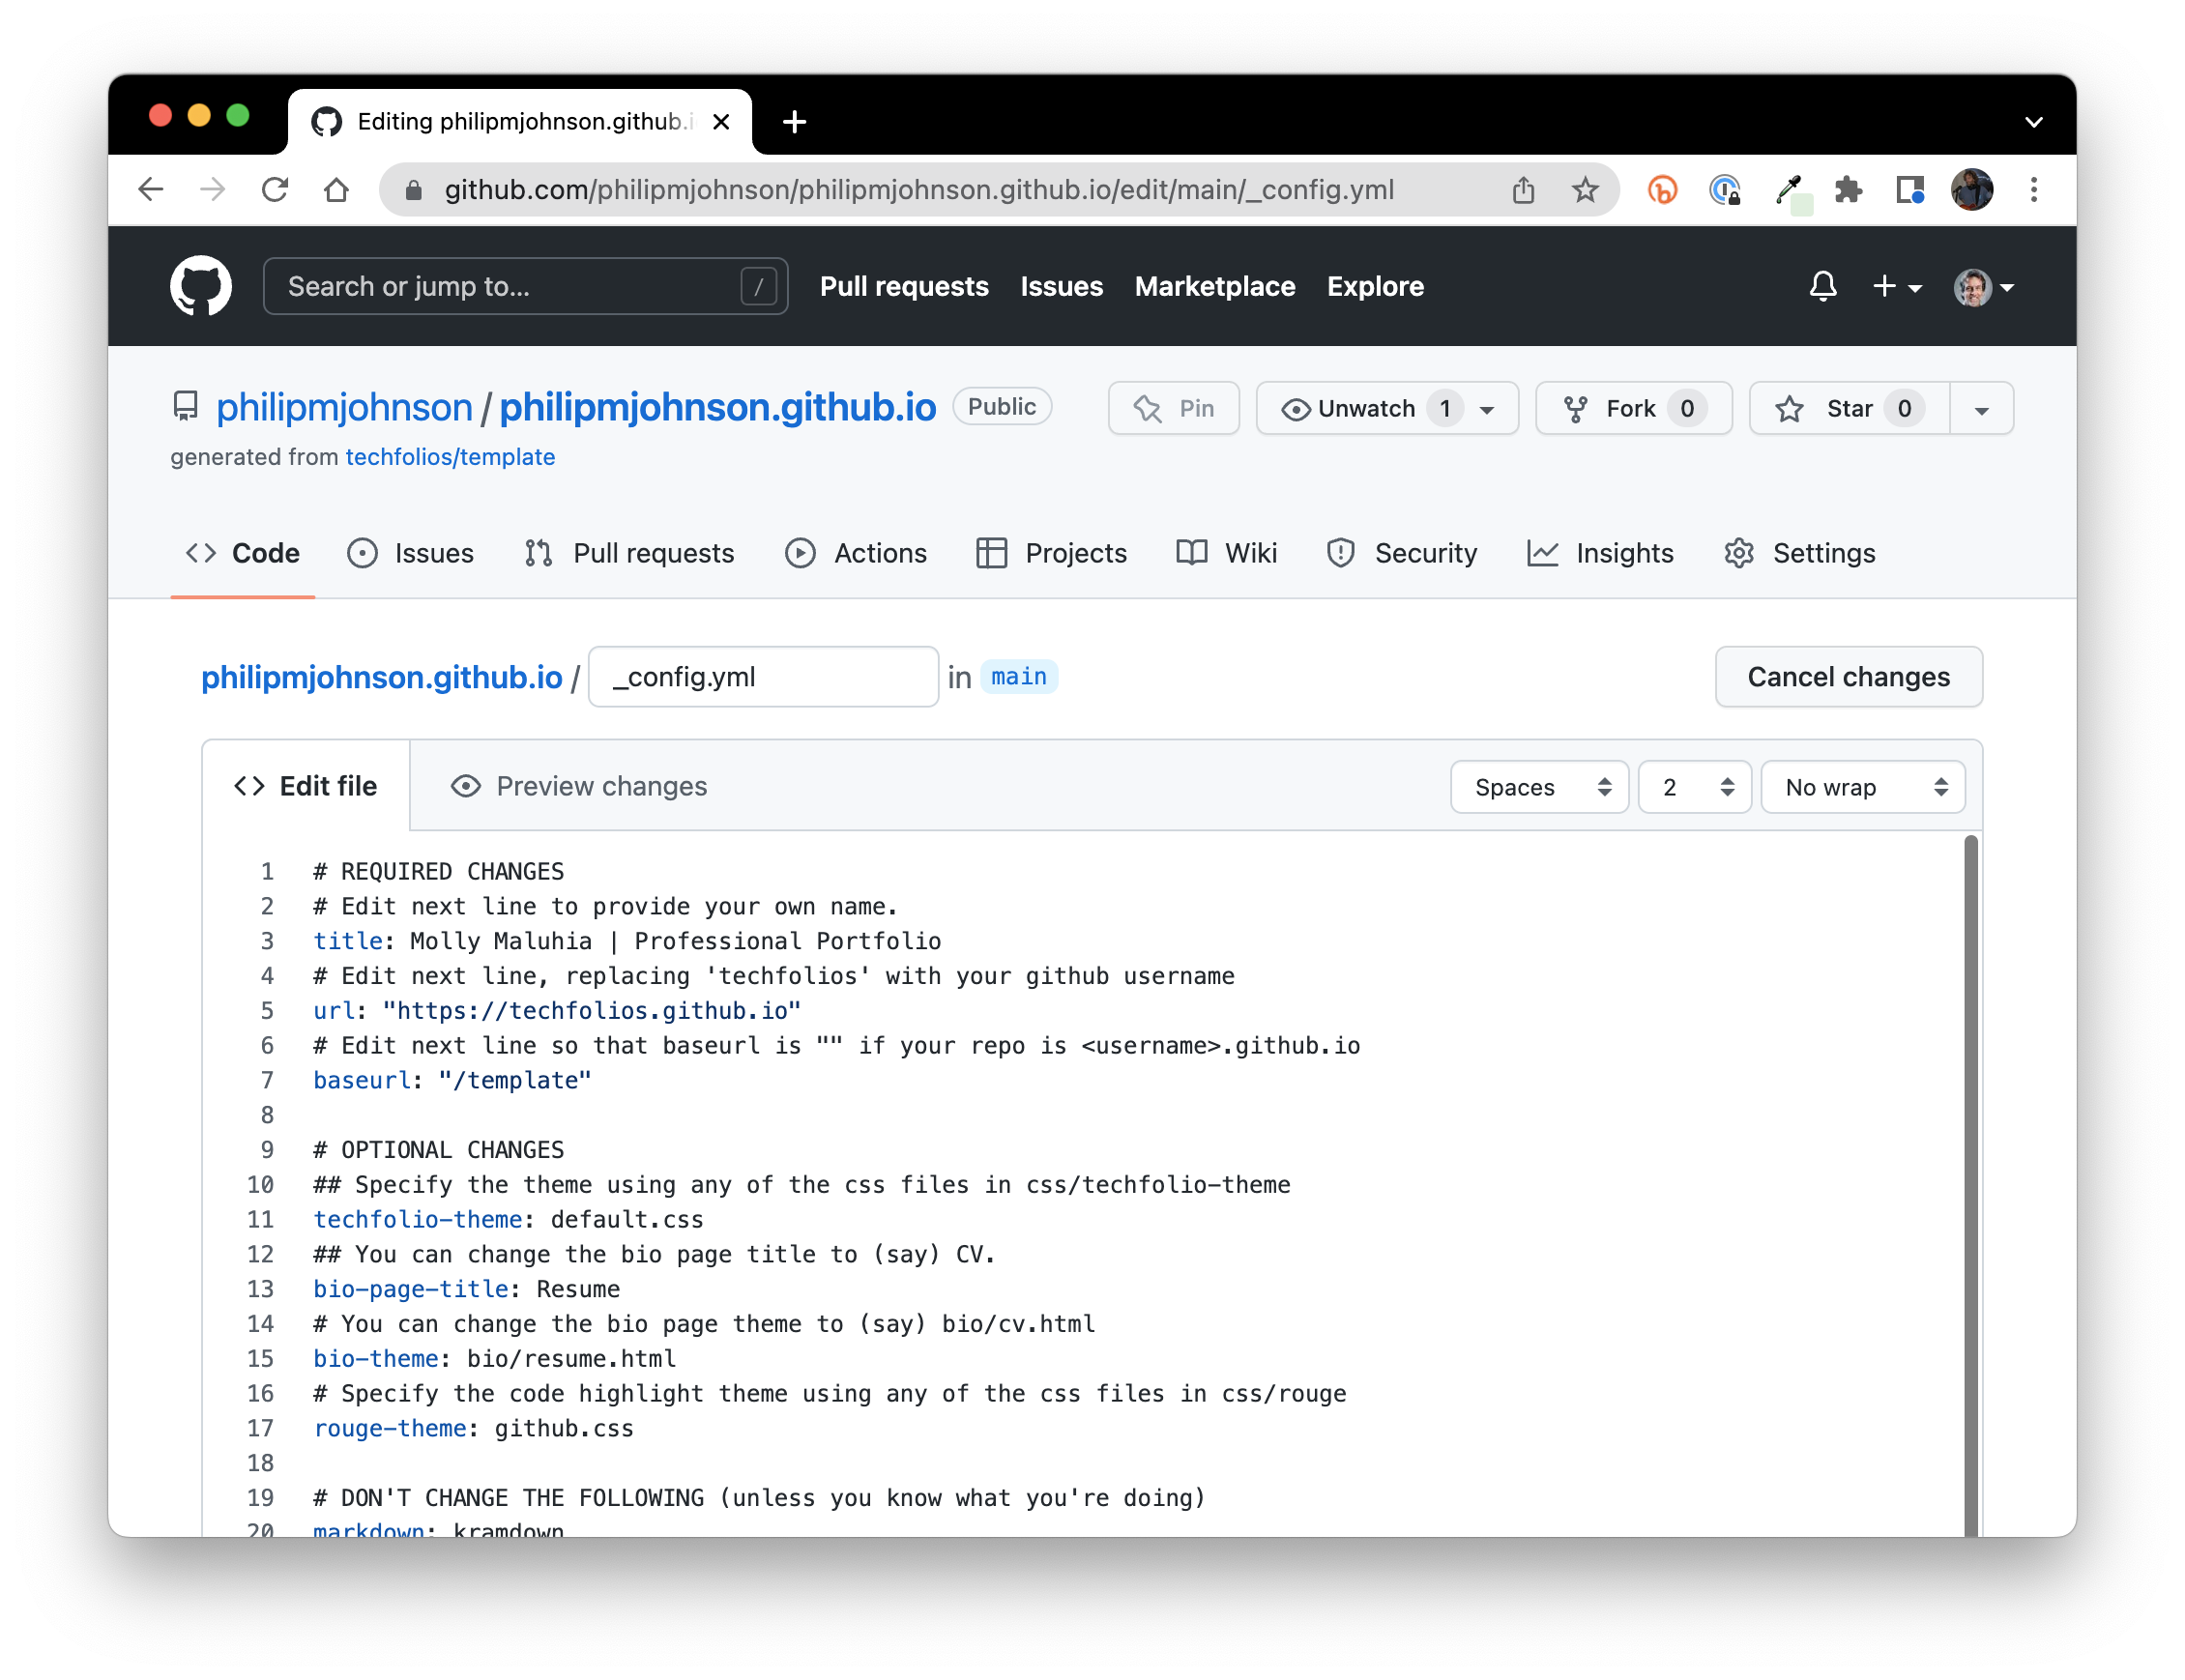
The first section of the file, "Required Changes", contains the three lines you have to change.
Edit title: to specify your own name, edit url: to specify your portfolio, and edit baseurl: to be the empty string. When you're done editing, that section of _config.yml should look similar to this:
Click "Commit changes" to save these changes. (It will pop up a dialog box, just click "Commit Changes" again to confirm.)
Monitor the build
Every time you commit a change to your portfolio, GitHub will attempt to build and deploy your revised portfolio. It does this through a technology called GitHub Actions. In fact, GitHub is trying to build a new version of your portfolio right now. Let's watch.
First, click on the "Actions" label on the home page of your repository. That will take you to a page that looks like this:
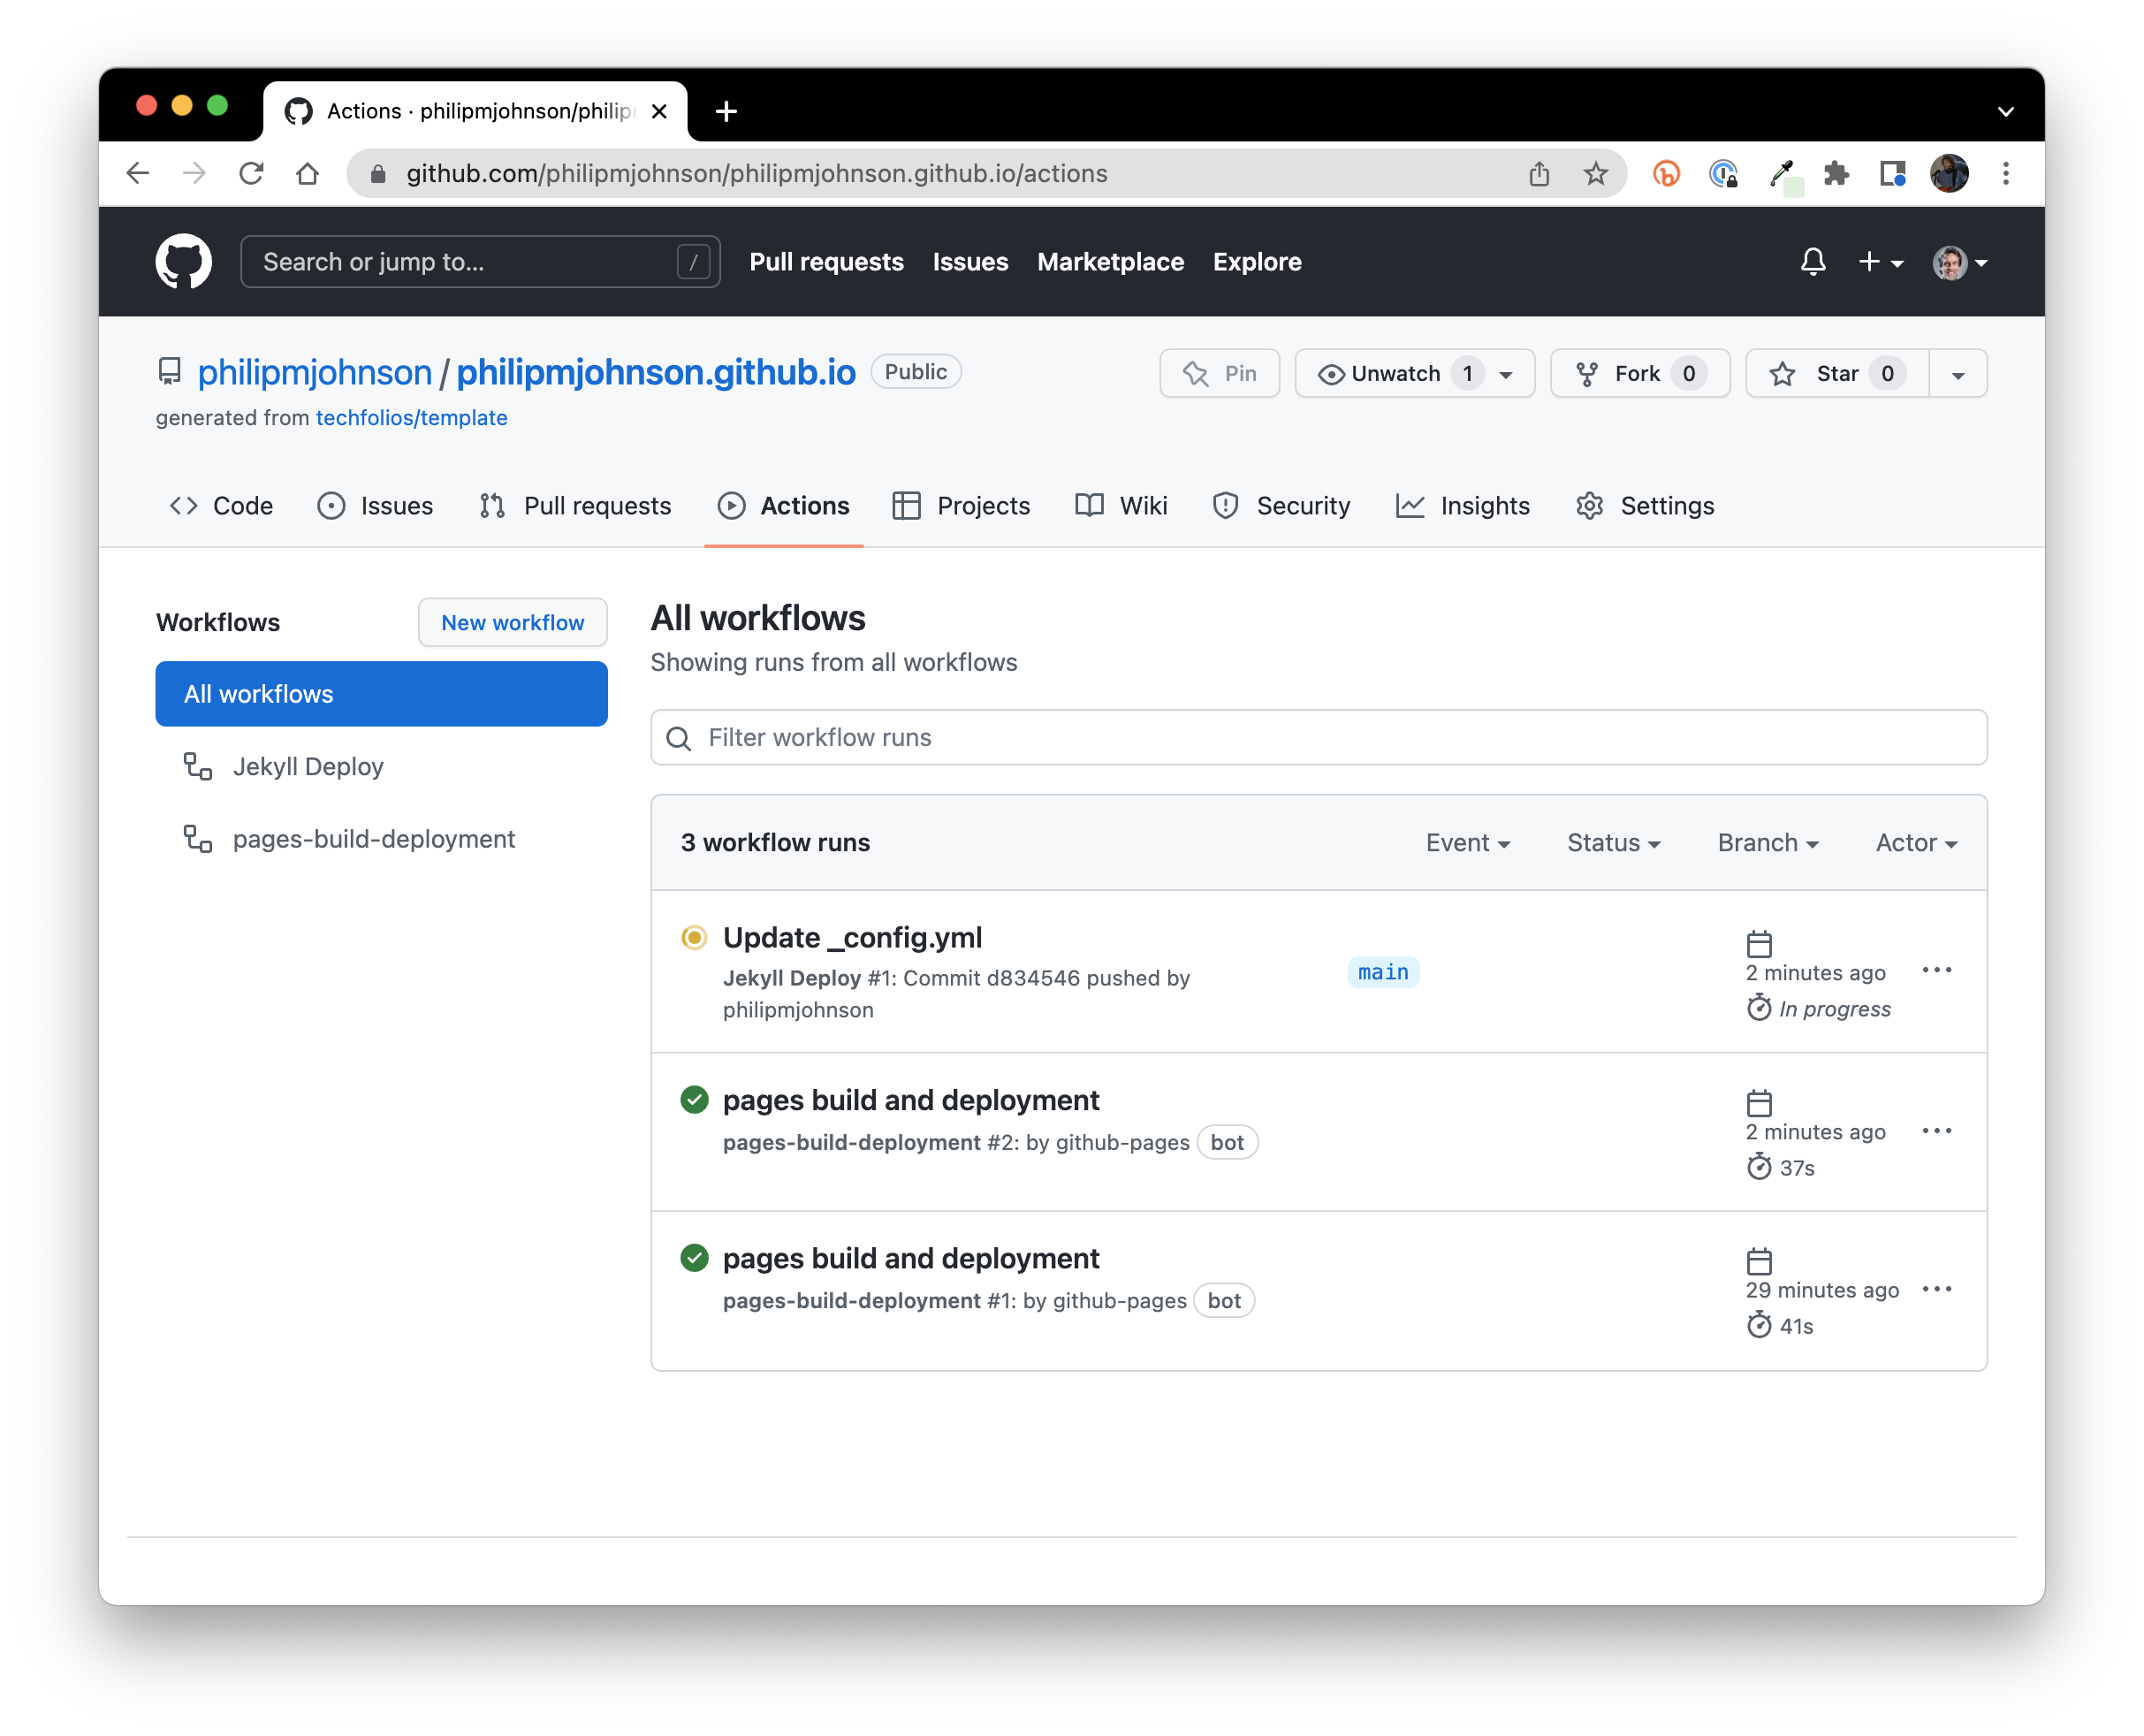
This page indicates that two GitHub Actions (i.e. "workflows") named "pages-build-deployment" have previously run and completed successfully (indicated by the green checkmarks). There is a workflow called "Jekyll Deploy" that is running right now (indicated by the yellow dot). GitHub labels this workflow execution instance using the commit message associated with the change to the repository that triggered the Action. In this case, it was "Update _config.yml".
GitHub occasionally changes the name of their build actions.
You can watch the build in more detail by clicking on the "Update _config.yml" line, which takes you to a page like this:
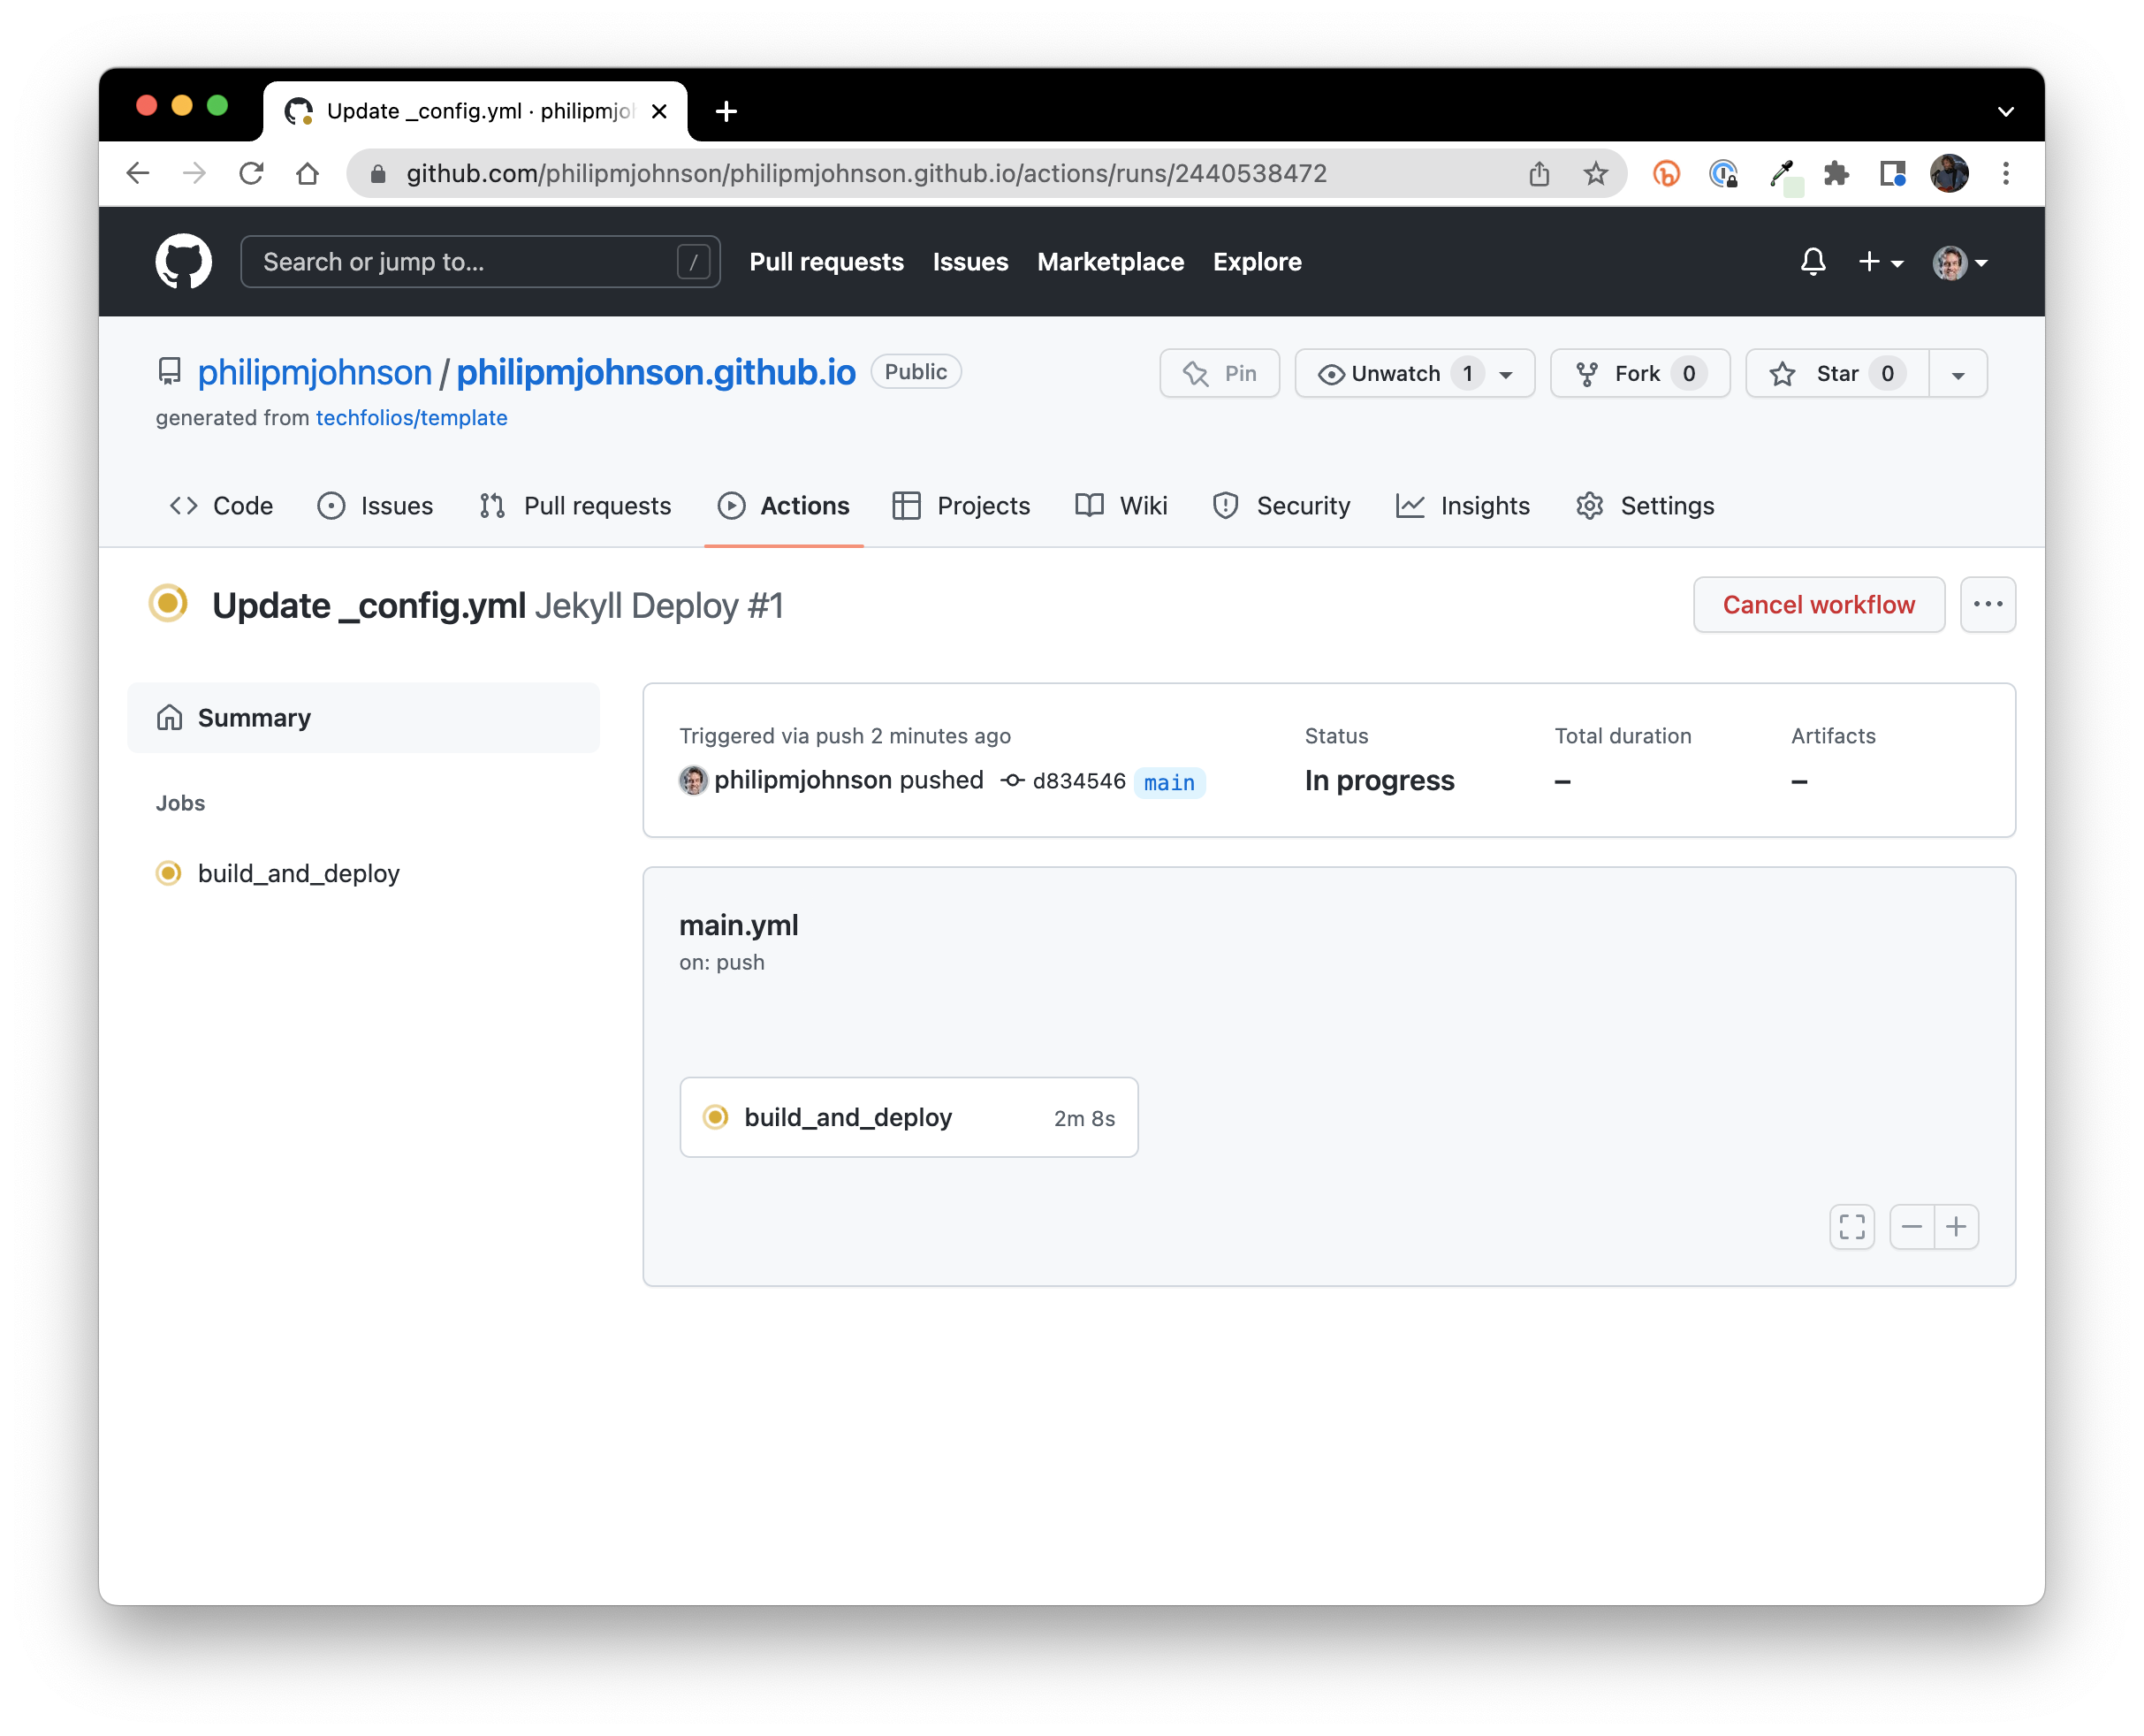
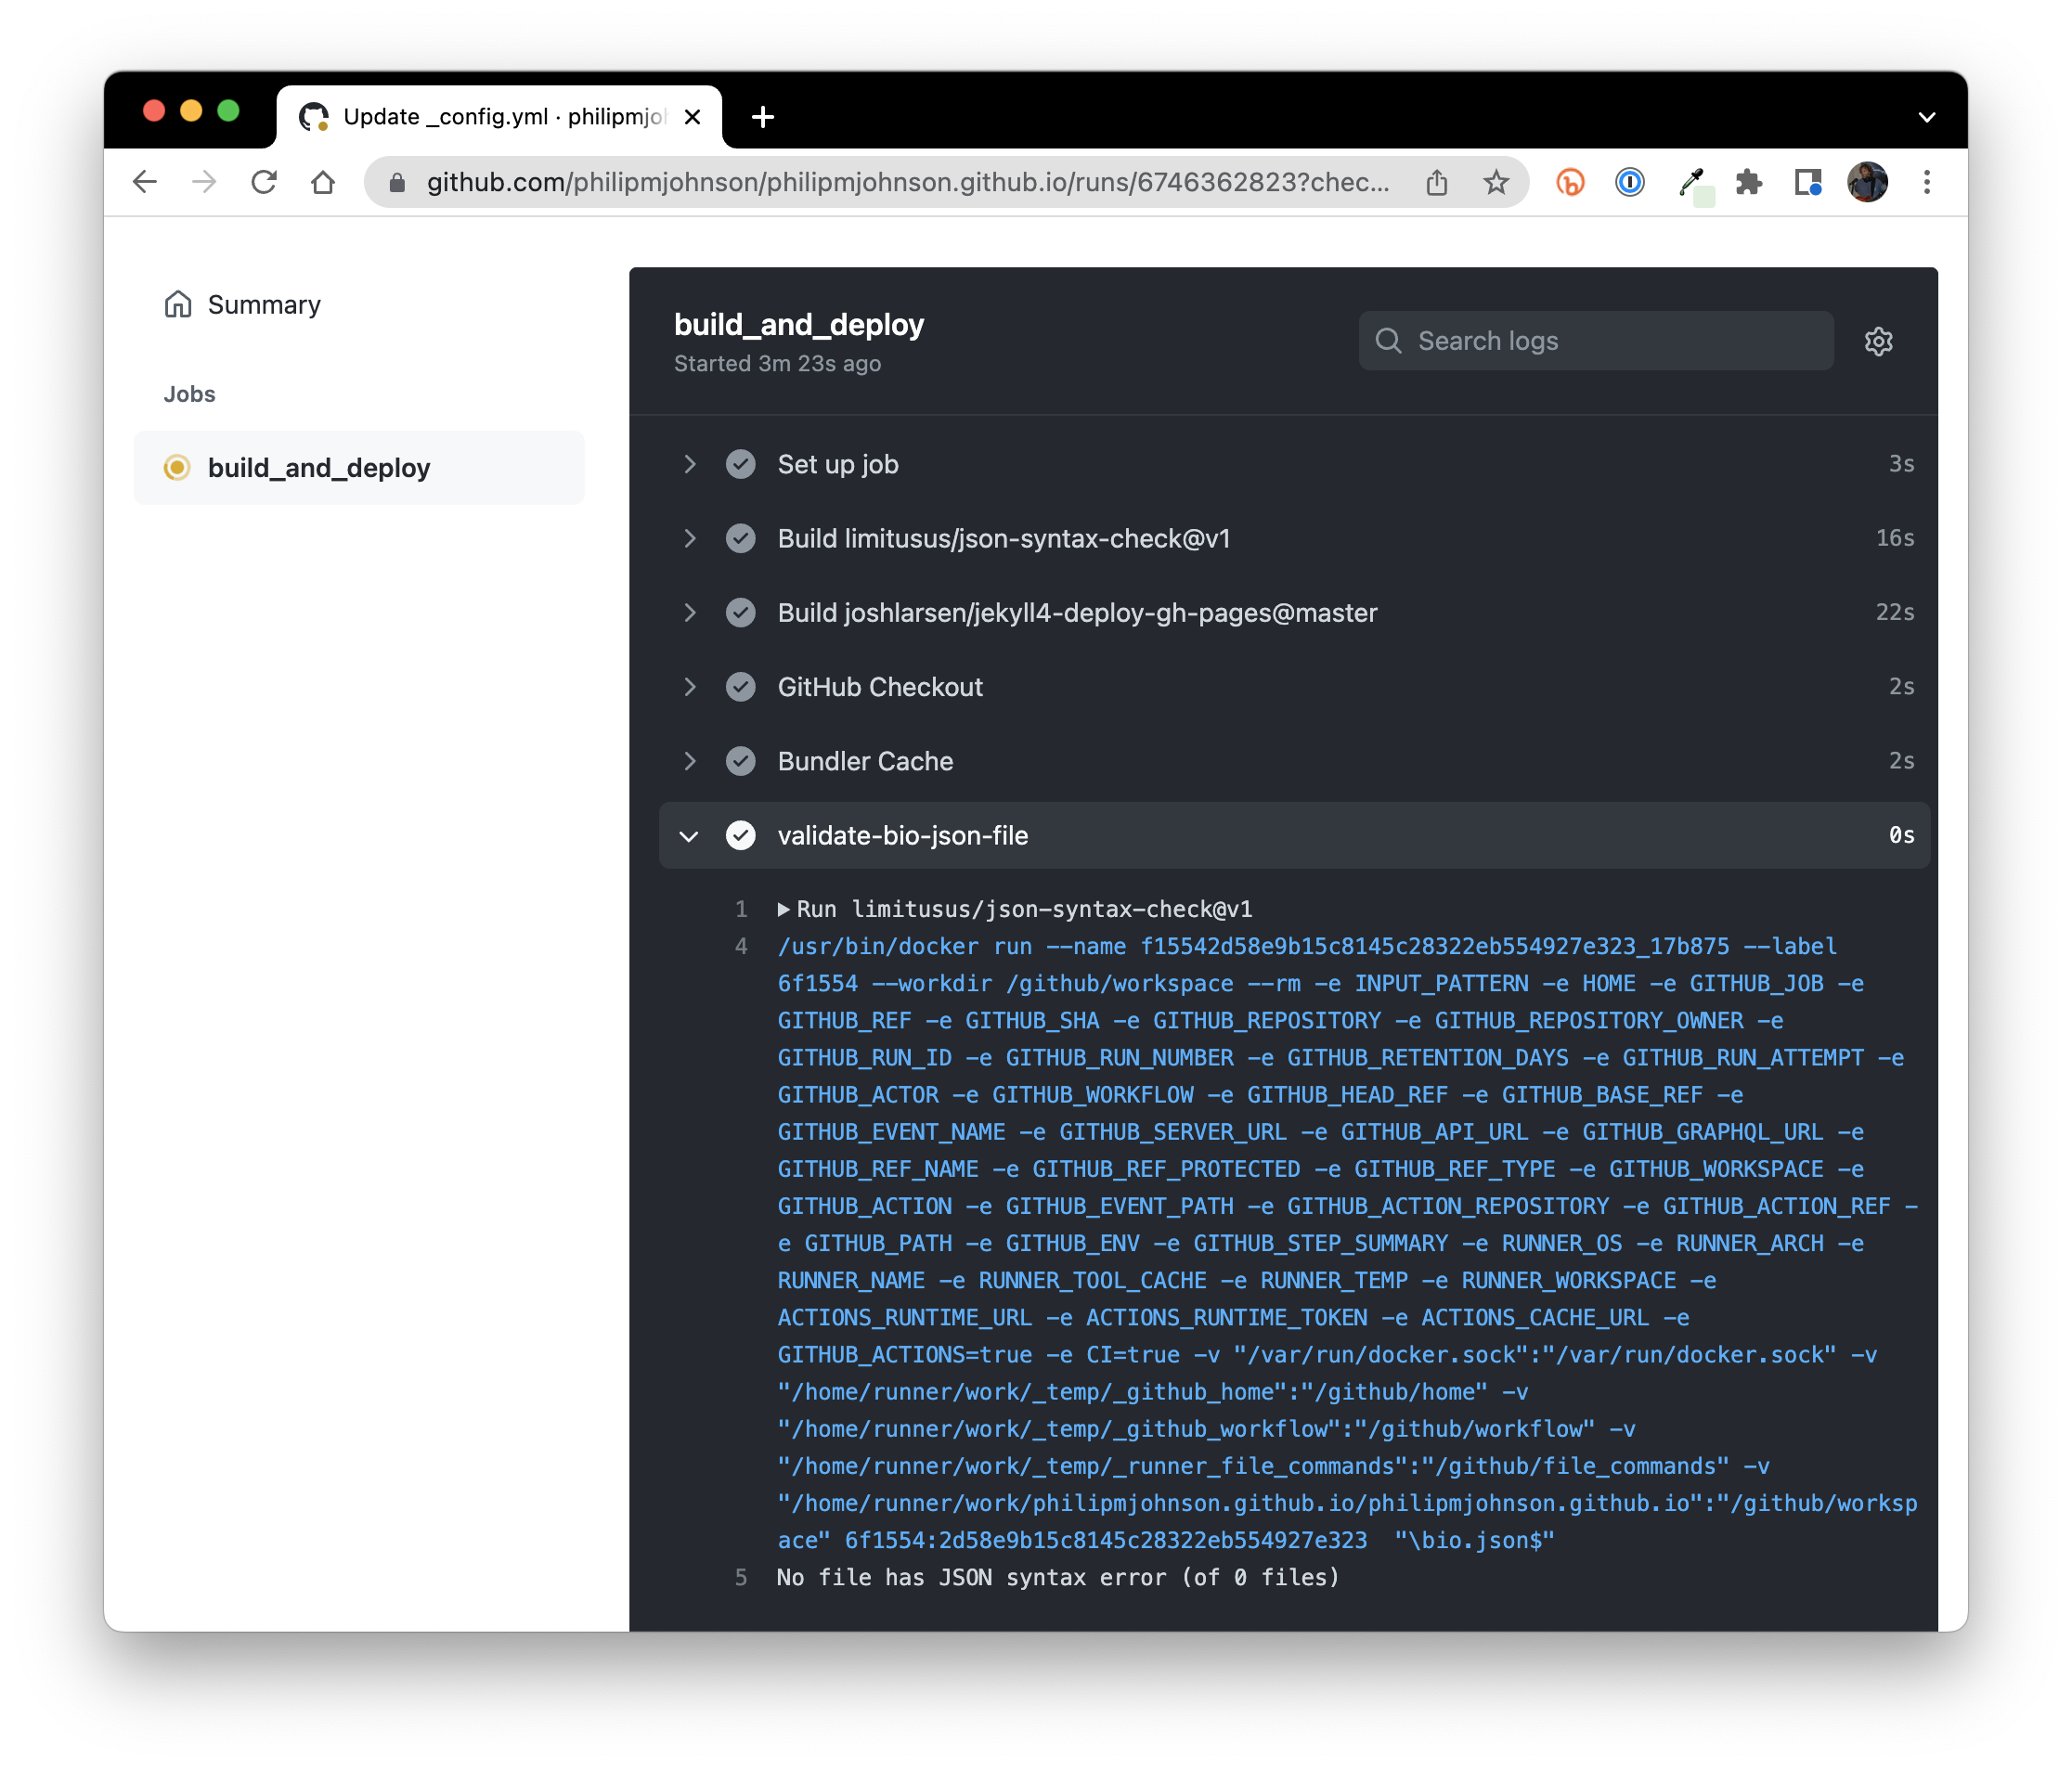
Clicking on the "build_and_deploy" label takes you to a page that shows the actual progress through the build:
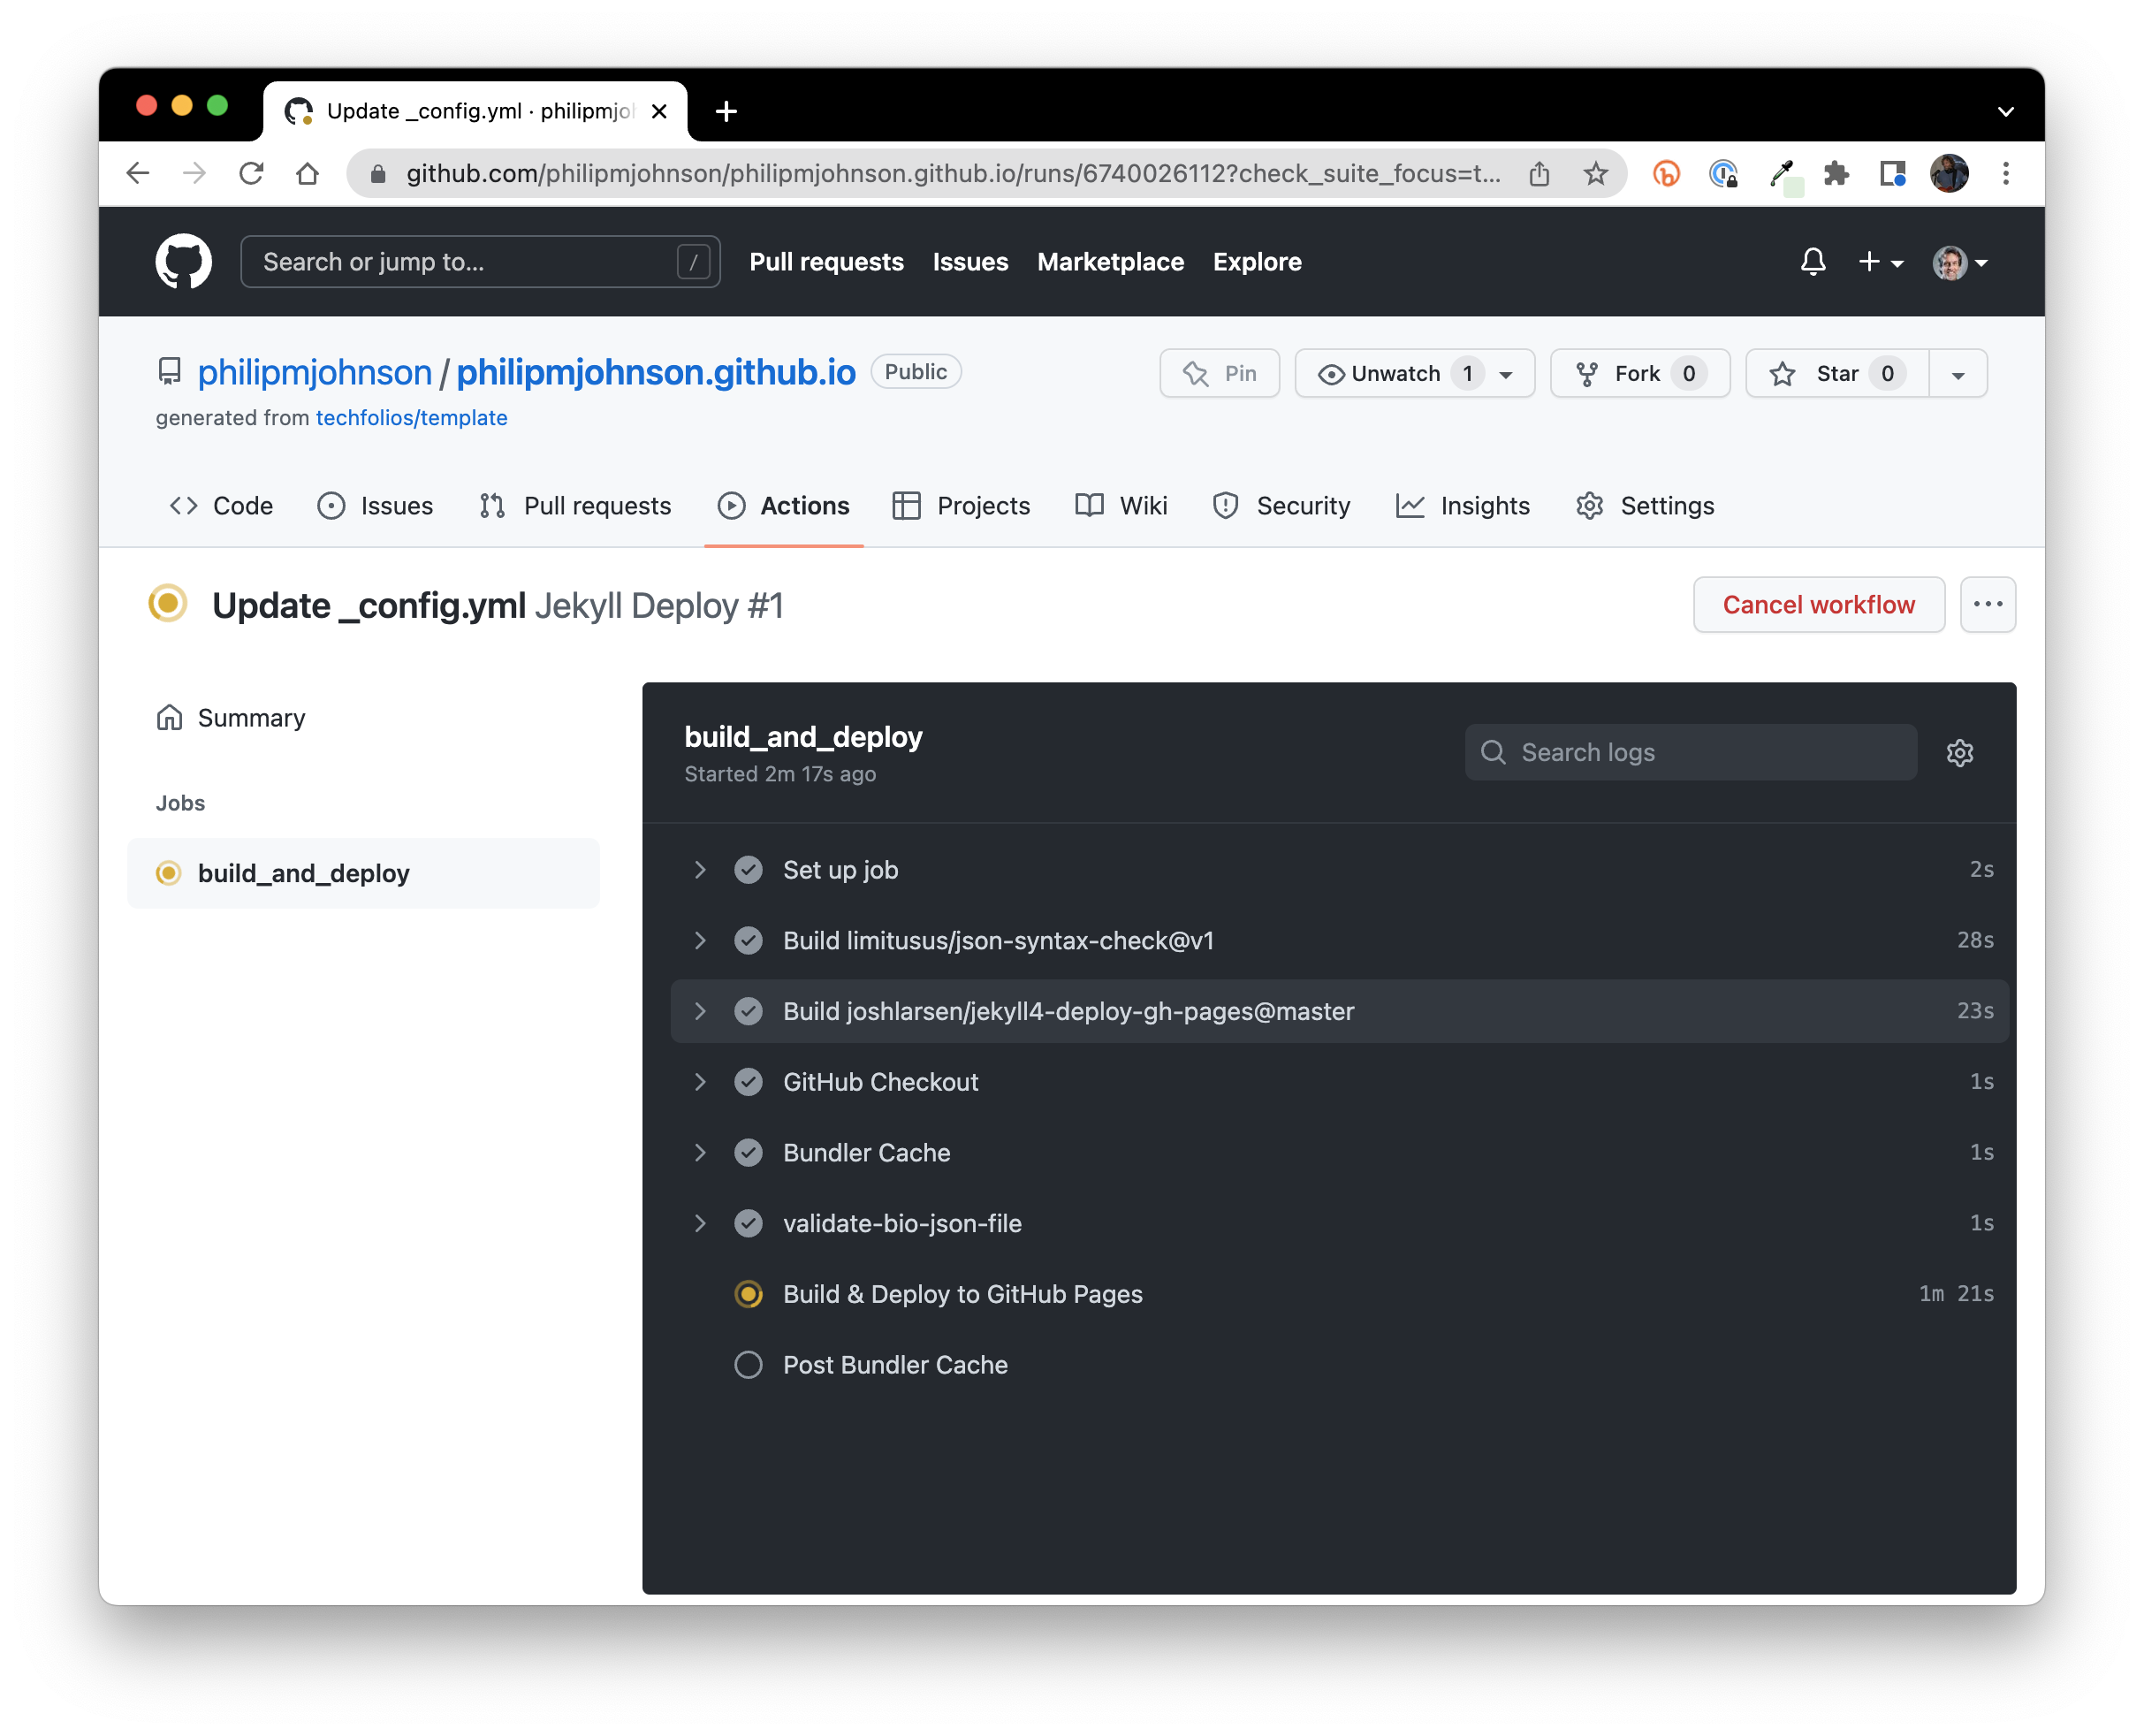
Finally, you can click on the arrow next to any build step and see what happened during it:
After a few minutes, the Jekyll Deploy workflow will complete and the Actions page will look like this:
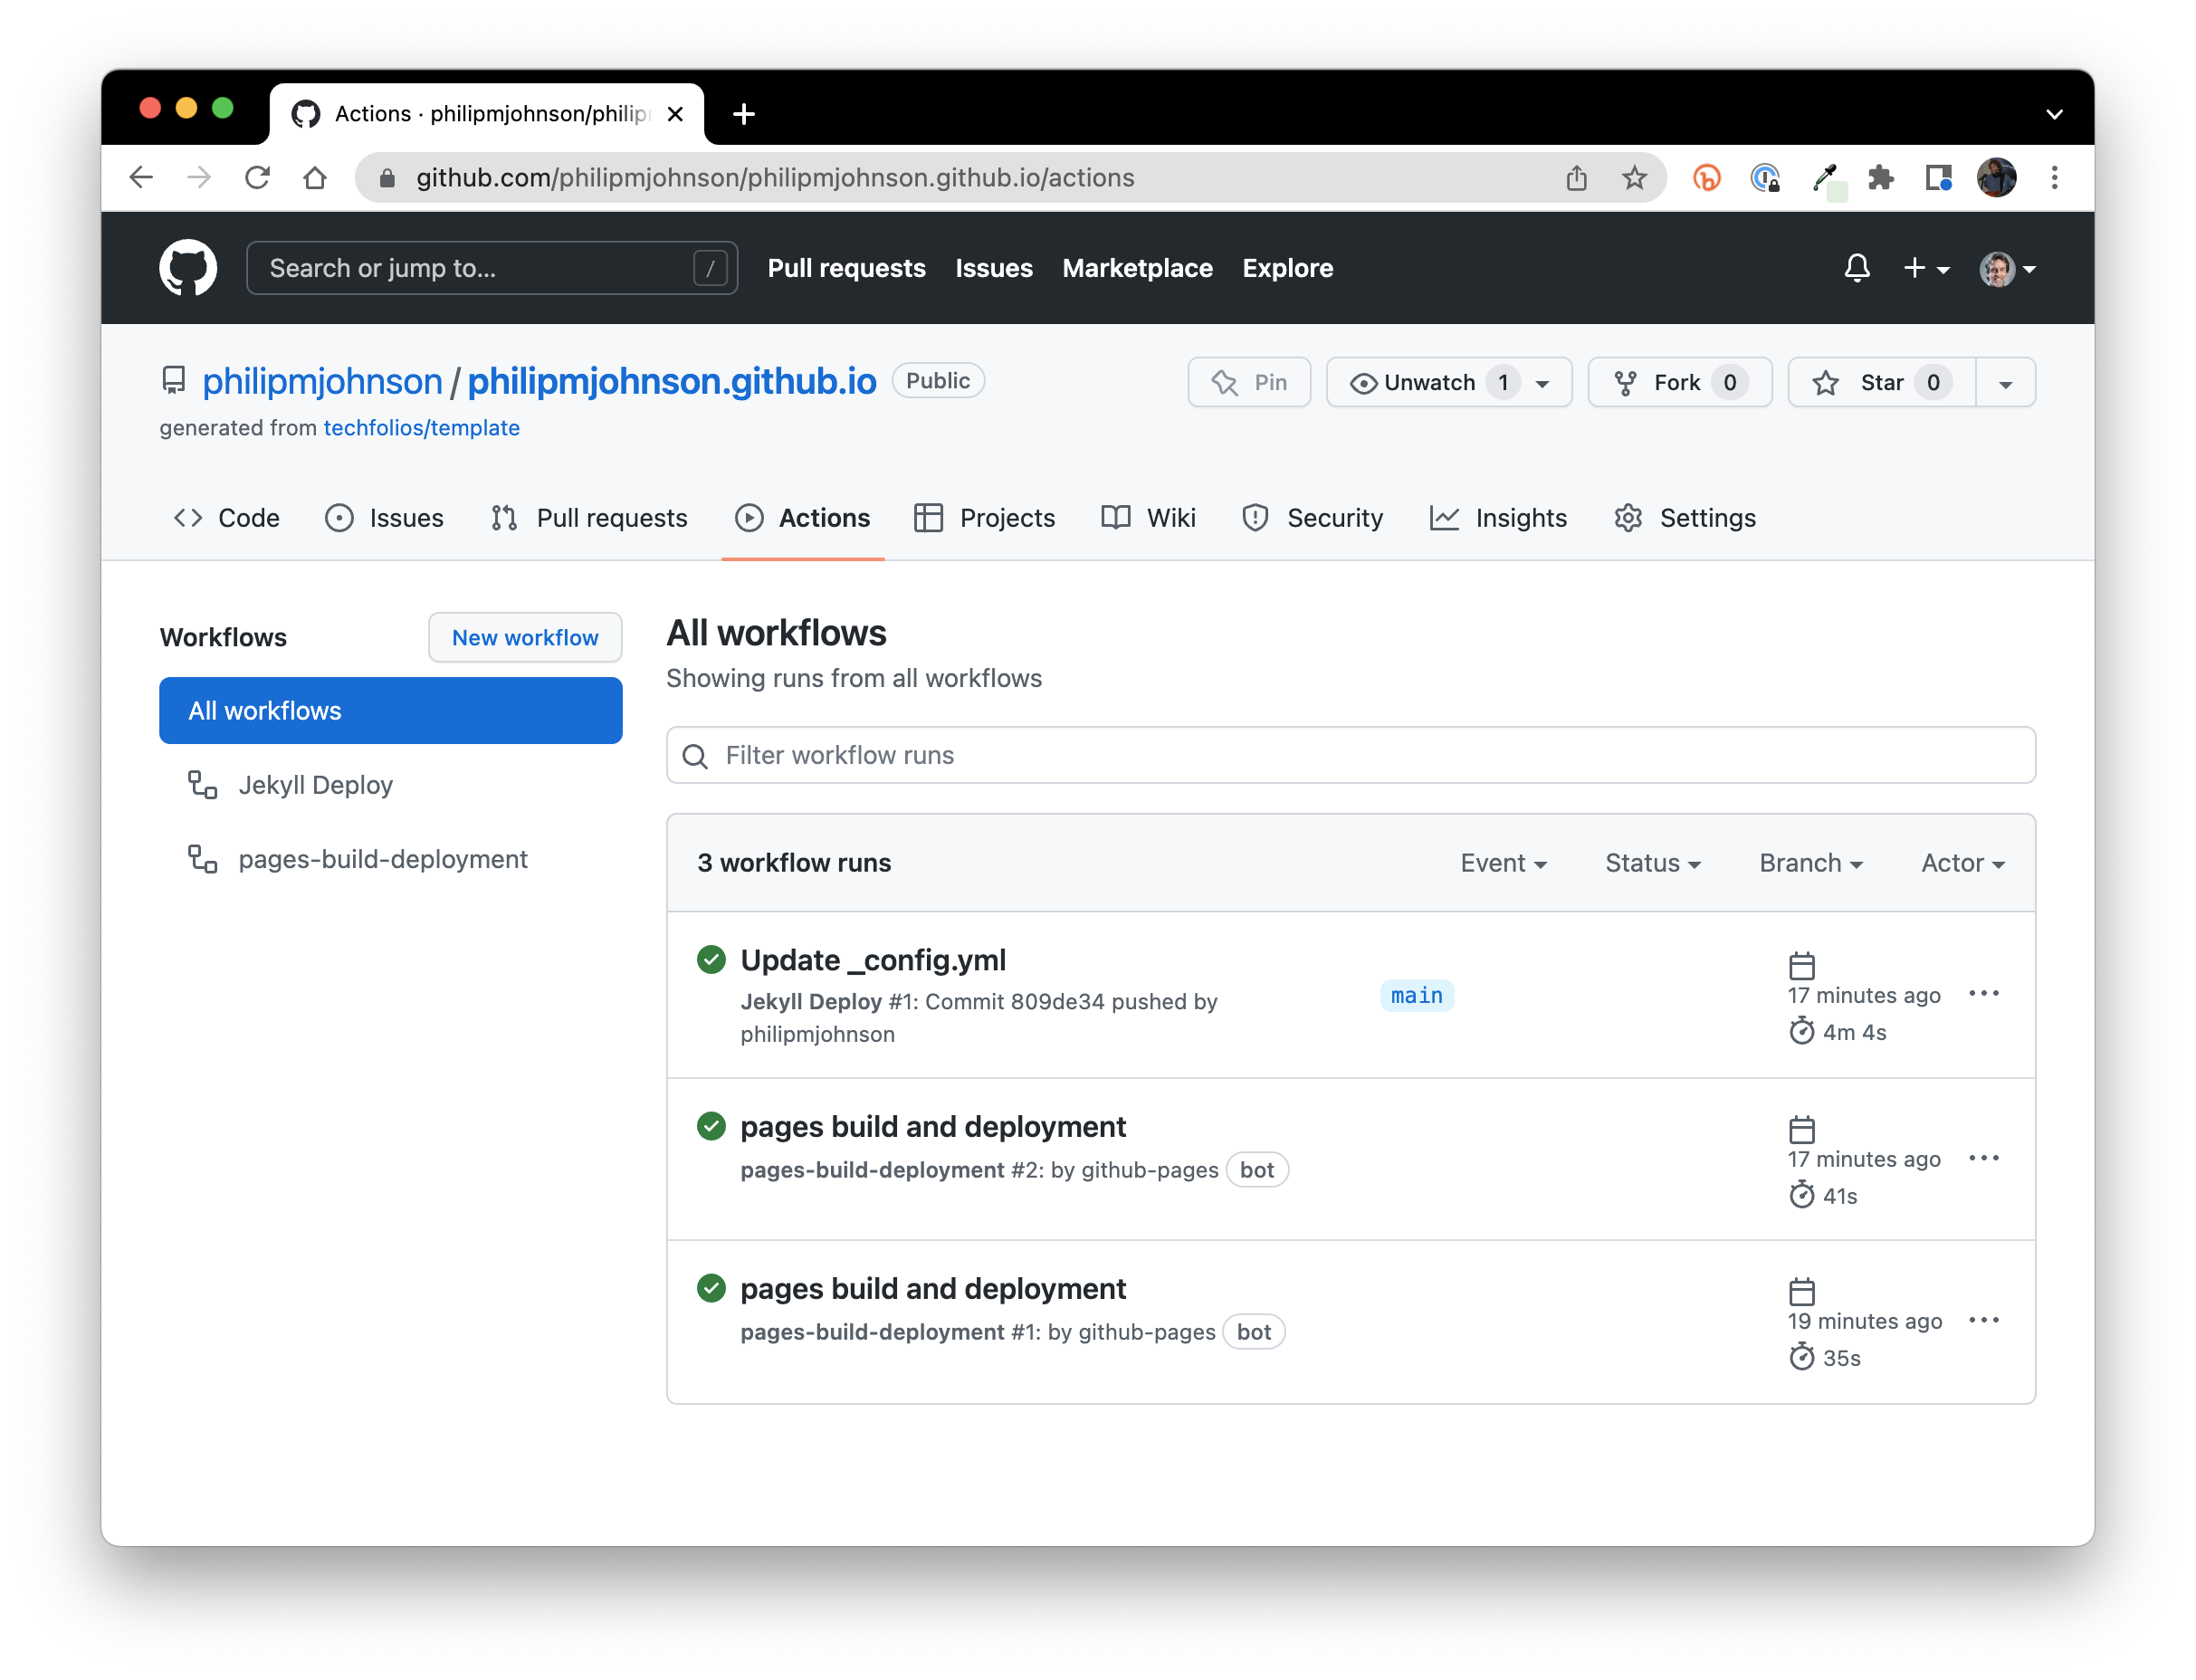
Notice that there is a green checkmark beside the "Update _config.yml" workflow run, indicating that it has completed successfully.
There are two reasons it is useful to know how to monitor the build:
- By monitoring the build, you'll know when your updated portfolio is ready to be viewed.
- Monitoring the build lets you know if any errors occurred during the build.
Also, please note that the very first time you try to build your portfolio, it takes about five minutes, which is a long time! Don't worry, though: after this very first build, GitHub will cache the build artifacts and your future builds should take less than a minute to complete.
Visiting your website might display the following text for a few minutes while the page is built:
--- title: Home layout: home --- {% include about/about.html %} {% include projects/projects.html limit=4 %} {% include essays/essays.html limit=6 %}
Unfortunately, some users have reported that their first build failed with an error like this:
error: RPC failed; curl 55 Failed sending HTTP2 data
fatal: the remote end hung up unexpectedly
fatal: the remote end hung up unexpectedly
This is not your fault (or ours): it means that there was a network connection problem on GitHub's side that resulted in a timeout. In our experience, all you have to do is re-trigger the build one more time. (You can do this by editing the _config.yml file and adding a space or newline, then committing the change).
The good news is that the files retrieved over the network for the first build are cached for the future, so it is unlikely you'll run into this particular error again upon subsequent builds of your portfolio.
View your portfolio
Click the link to see your brand new professional portfolio:
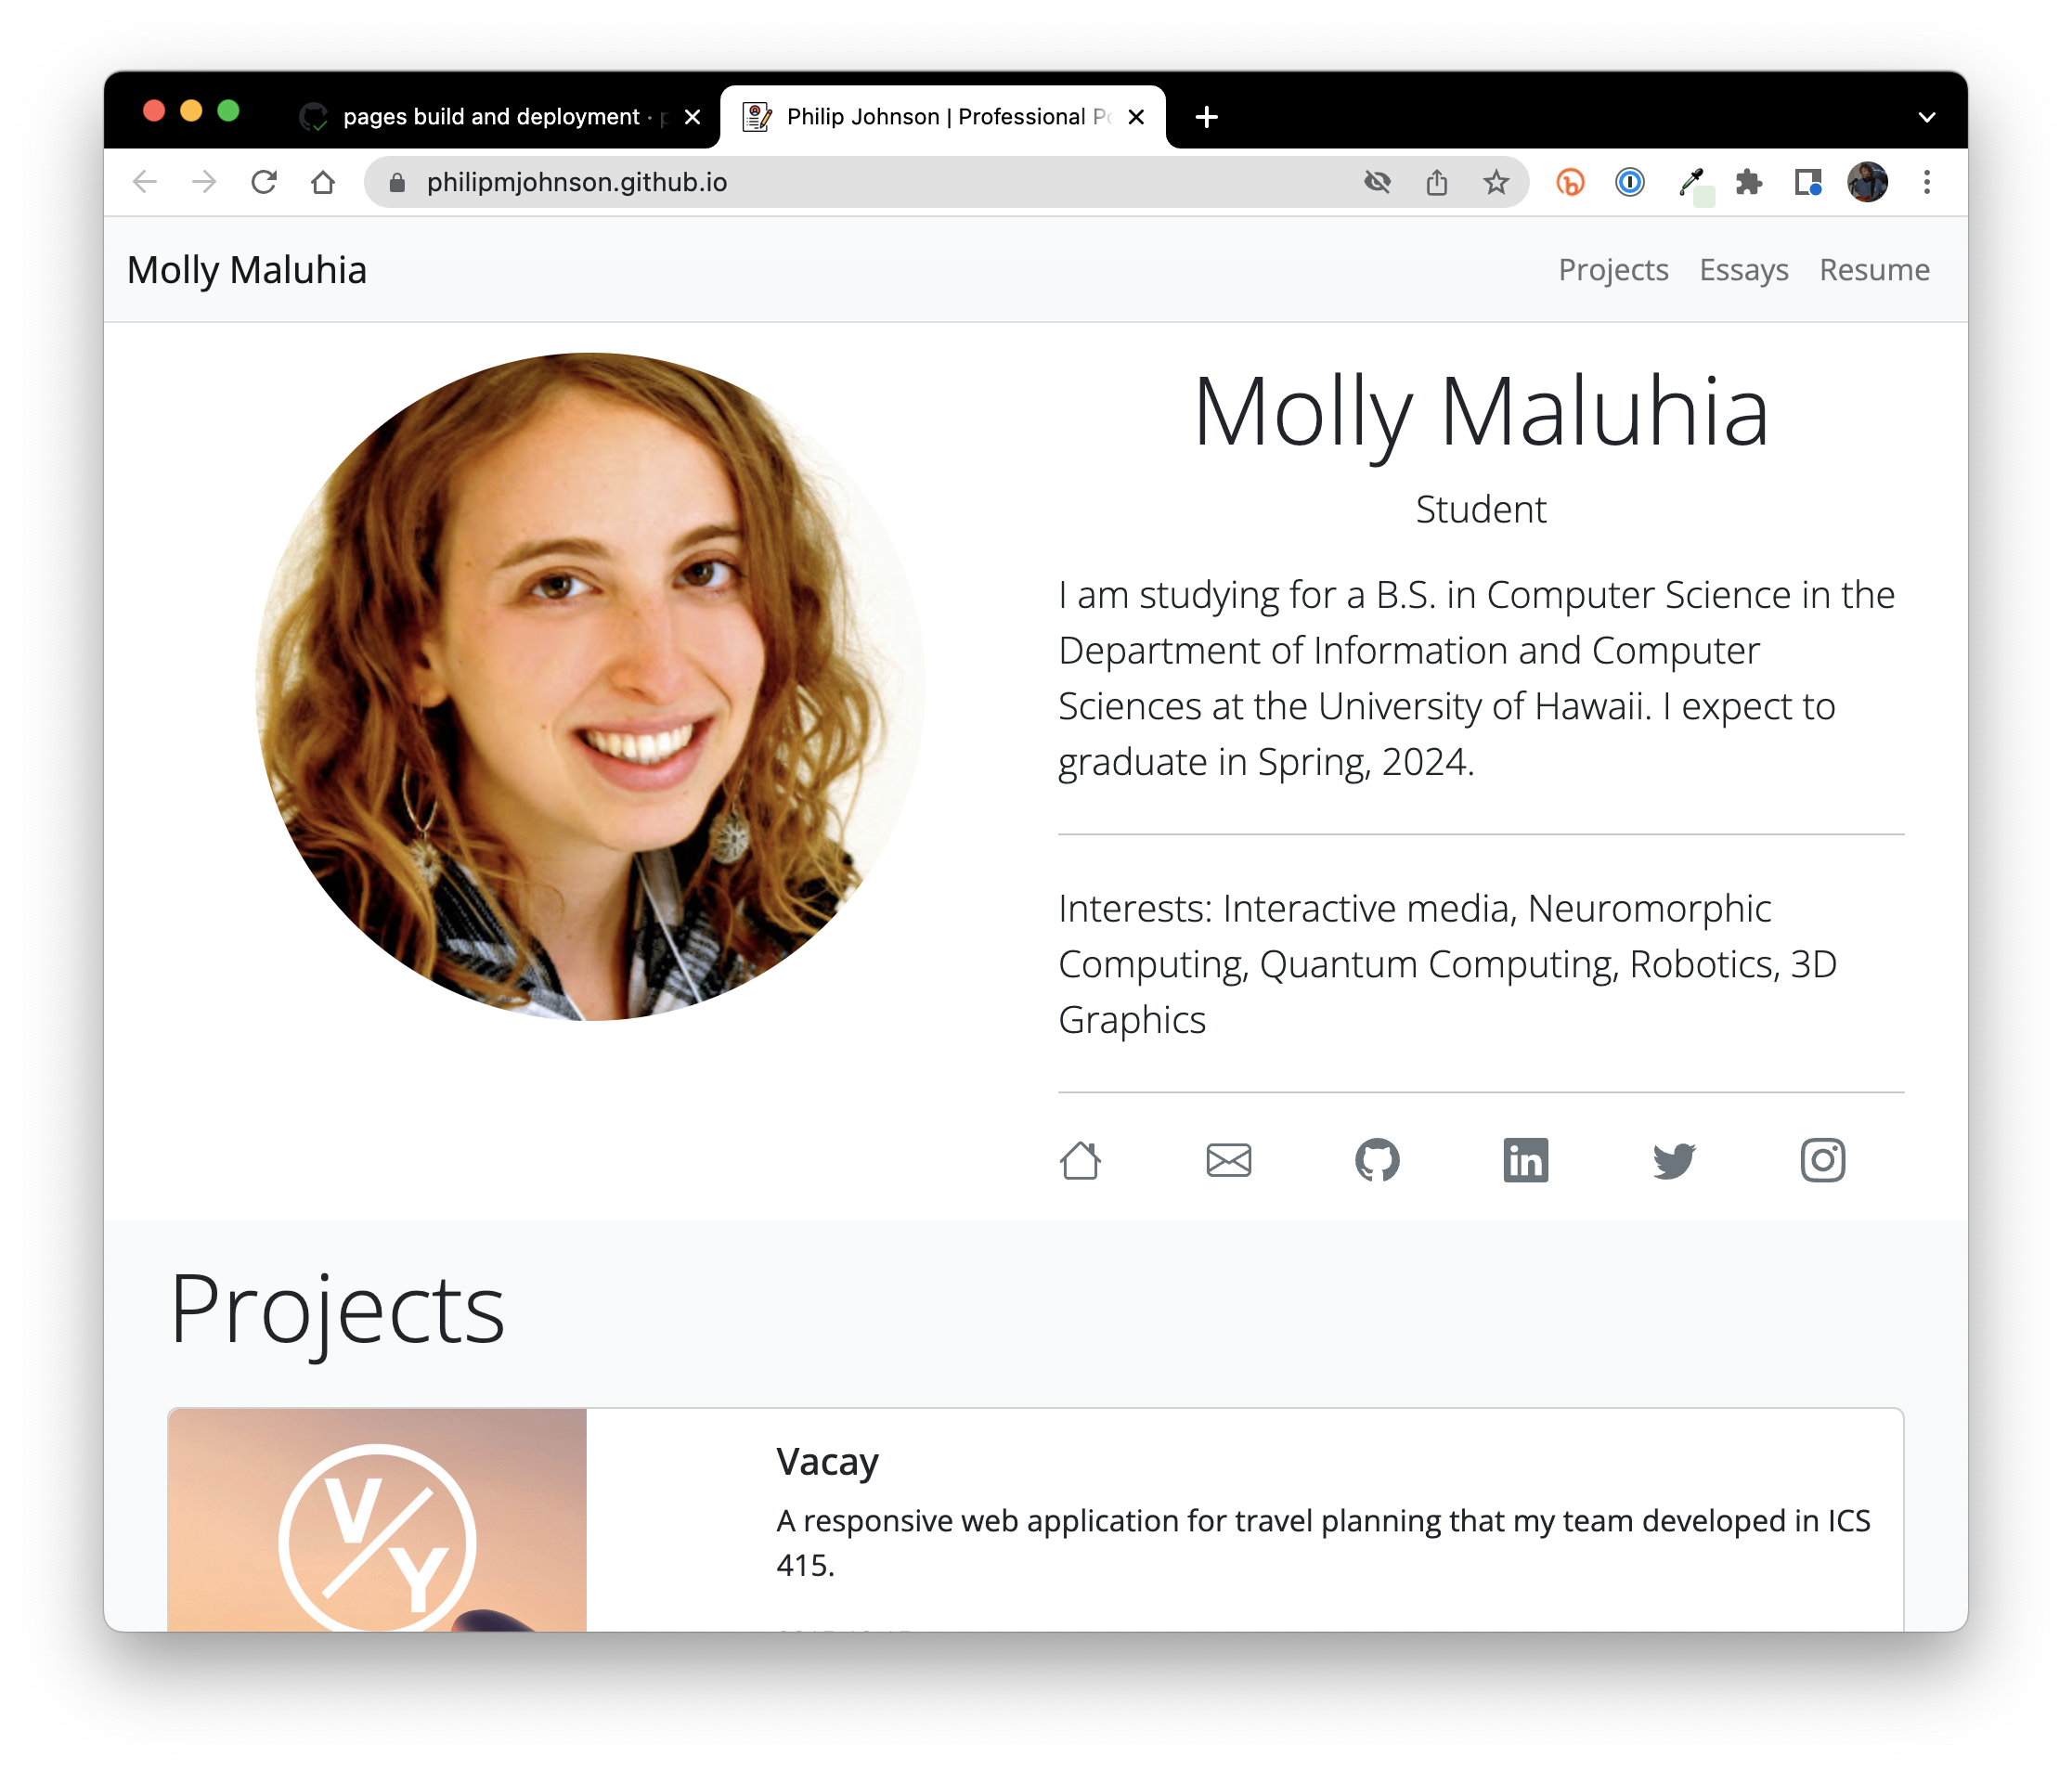
Congratulations! The URL "https://philipmjohnson.github.io" now shows the portfolio for... Molly Maluhia?