Configure bio.json
OK, I understand if you are a bit disappointed by the conclusion of the last section---unless you actually are Molly Maluhia, that portfolio doesn't look like you at all!
The good news is that you've finished the one-time "initialization" for your TechFolio, and now you can start learning how to customize it to reflect your own accomplishments.
Create a headshot
The default TechFolio layout requires a square image to be used as the "head shot". So, take a moment right now to look through your photos to find a picture that you want to use as the head shot.
While there are many different ways to create a URL to your headshot and make it square if it isn't already, a very easy way is to upload that photo as your GitHub profile picture, which will automatically crop it into a square image if it isn't already.
To do this, go to your account page and then move your mouse over the head shot area, which will make the image a button with the comment "Change your avatar"
![]()
Click on the image to bring up a page where you can edit your profile picture:
![]()
Click on the "Edit" link and select "Upload a photo...". Select the file from your computer with your headshot image. GitHub will then display a dialog that enables you to crop and center your head shot:
![]()
When you have finished the upload process, GitHub will provide a link to your profile picture as "https://github.com/USERNAME.png", where USERNAME is your GitHub username. For example, here's https://github.com/philipmjohnson.png:
![]()
Note that GitHub will redirect this URL to a different, more complicated URL, but you can always use the simple one).
Now that you have a URL that you can use for your head shot, let's fix the basic biographical information in your portfolio.
Edit basics and interests
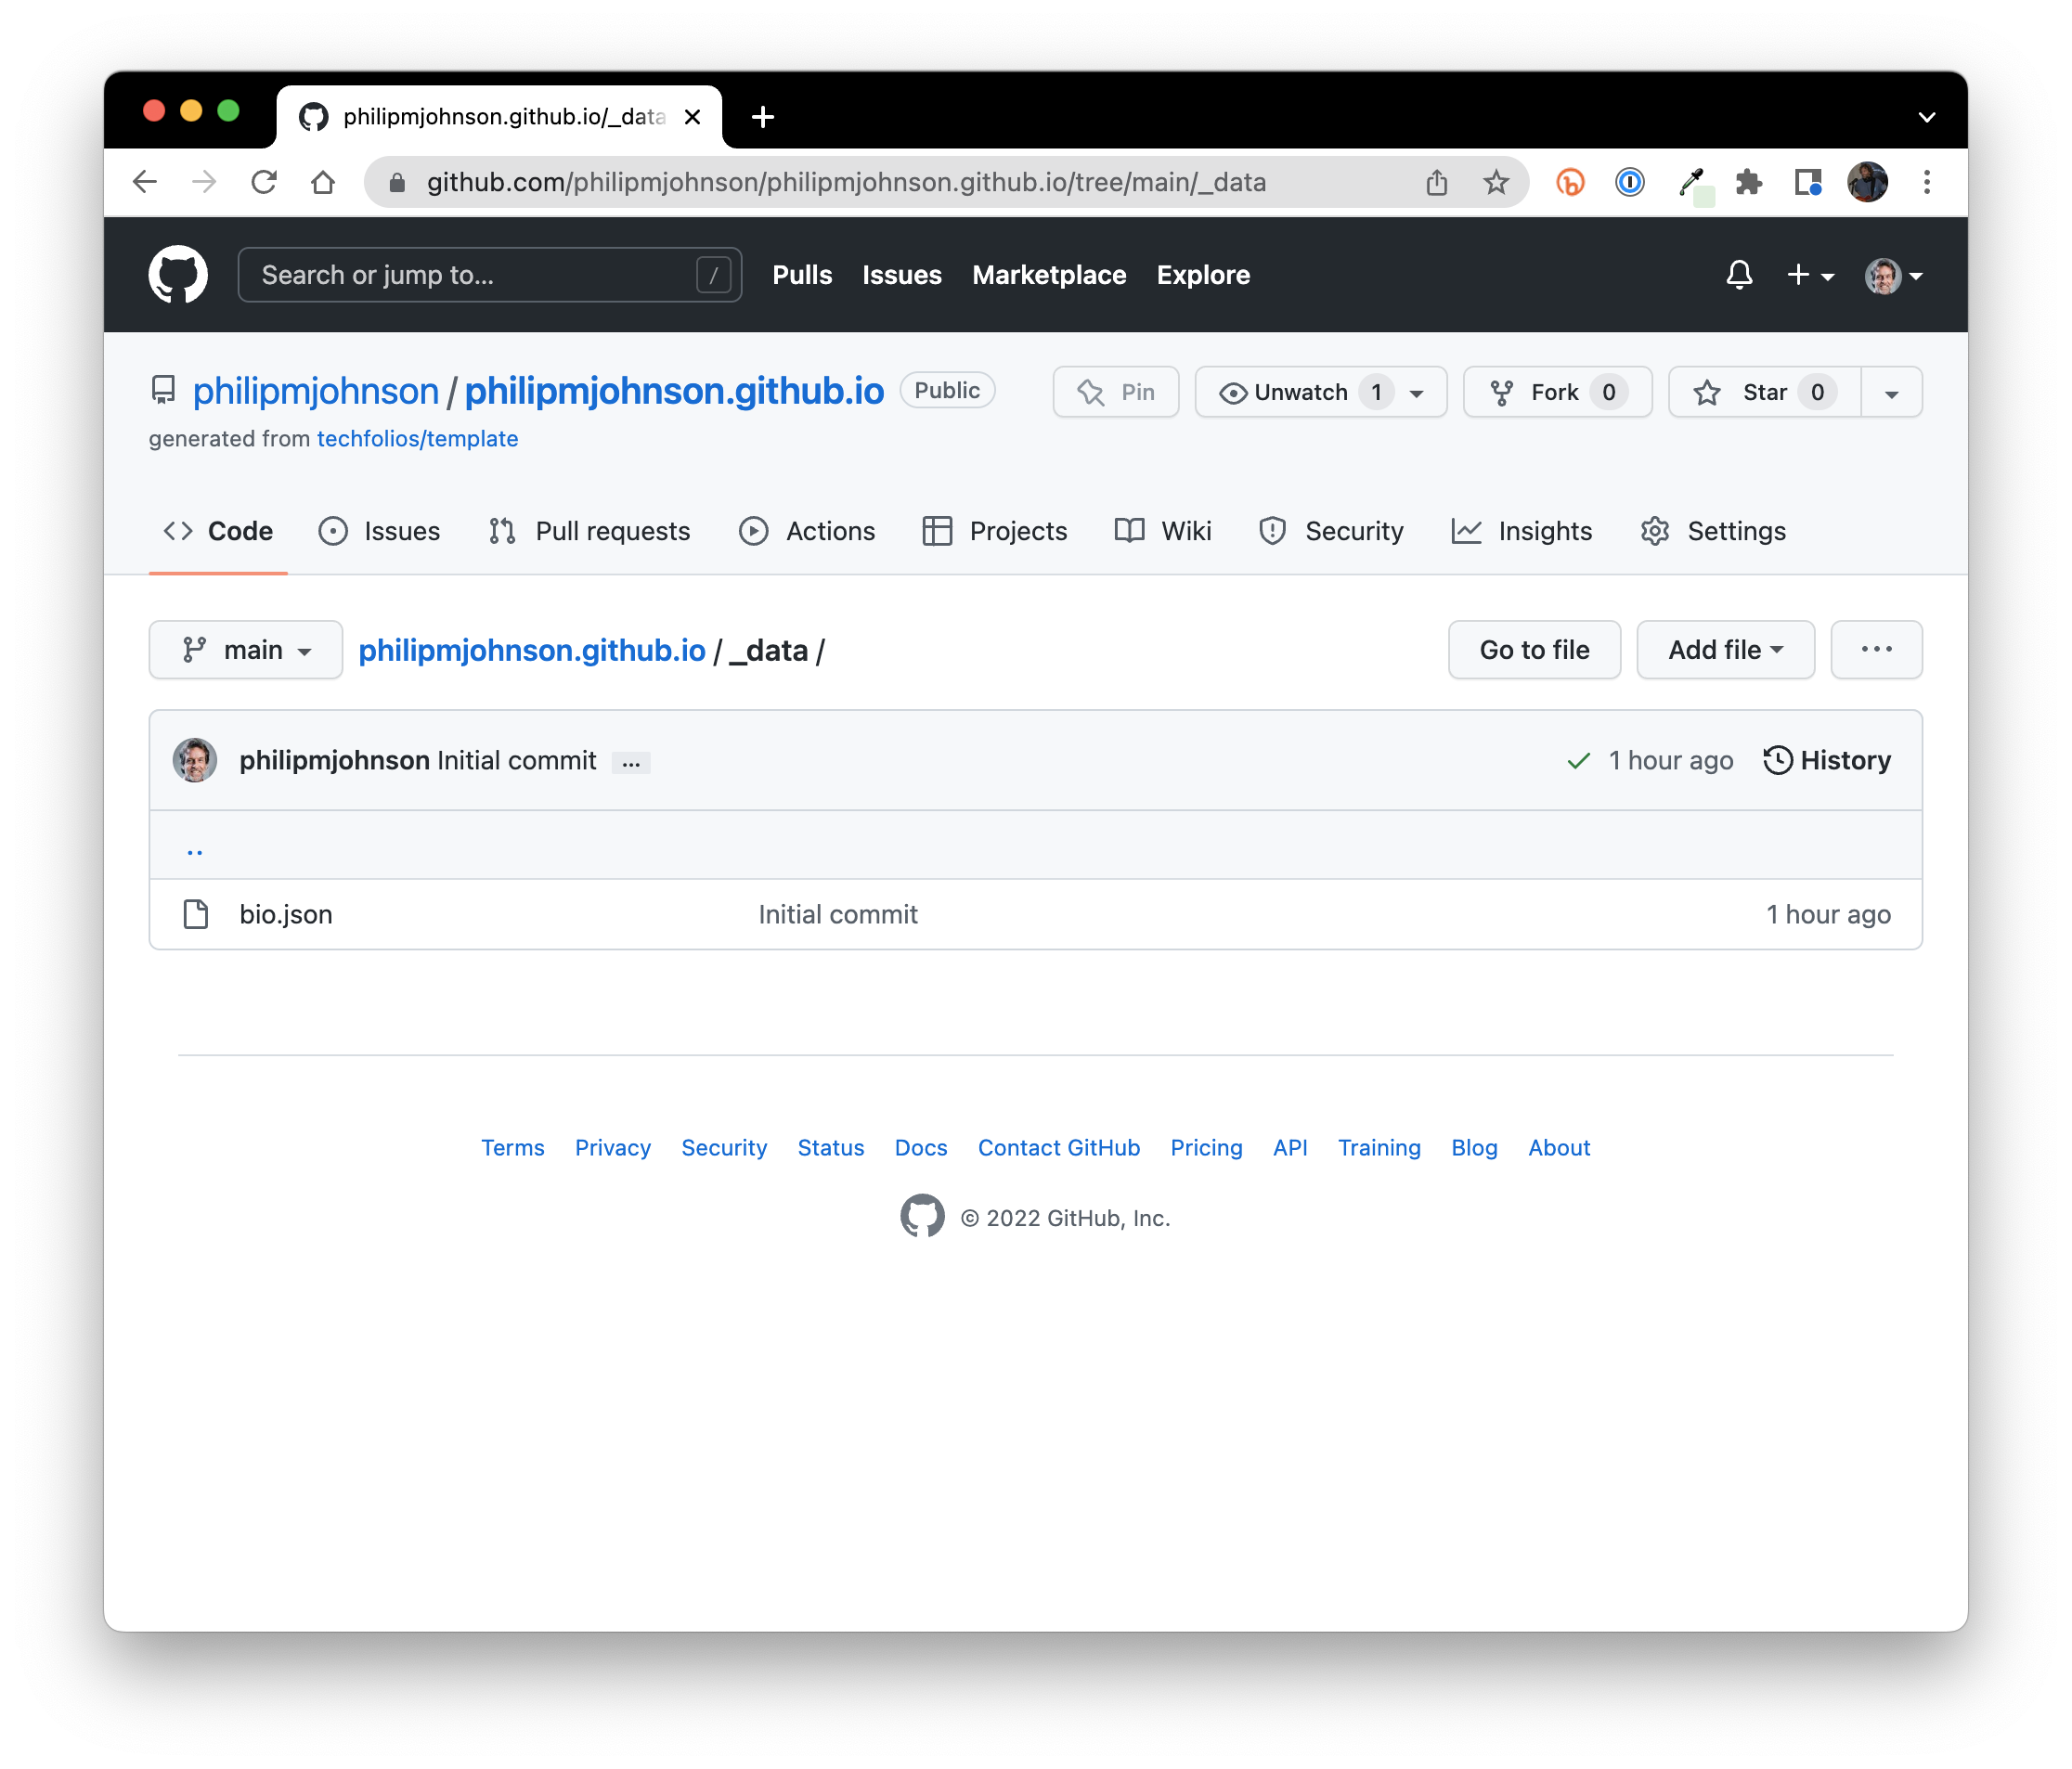
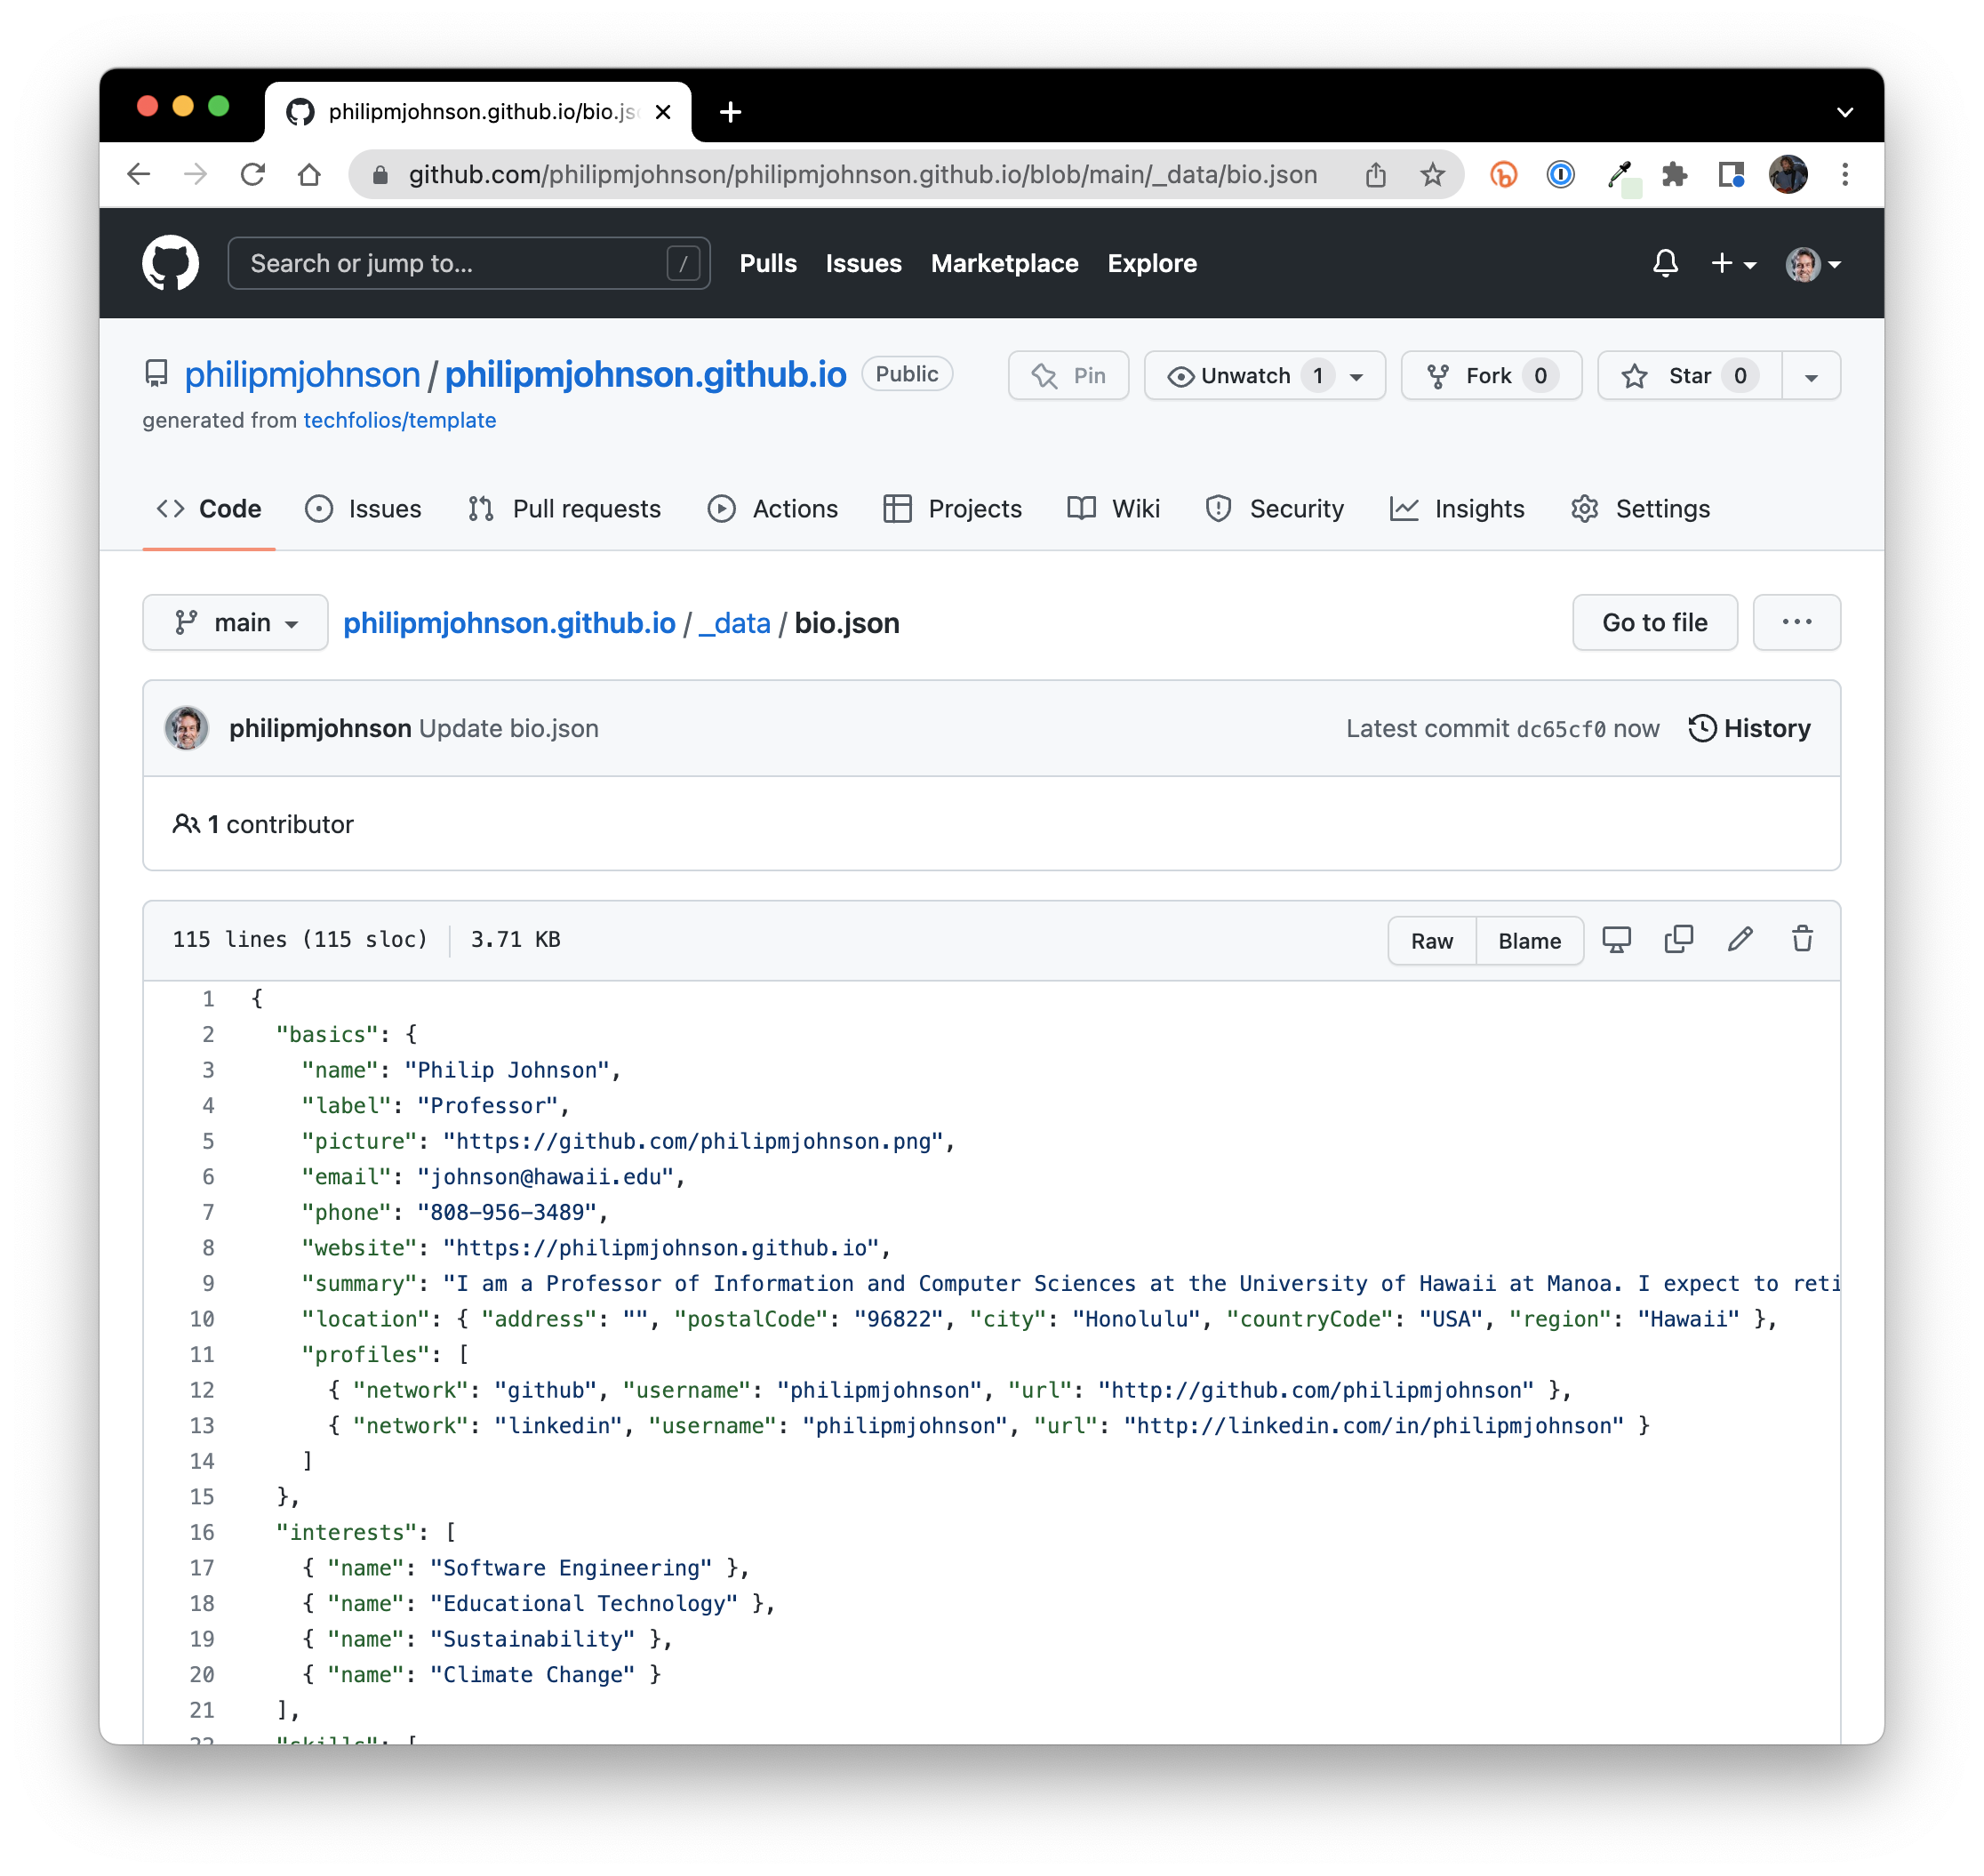
To configure the name, head shot, and other basic information that appears in your TechFolio, you have to edit a file called "bio.json". It's in the \_data directory. To get there, go to your repo home page and click on the _data directory to bring you to the following page:
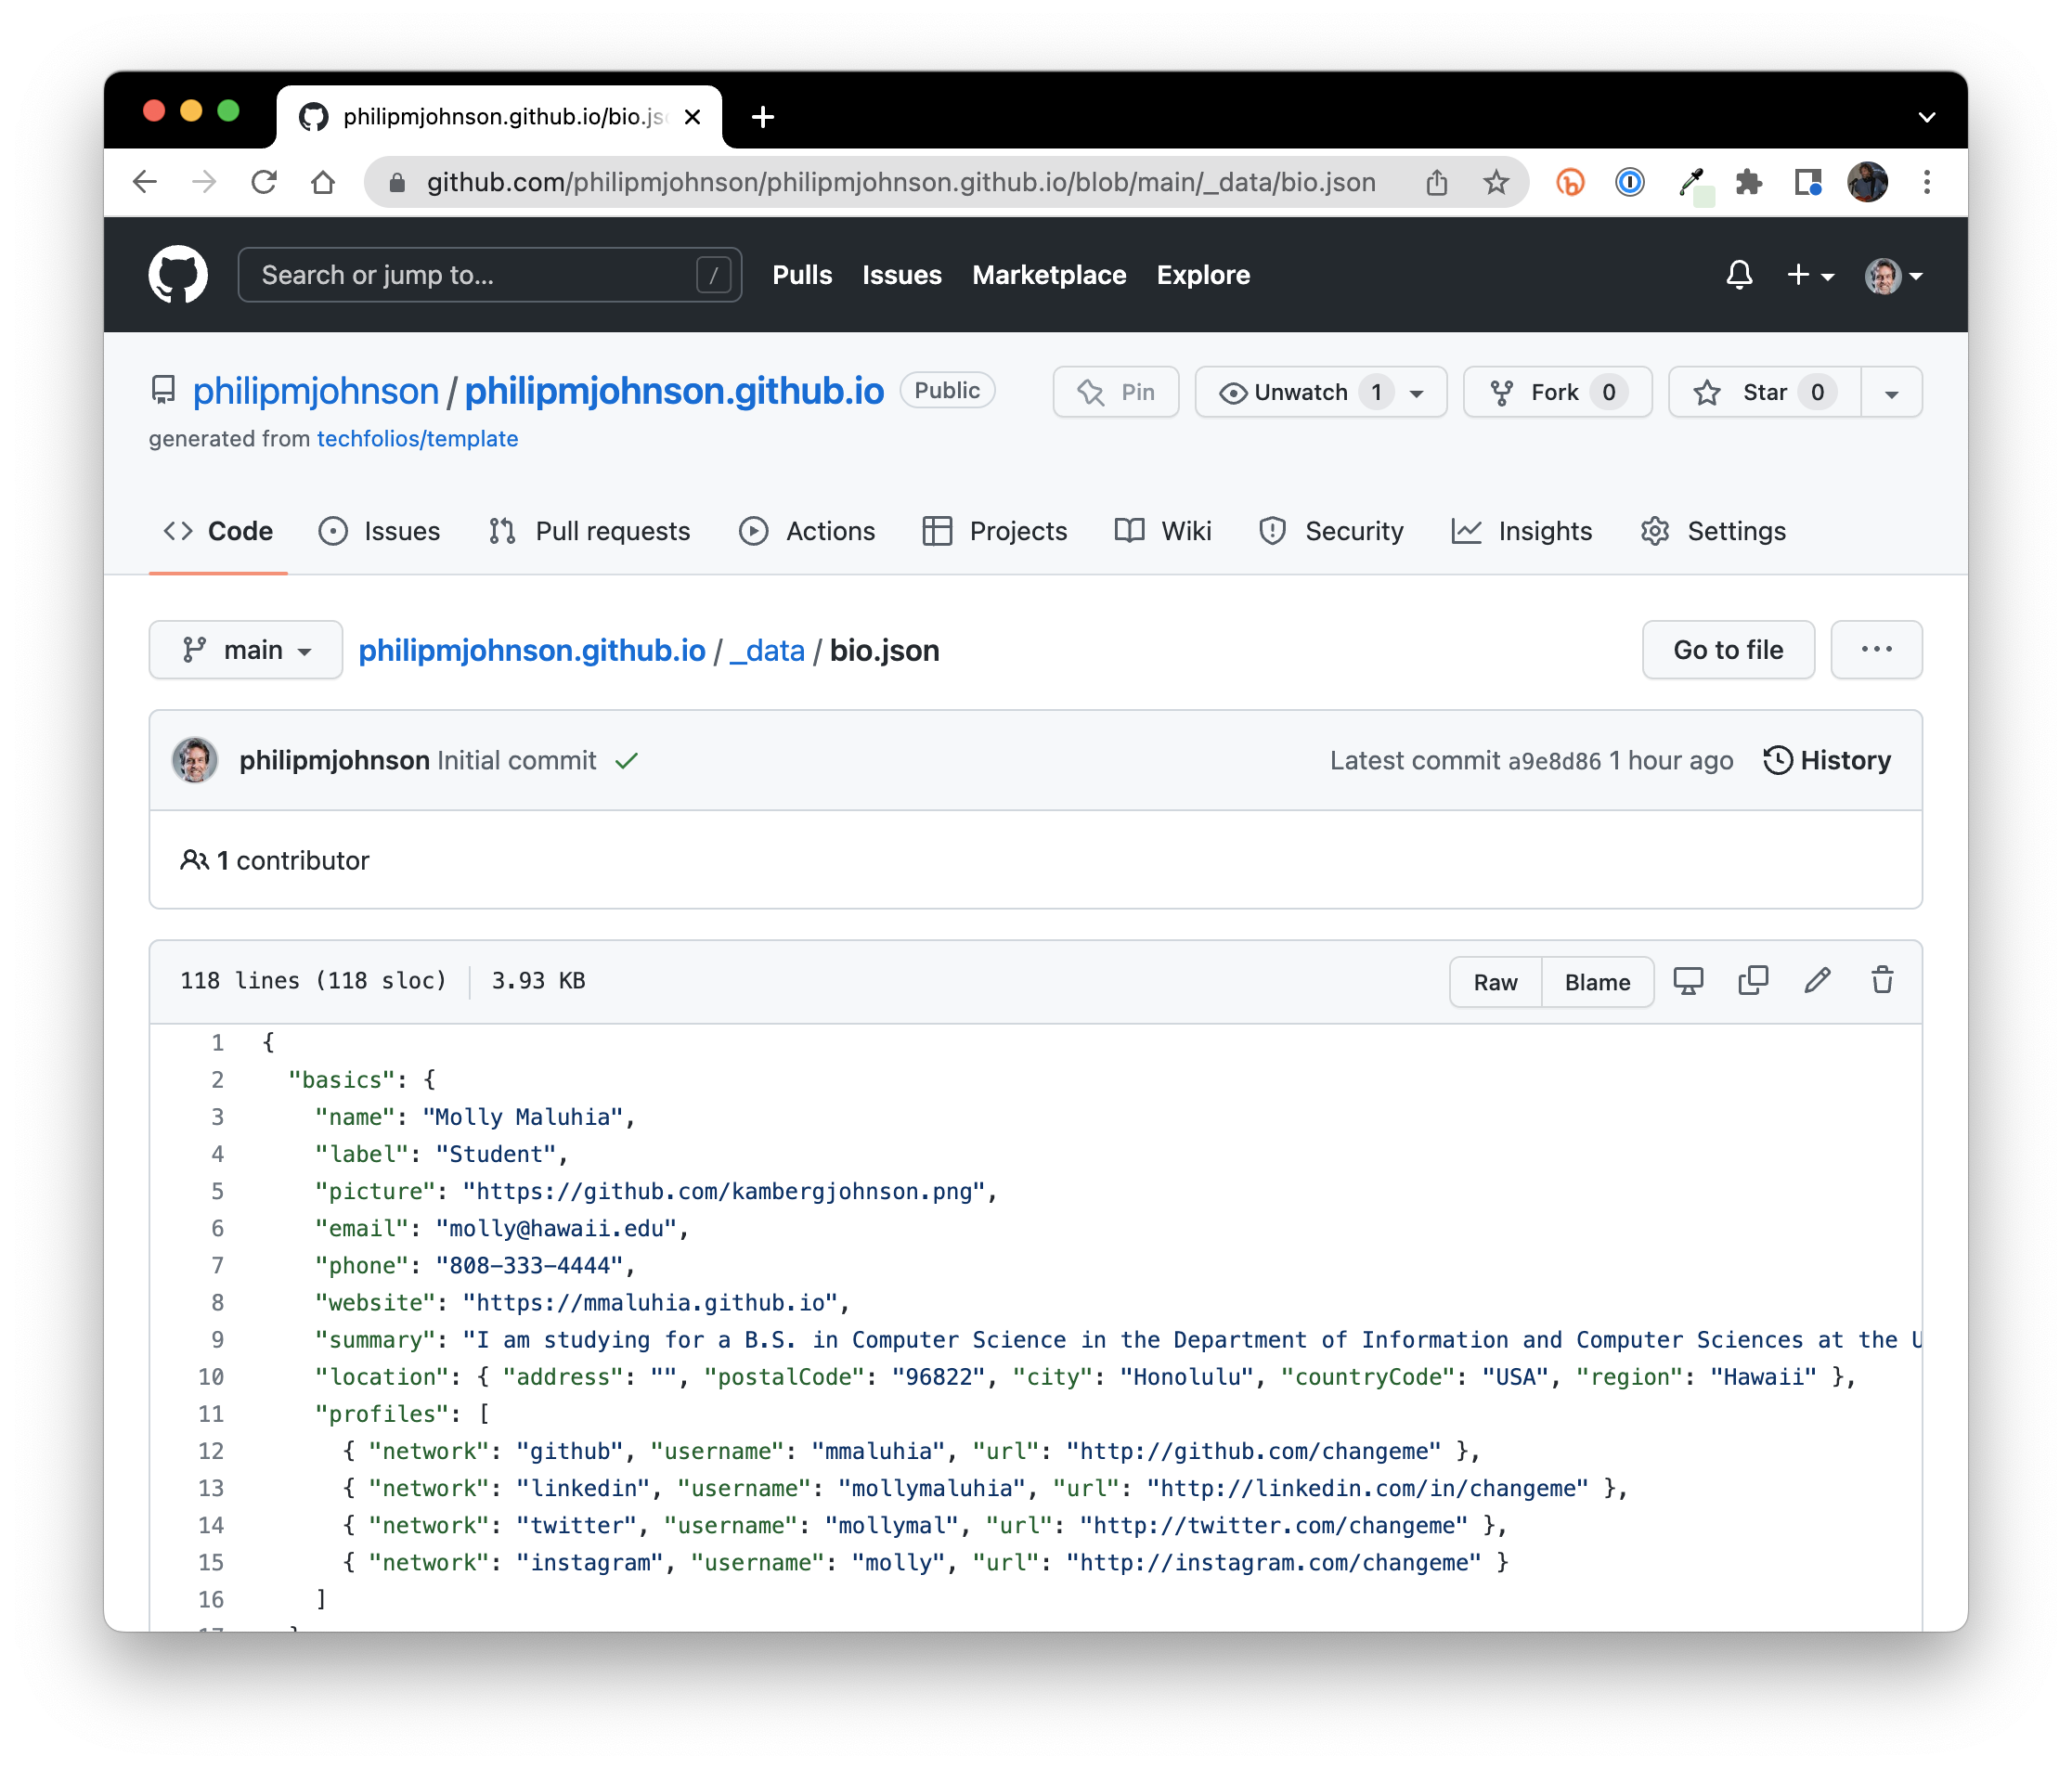
Click on bio.json to get to this page:
Now click the pencil icon to edit this file within your browser:
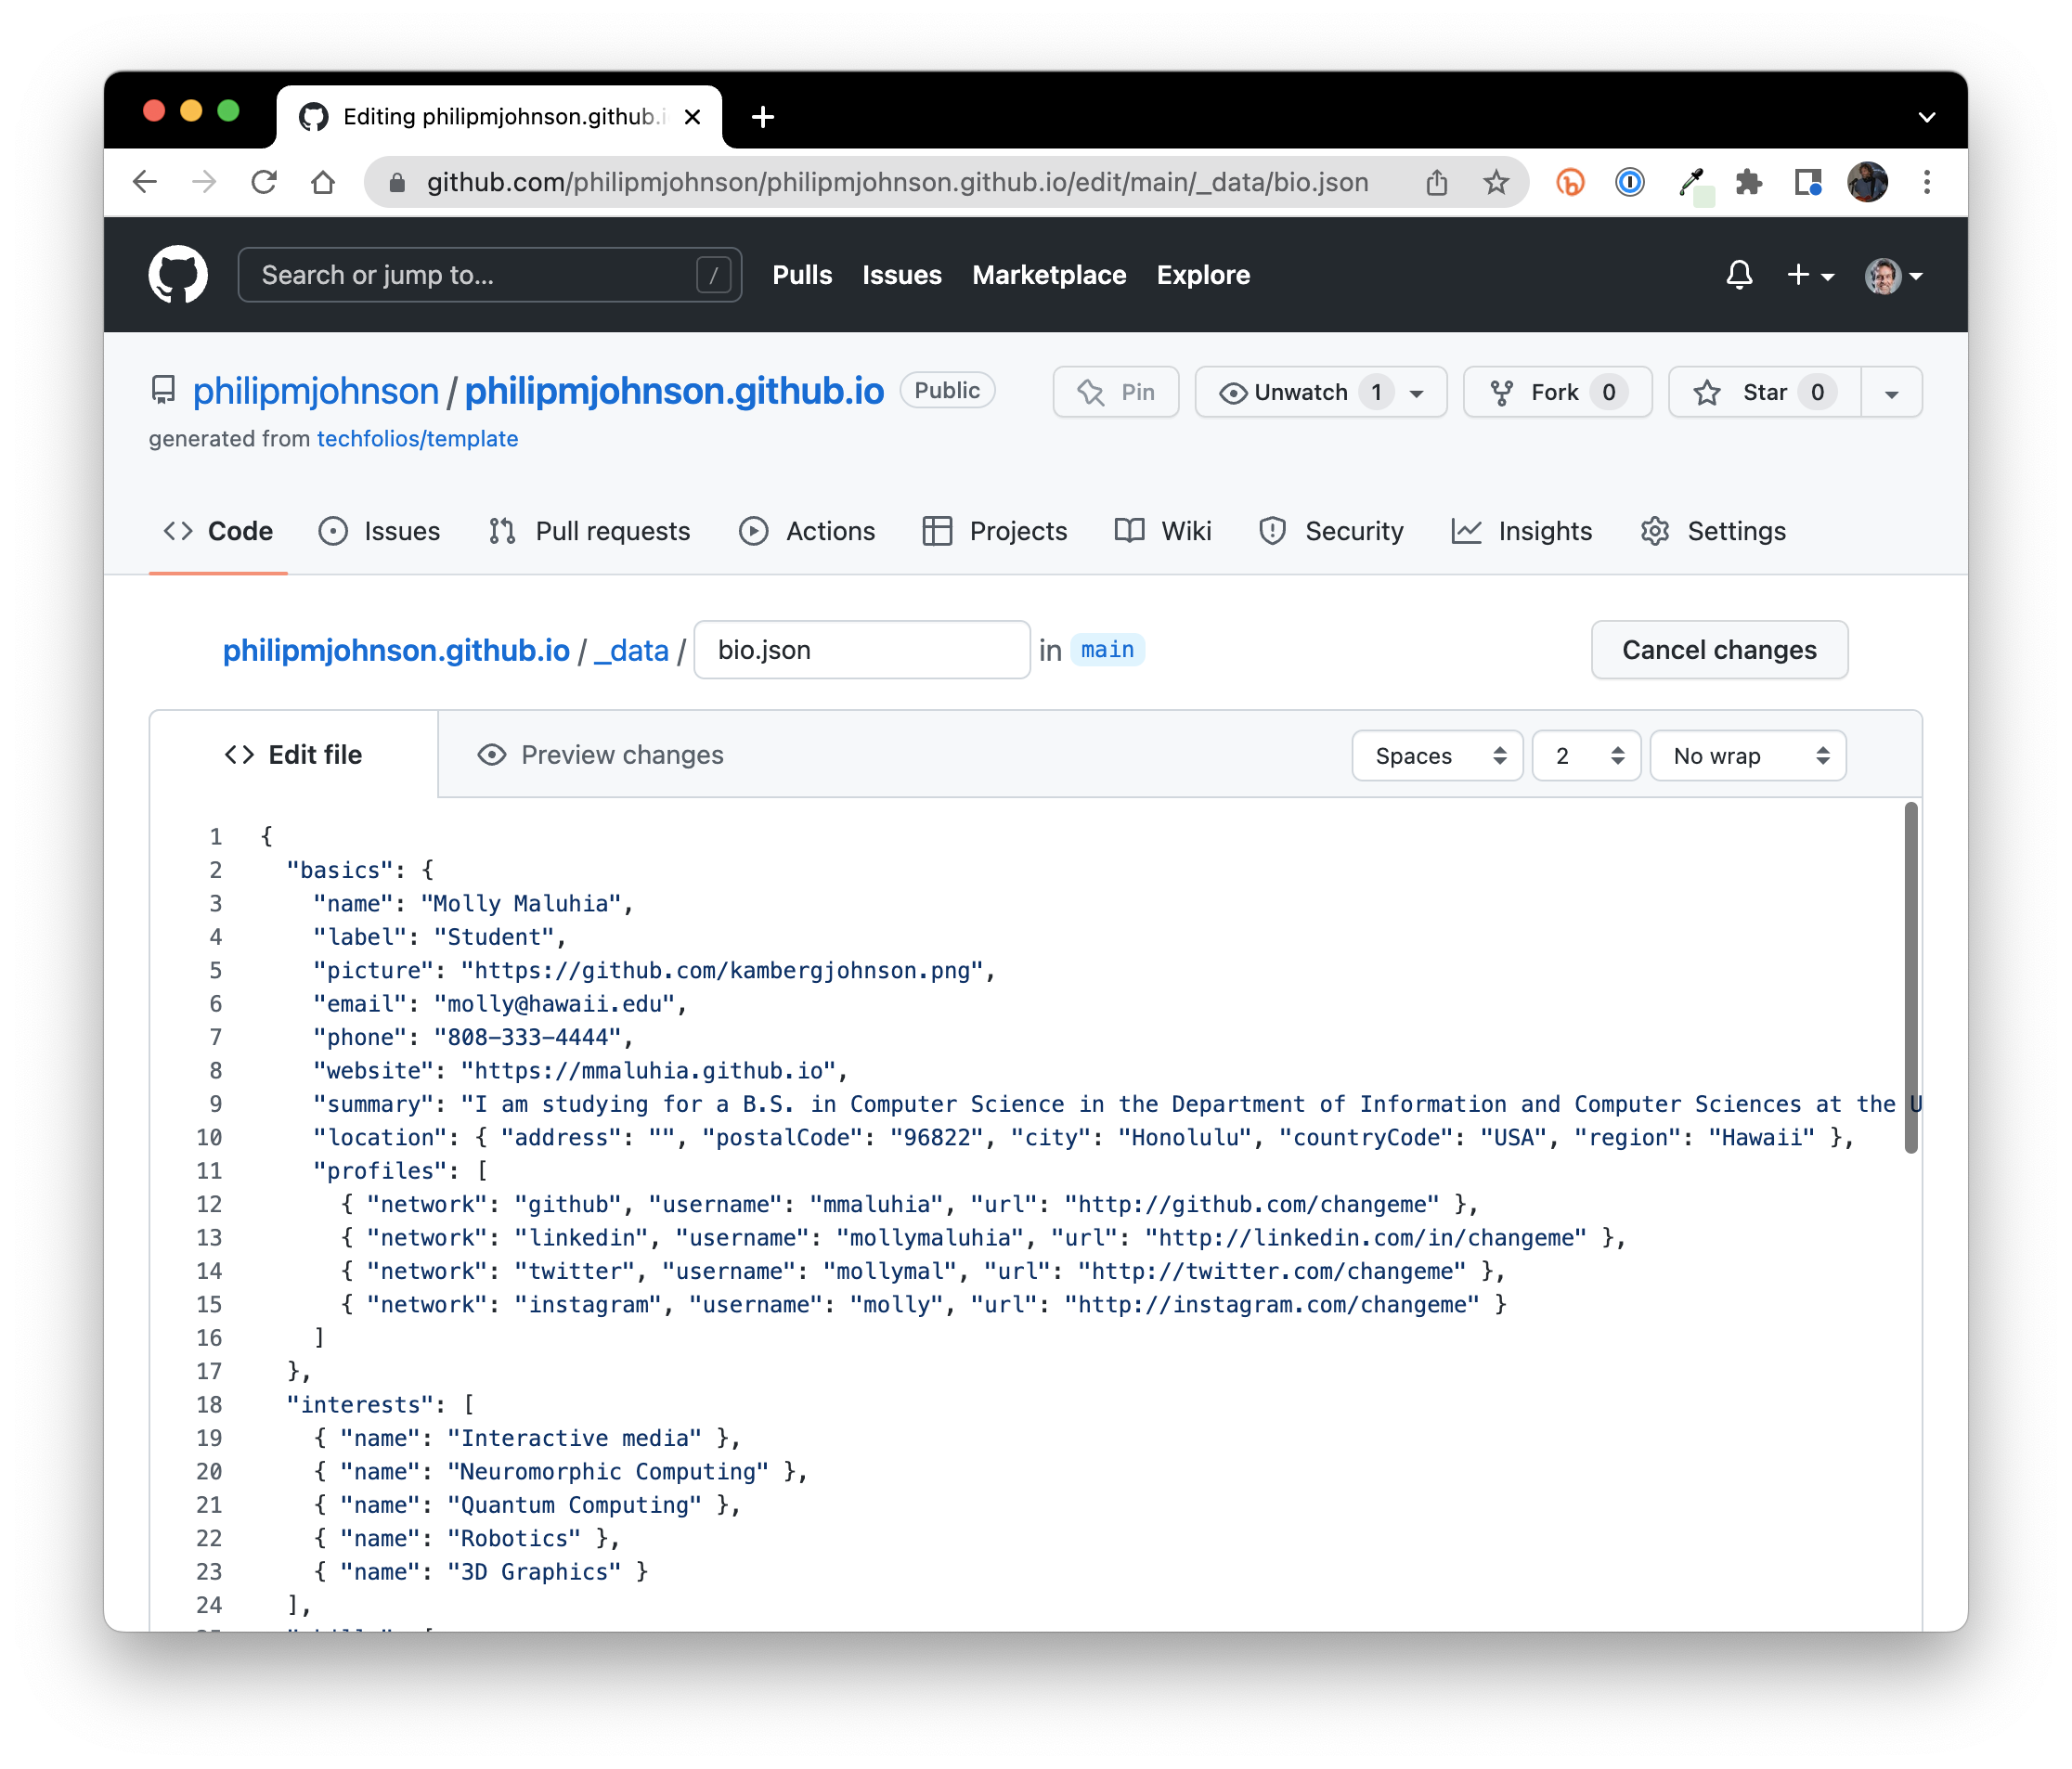
Notice the dropdown that currently specifies "No wrap". That's irritating, because certain lines (like the summary line) run right off the right side of the browser window. To fix this, press that dropdown and select "Soft wrap" instead. This way you can see the entire contents of each line within your browser without horizontal scrolling:
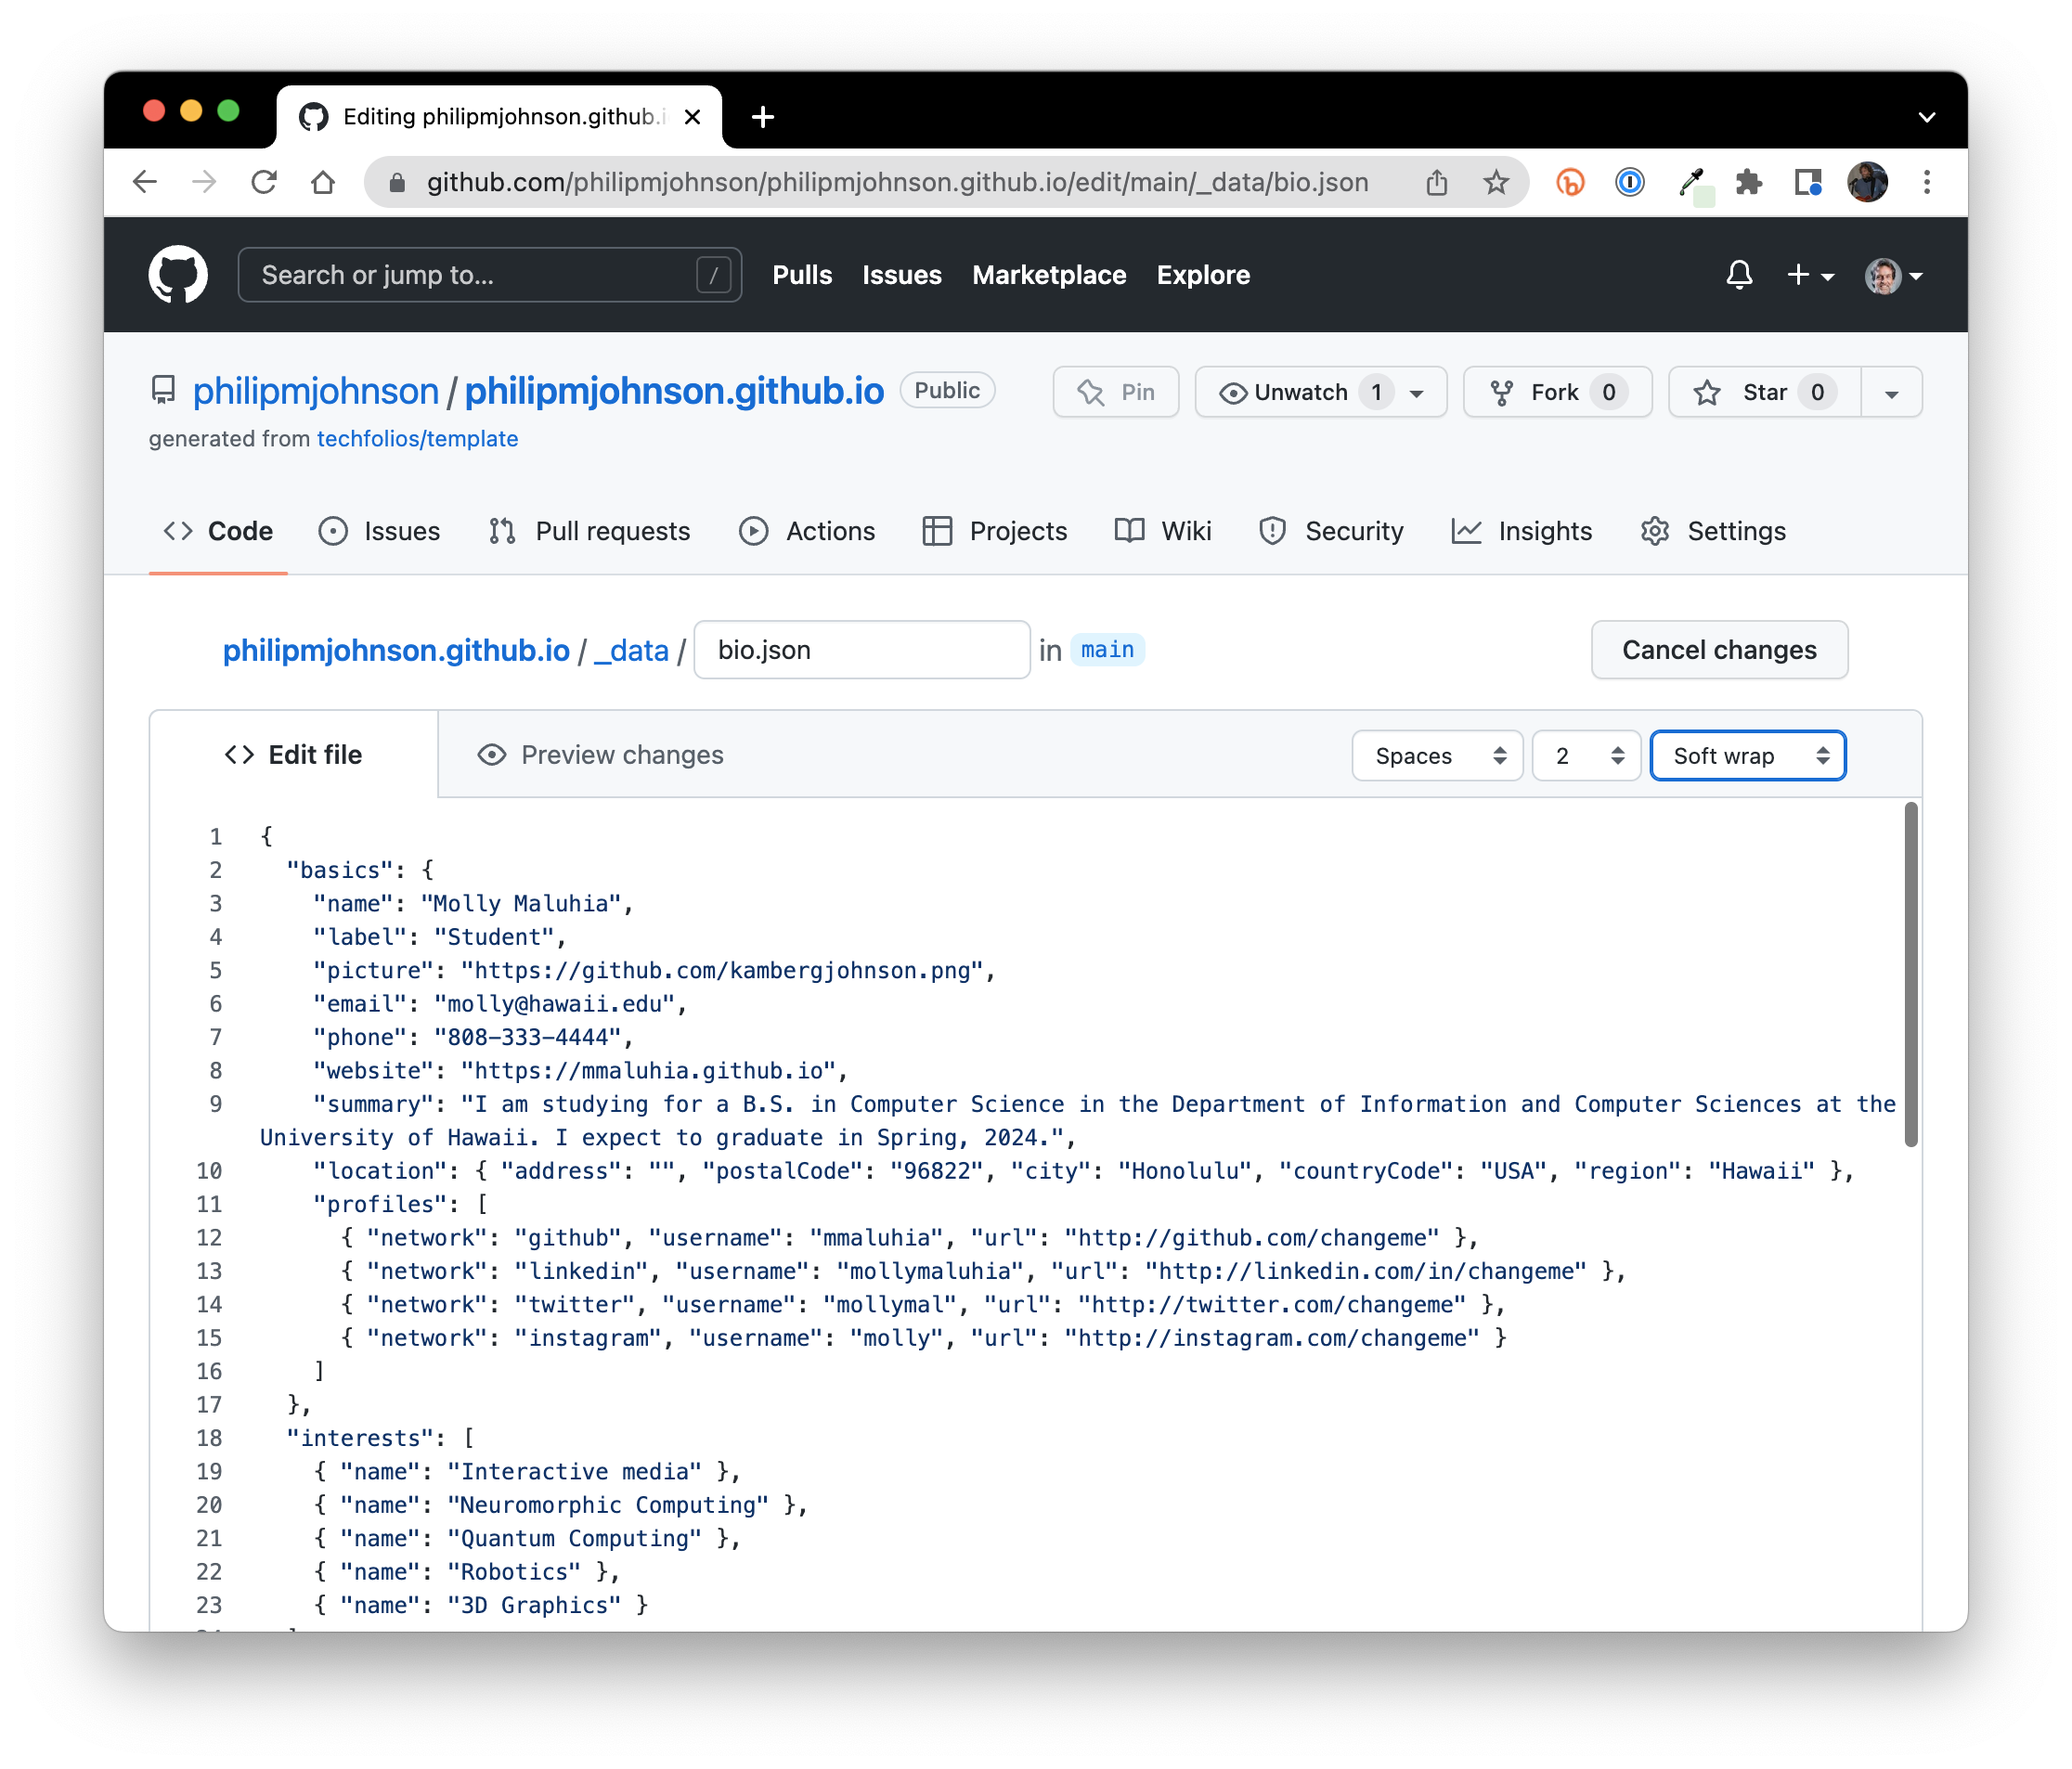
OK, now go ahead and edit the "basics" section and the "interests" section to provide your own information. Here's what I did:

There is one tricky thing you need to know when editing this file. Because it's a "json" file, you have to observe some strict syntax rules. In particular, the lines between the square brackets have to be separated by commas, except for the last line, which cannot have a comma. Because I deleted the Twitter and Instagram lines in the "profiles" section, as well as one of the interests in the Interests section, I needed to make sure that the last line in each of those sections did not have a comma. The red boxes in the image above shows the last lines of those sections and how they do not have a comma.
If you make a mistake when editing the bio.json file, the build will fail. That's not a big deal, it happens to everyone occasionally. I'll tell you what to do in this case in a bit.
After making your changes to the "basics" and "interests" section of bio.json, then scroll to the bottom of the page and click "Commit changes". Now GitHub will display the saved file:
In addition, since you committed a change to your repo, GitHub will start a new build of your portfolio. Click on the Actions tab to see:

As before, you can click into the workflow to see what's happening. In this case, the most important workflow item to check is the one called "validate-bio-json-file":
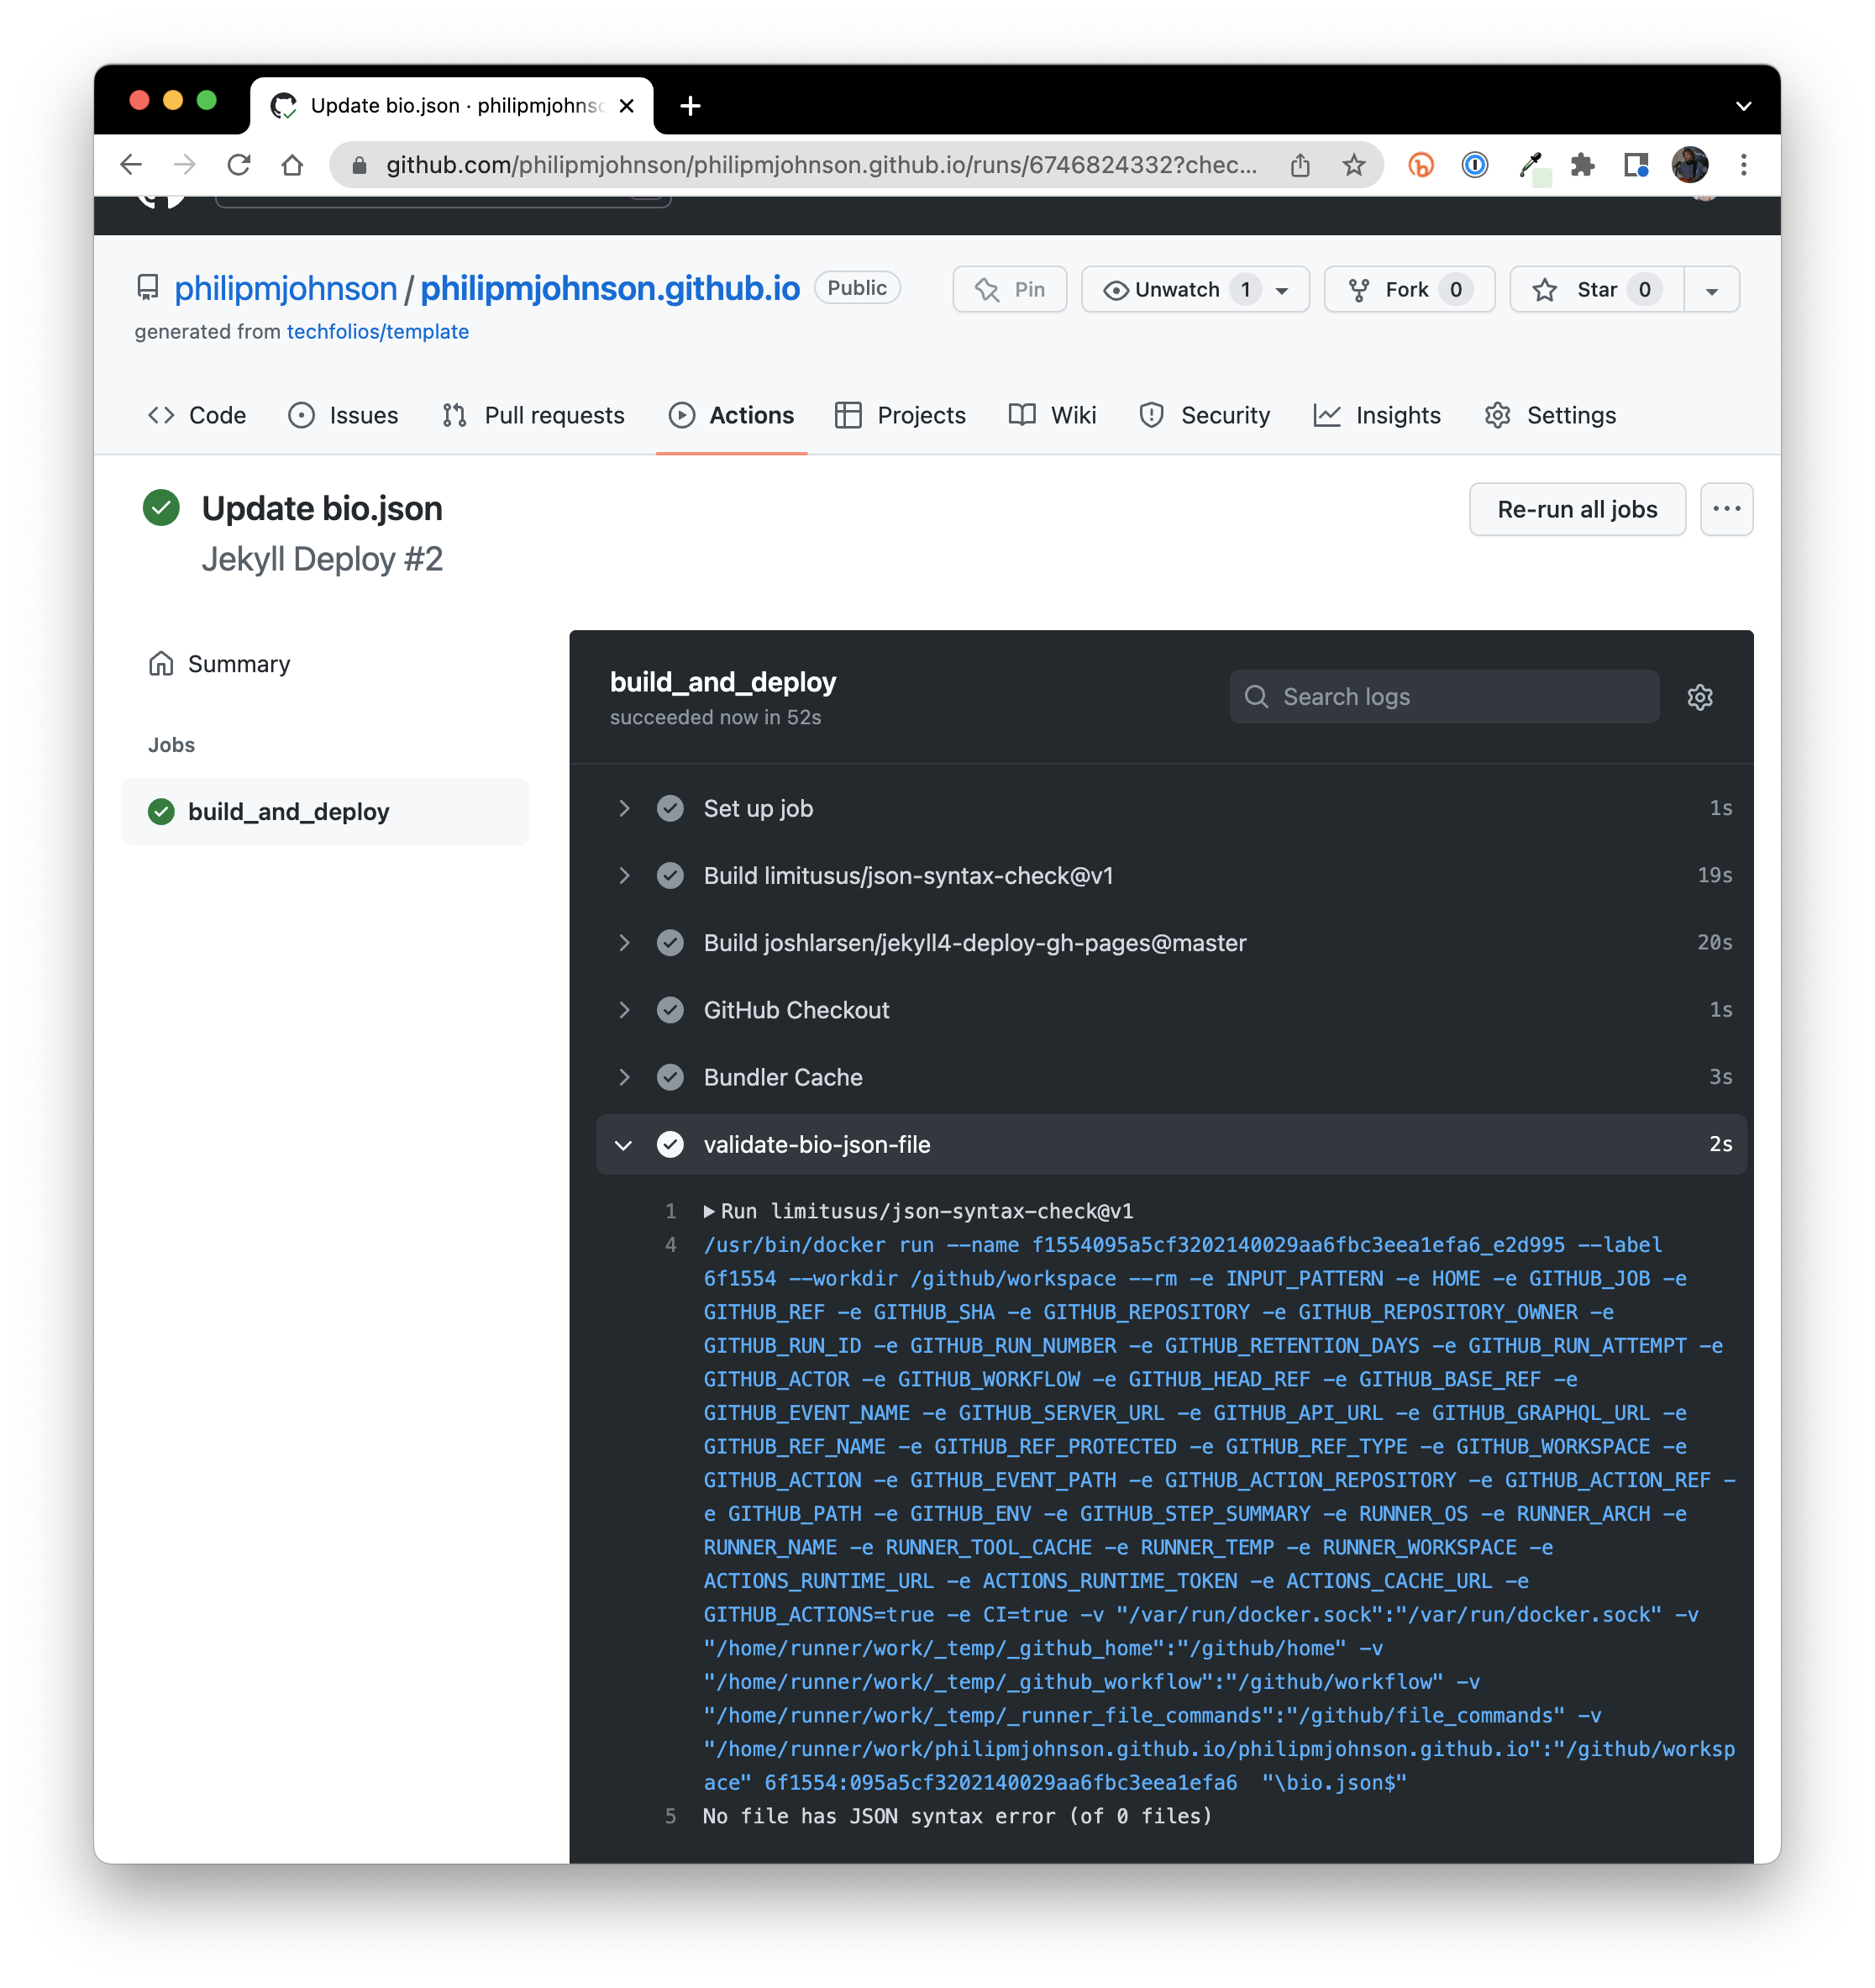
This task checks the syntax of your bio.json file. As you can see, in this case, it did not find any errors.
If the build fails due to a problem with your bio.json, the easiest thing to do is to use an online json syntax checker like https://jsonchecker.com to check the syntax of your file and show you where it needs fixing. Then edit your file, save it, and this will kick off a new build of your portfolio.
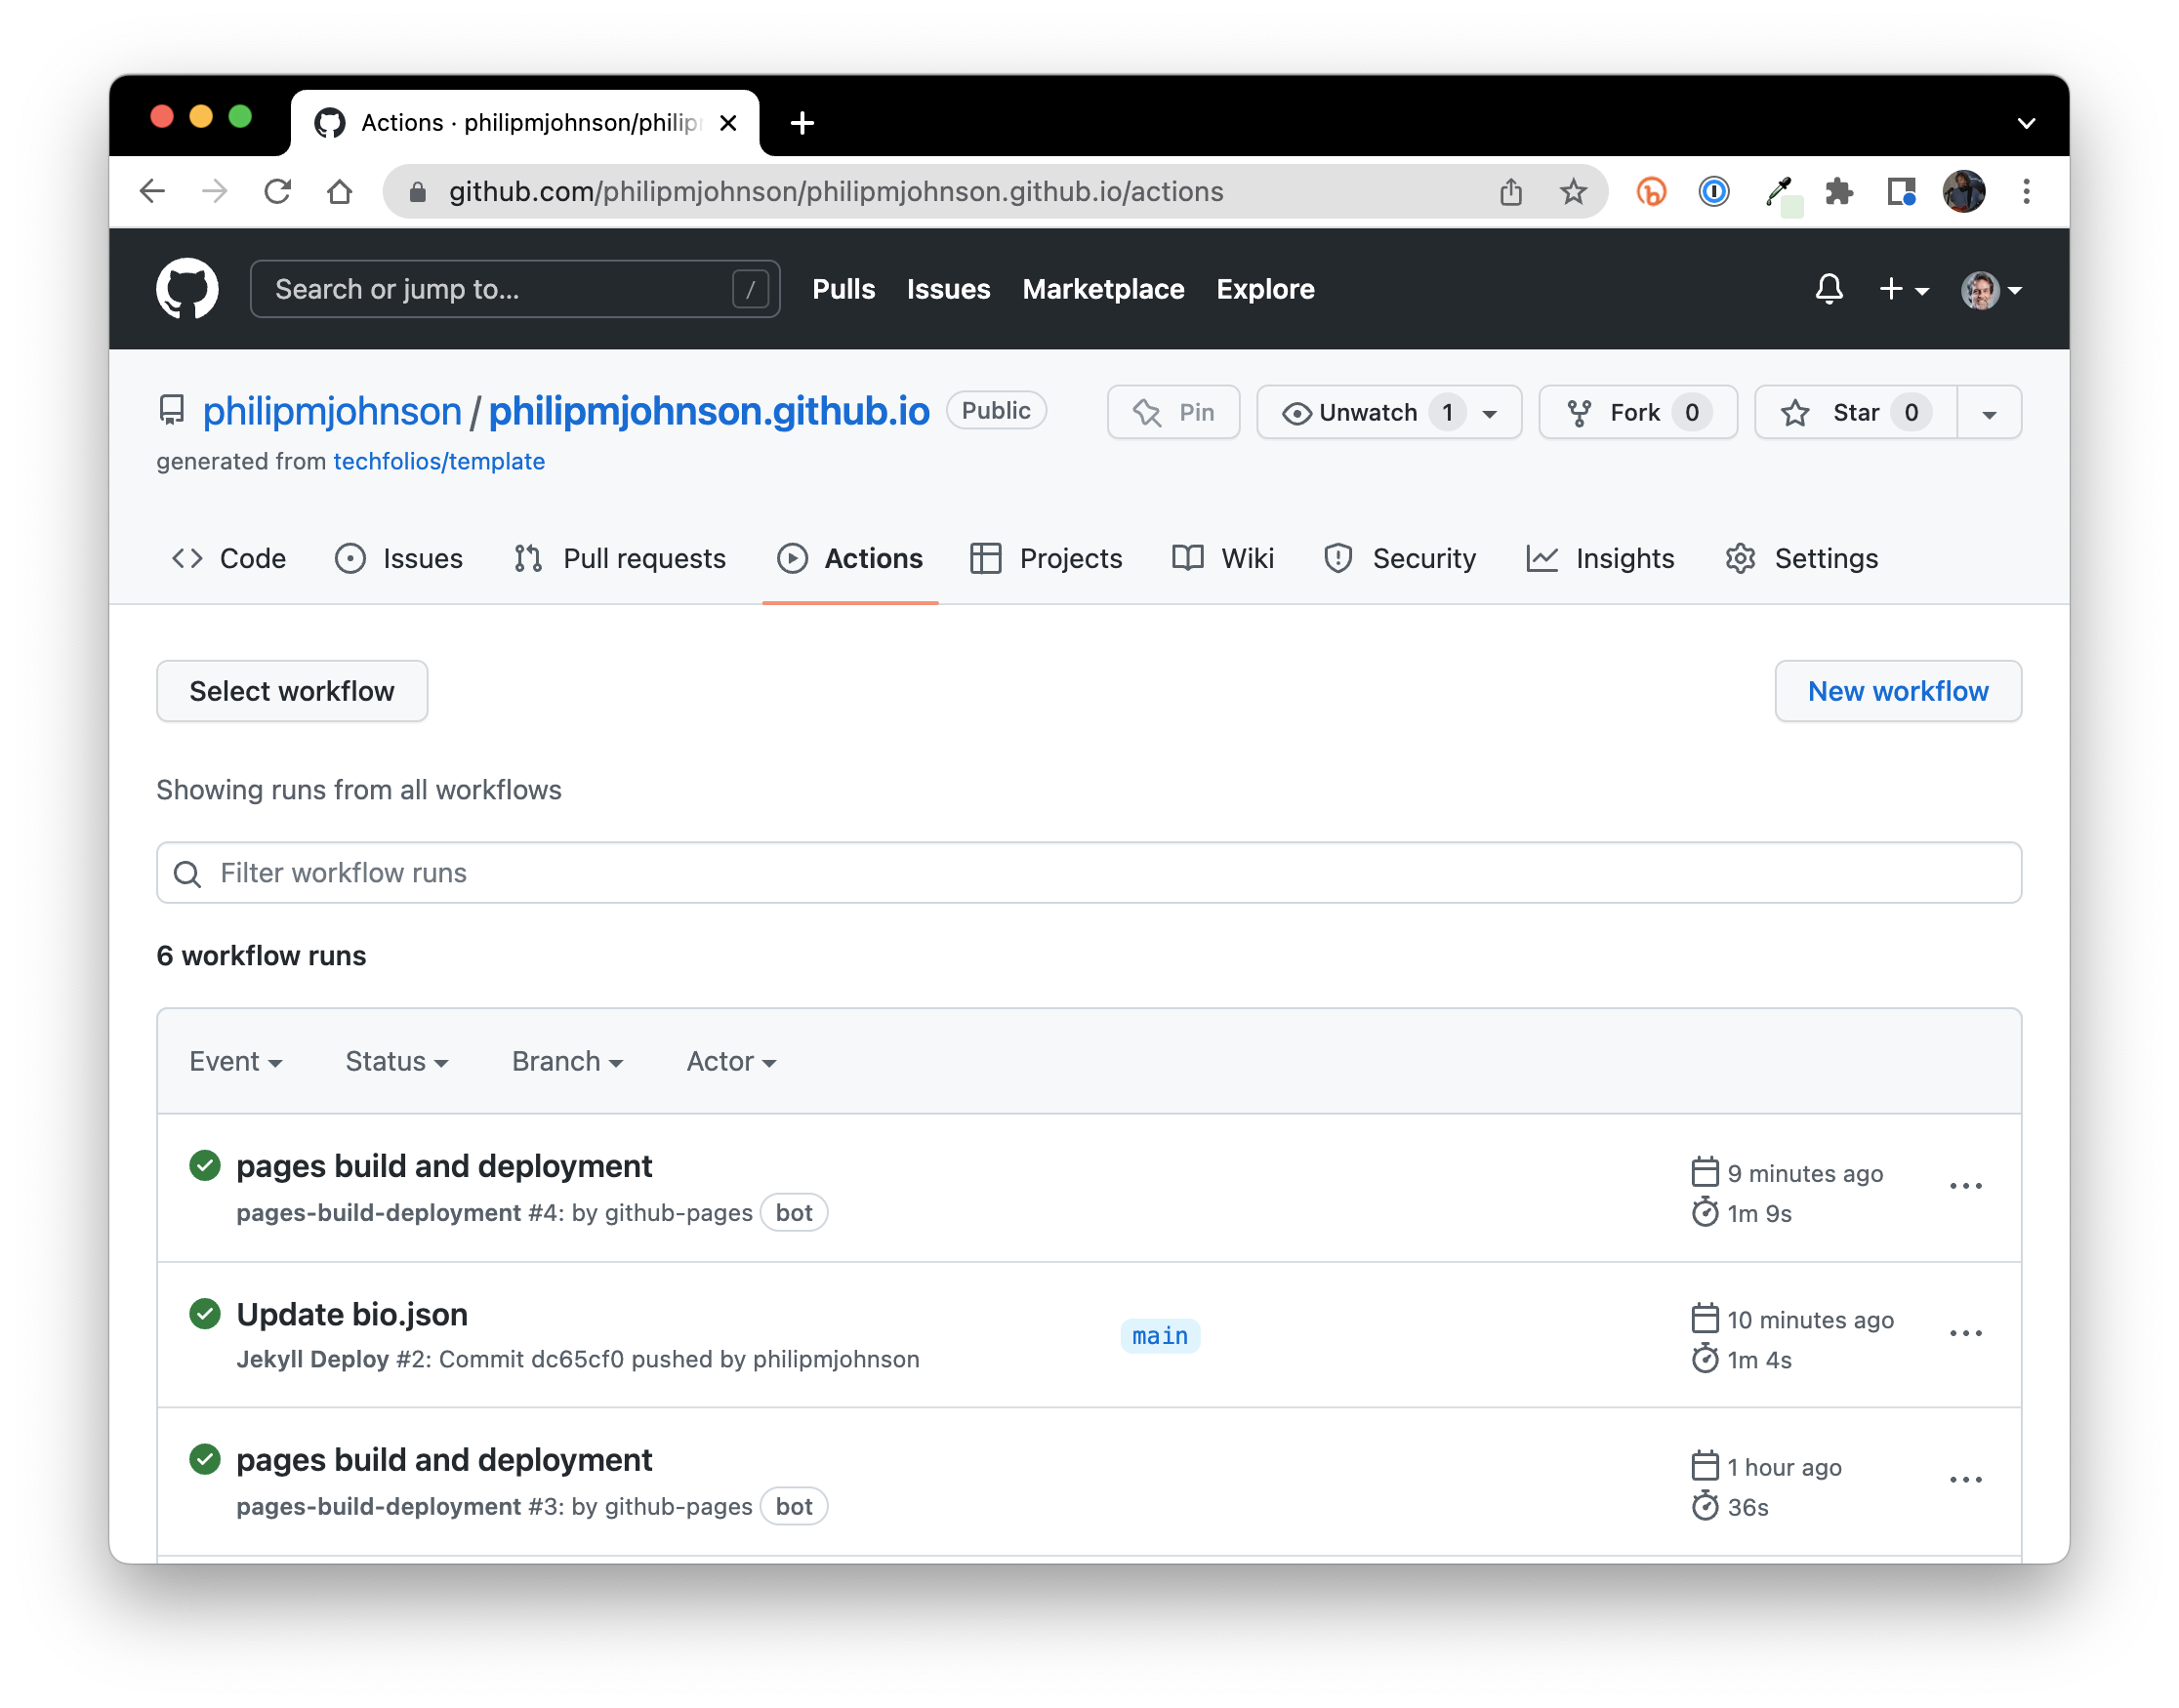
If the "Update bio.json" action completes successfully, then new files will be written to the gh_pages branch of your repo, which will trigger the "pages build and deployment" action. This action takes typically about 30 seconds to complete. Wait until you get the green checkmark:
Once it completes, your portfolio is ready to be viewed again. Here's what mine looks like now:
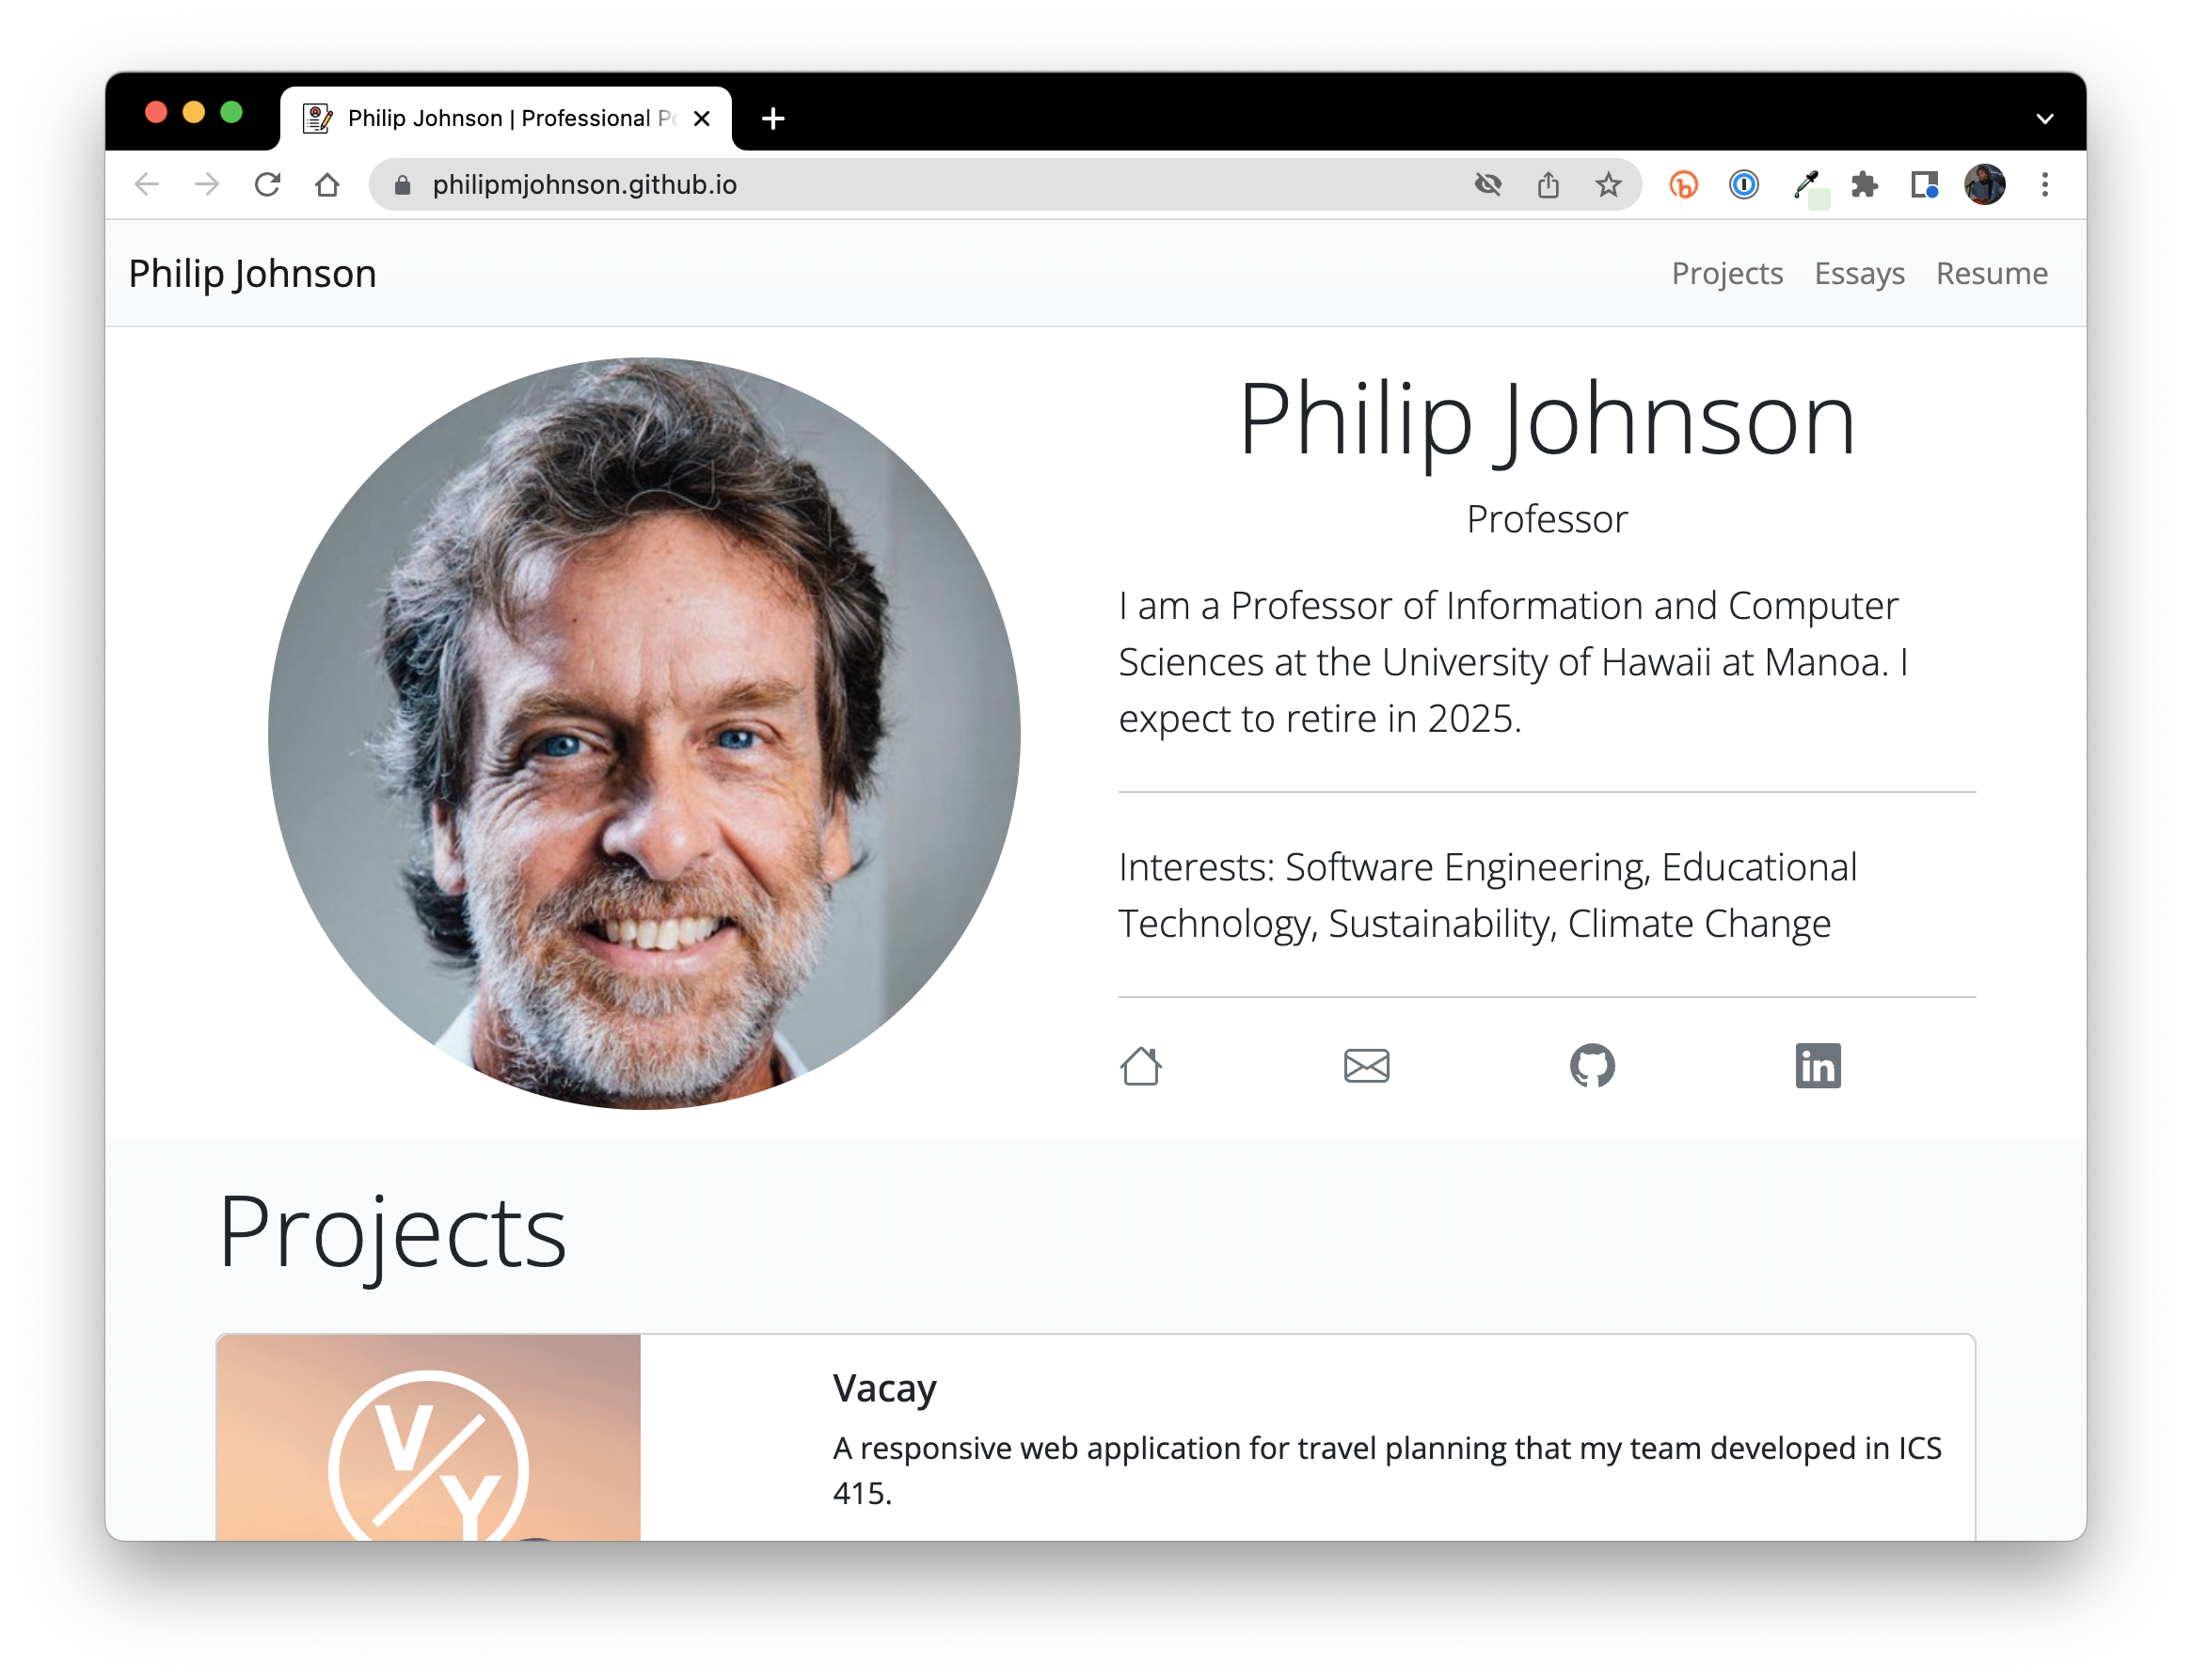
Now we're getting somewhere! As you can see, the first part of the page should now accurately reflect your professional details. But if you scroll down, the Projects and Essays sections are still based on the template, and if you click on the "Resume" link, that won't provide correct details either. The next three sections will explain how you can start fixing those problems.