Local development
Local Development
While cloud-based development is the best choice for most people, some might want to install tools locally and do their development there. If you choose this page, here are the steps:
Install GitHub Desktop (or another git client)
If you are using MacOS or Windows, the easiest way to manage your portfolio repository is with GitHub Desktop. GitHub Desktop provides an extremely easy way to download your portfolio files from GitHub to your computer for editing, and then push the files back to GitHub for deployment once you're ready for that to happen.
If you are using Linux, then you will need to install a different git client. If you are using Linux, you probably know this already and already have a git client installed.
Install an editor
You cannot use a word processor like Microsoft Word to edit your professional portfolio. Instead, you need a text editor such as Emacs, Vim, IntelliJ IDEA, Microsoft Visual Studio, Eclipse, Atom, or similar.
Please be sure to install a text editor on your computer. Any one will do.
Install Jekyll
The final step is to install Jekyll. Jekyll runs on all platforms.
To verify that you've installed Jekyll correctly, please go through the Jekyll Quickstart instructions to be sure that you can create a simple Jekyll site and display it on your computer.
bundle add webrickThe Jekyll documentation for the Quick Start notes that "Step 5 may fail". Yes, it almost certainly will. As instructed, go ahead and run:
bundle install webbrick
Then run bundle exec jekyll serve and things should work correctly.
If you have followed the Quickstart instructions successfully, then you should be able to go to http://127.0.0.1:4000/ and see the following page:
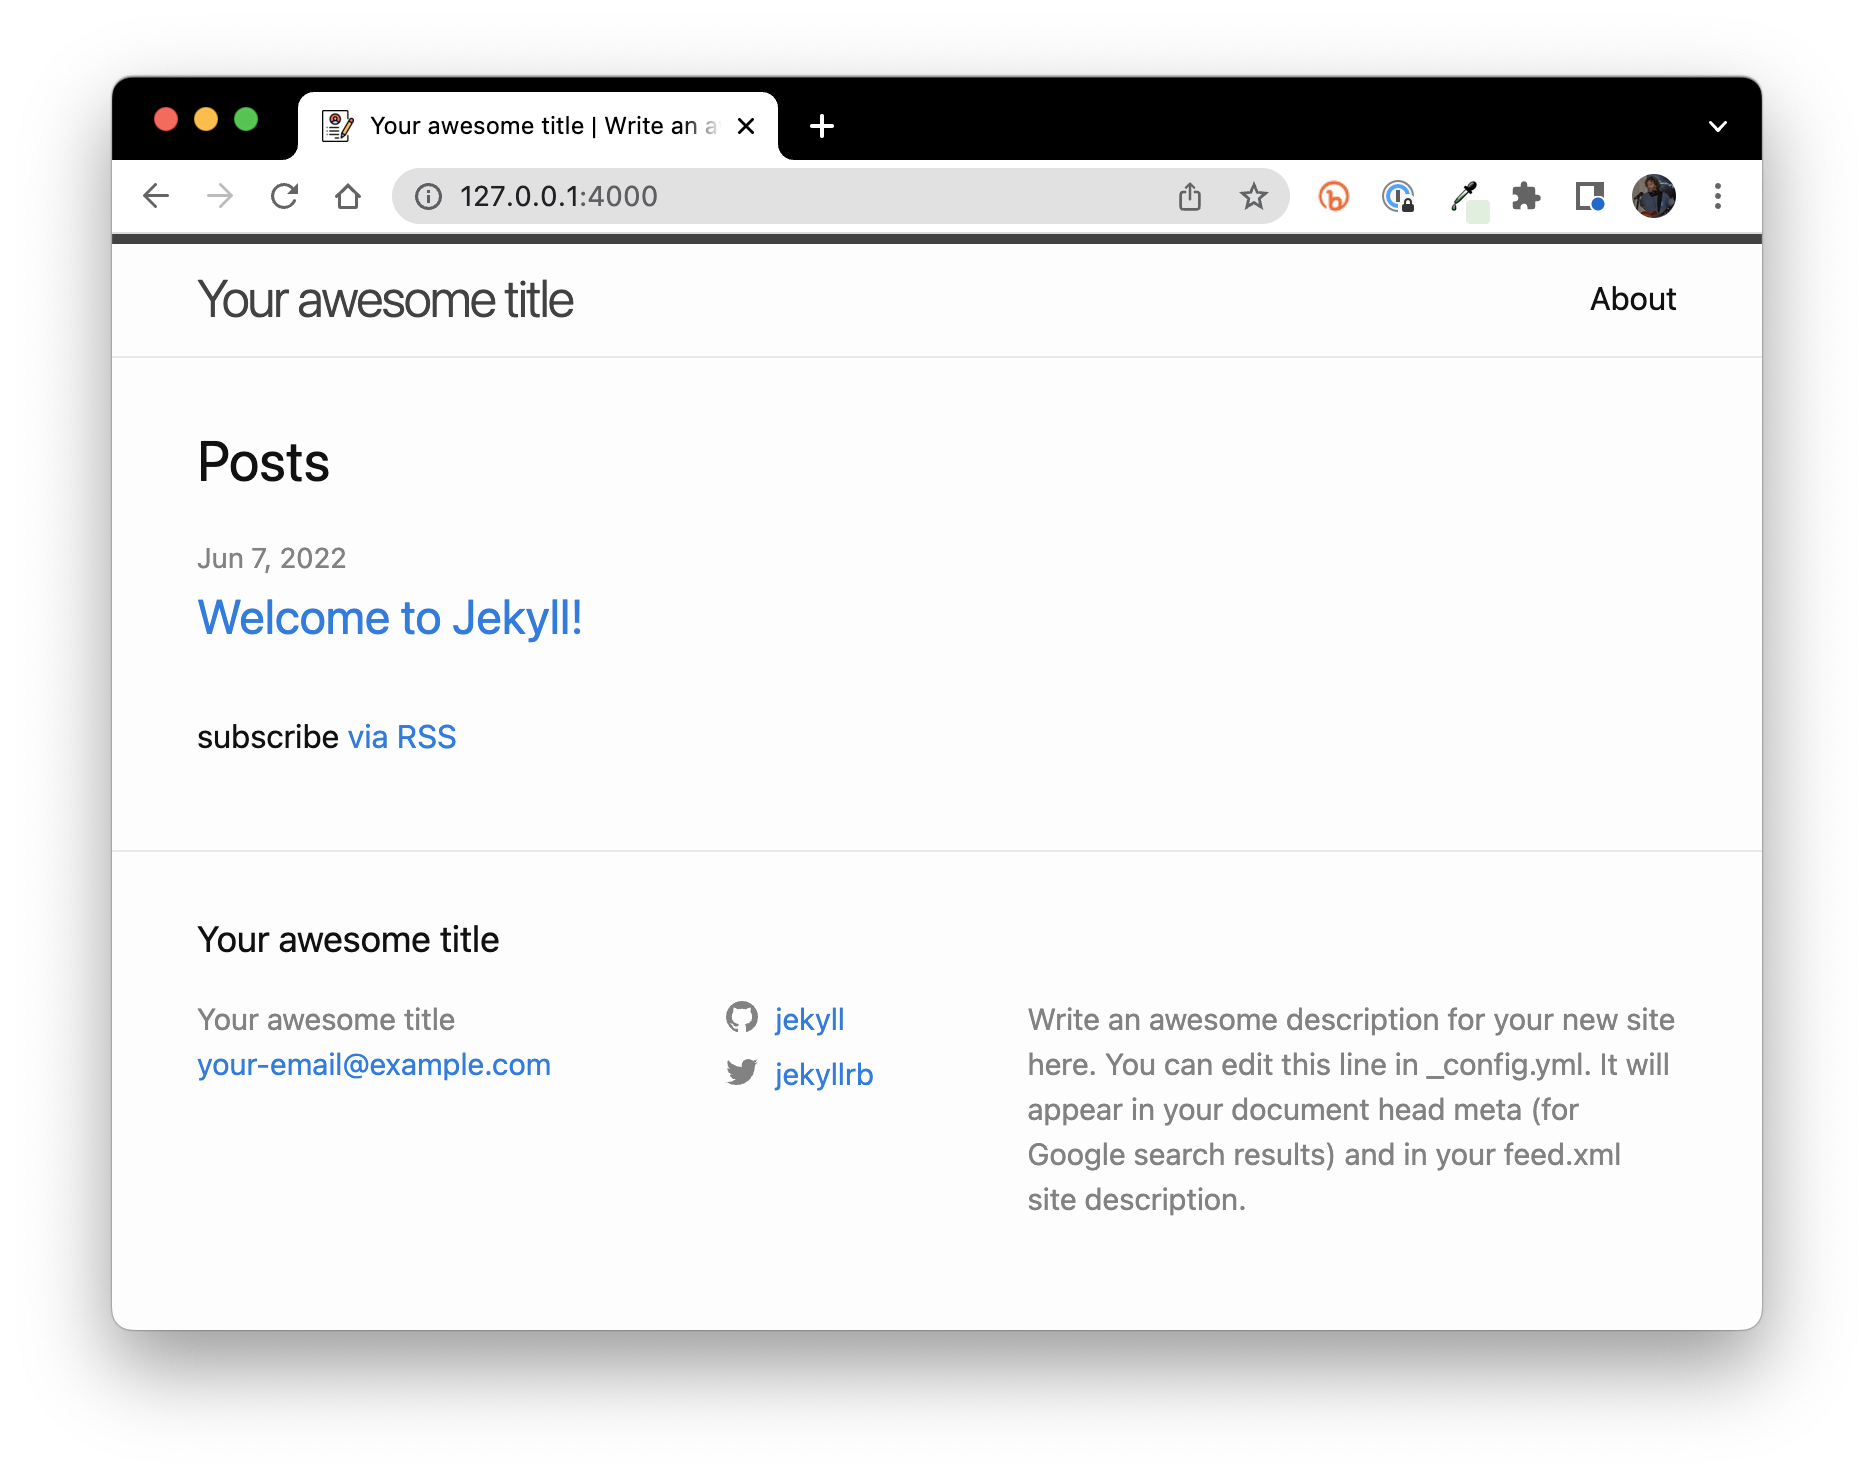
Make sure you can see this page after running bundle exec jekyll serve. Once you can, then you know you have successfully installed Jekyll.
Now that you have GitHub Desktop, an editor, and Jekyll, let's see how to build and view your professional portfolio locally.
Clone your repo
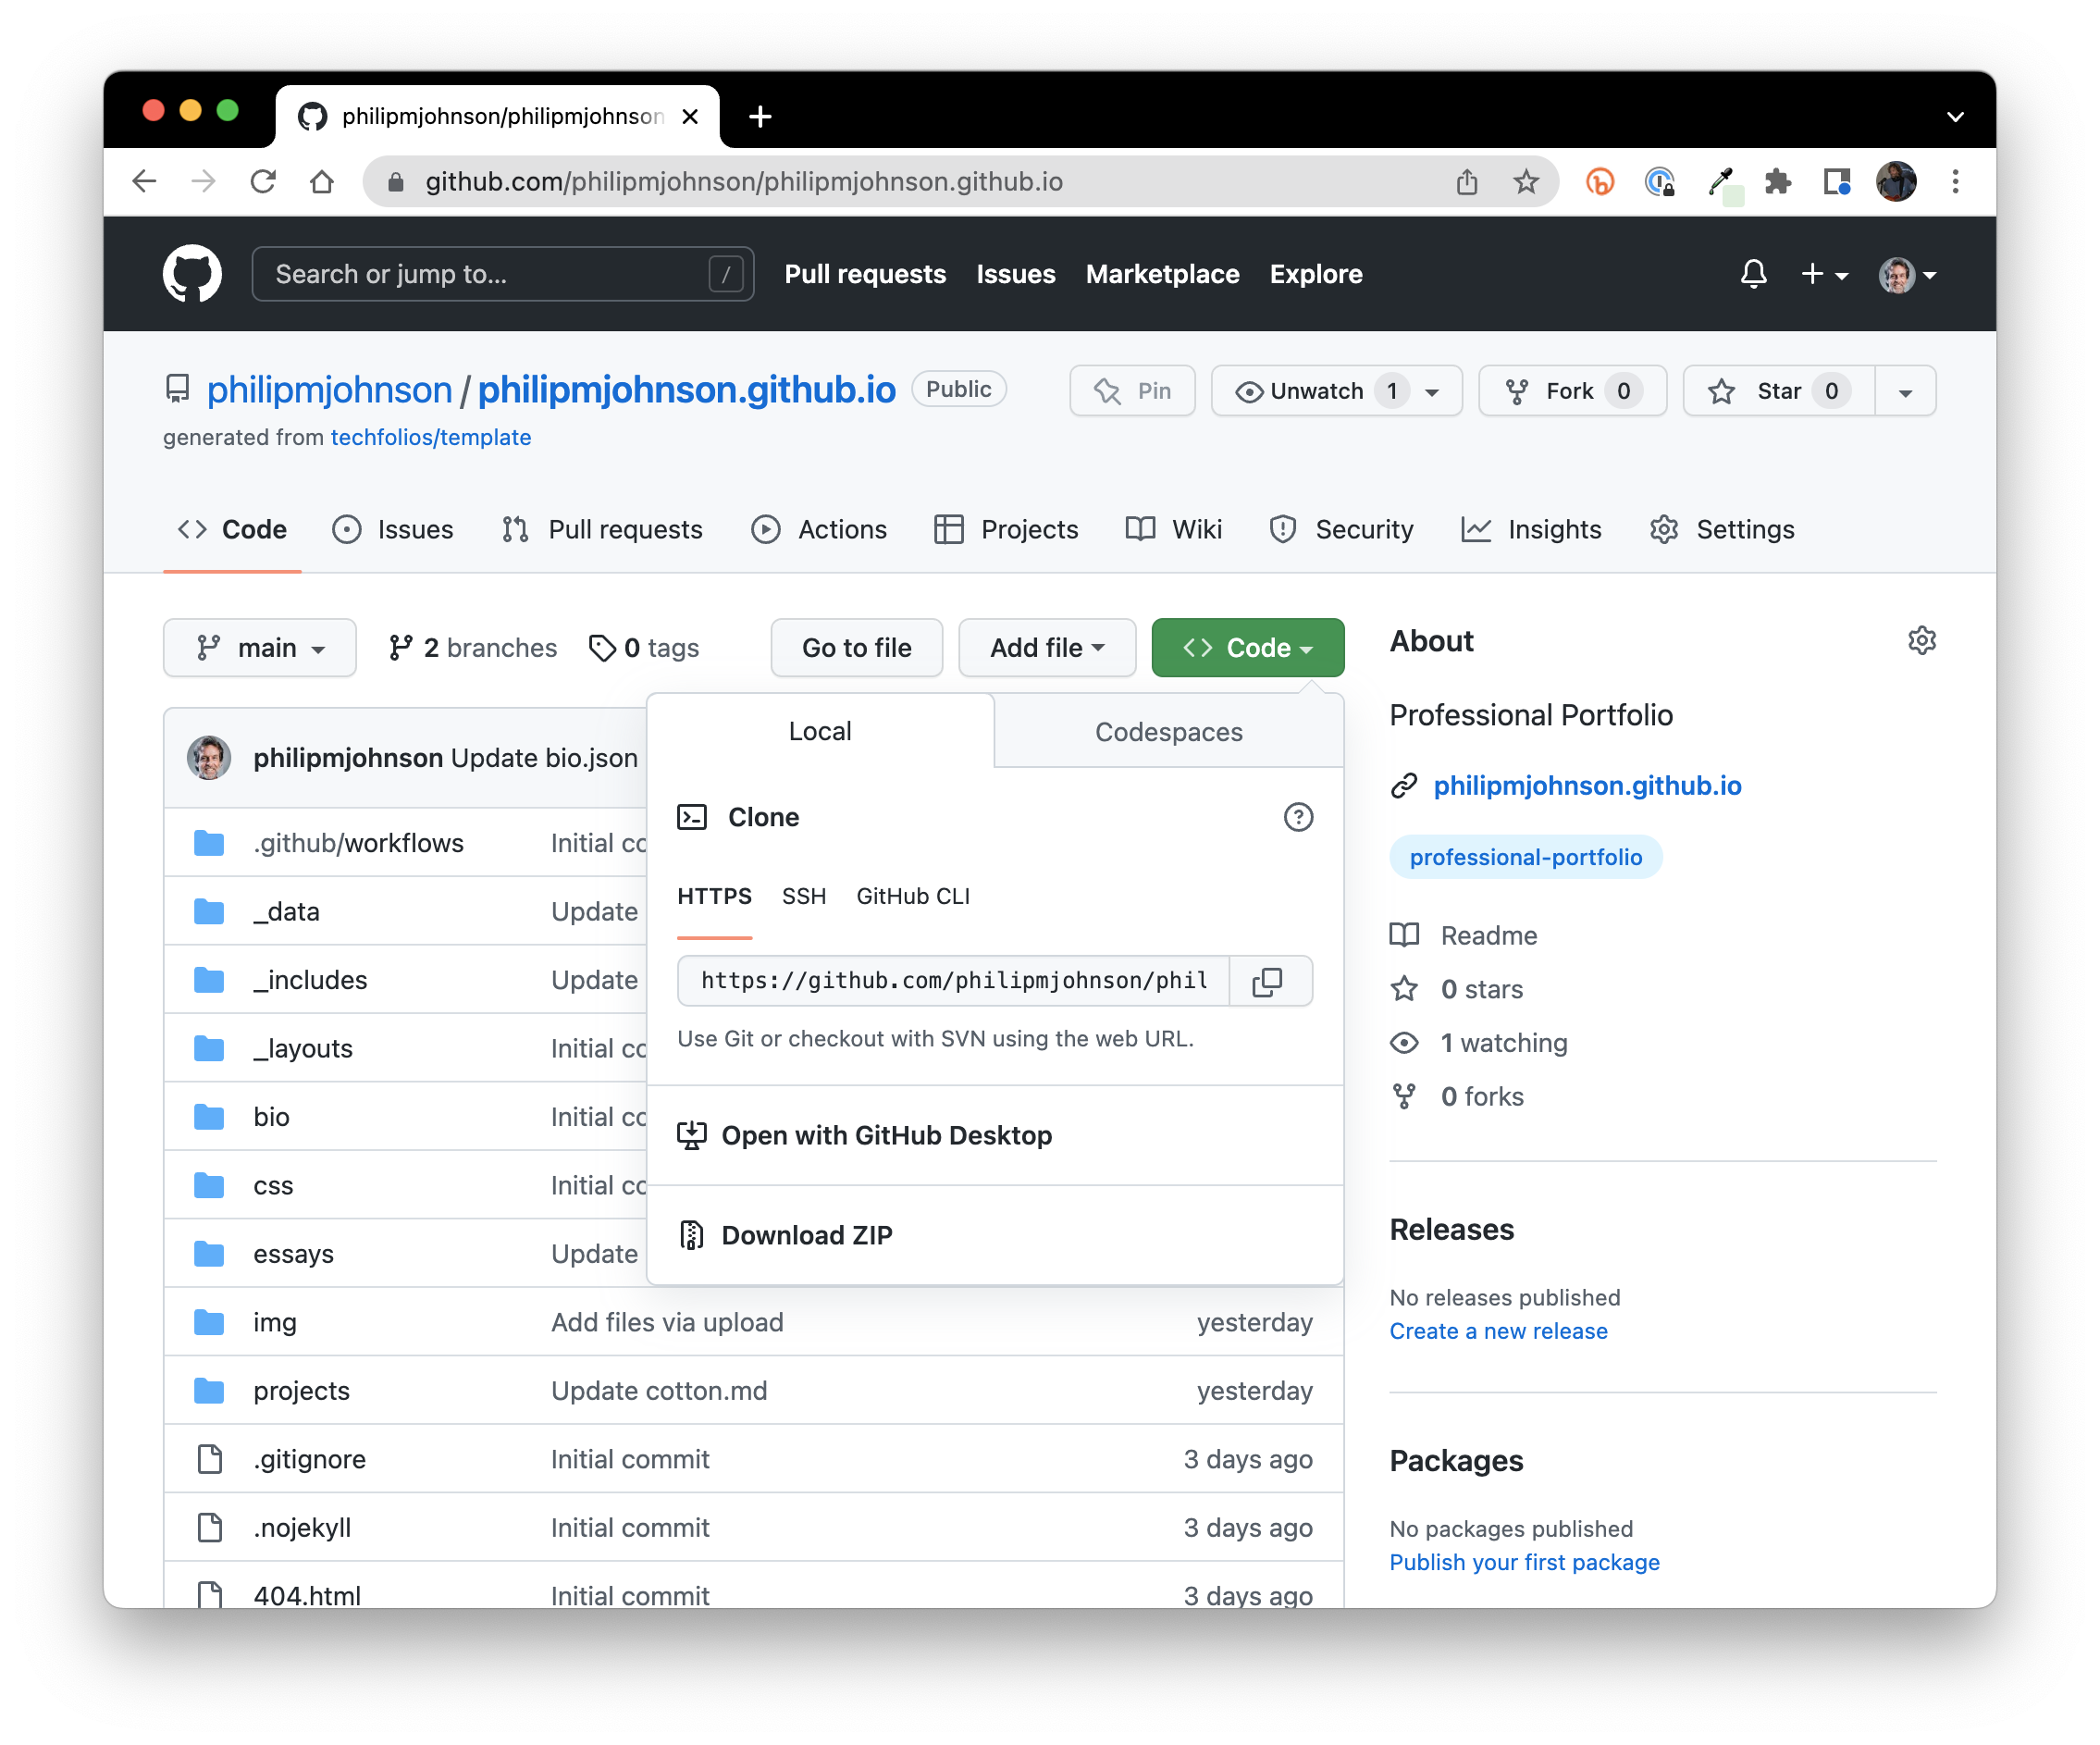
The next step in setting up local development is to "clone" the GitHub repository containing your professional portfolio source files to your computer. To do this, go to your repo, click on "Code", and then select "Open with GitHub Desktop":
That will bring up GitHub Desktop, which will ask you where in your file system you want to locate the files associated with this repository:
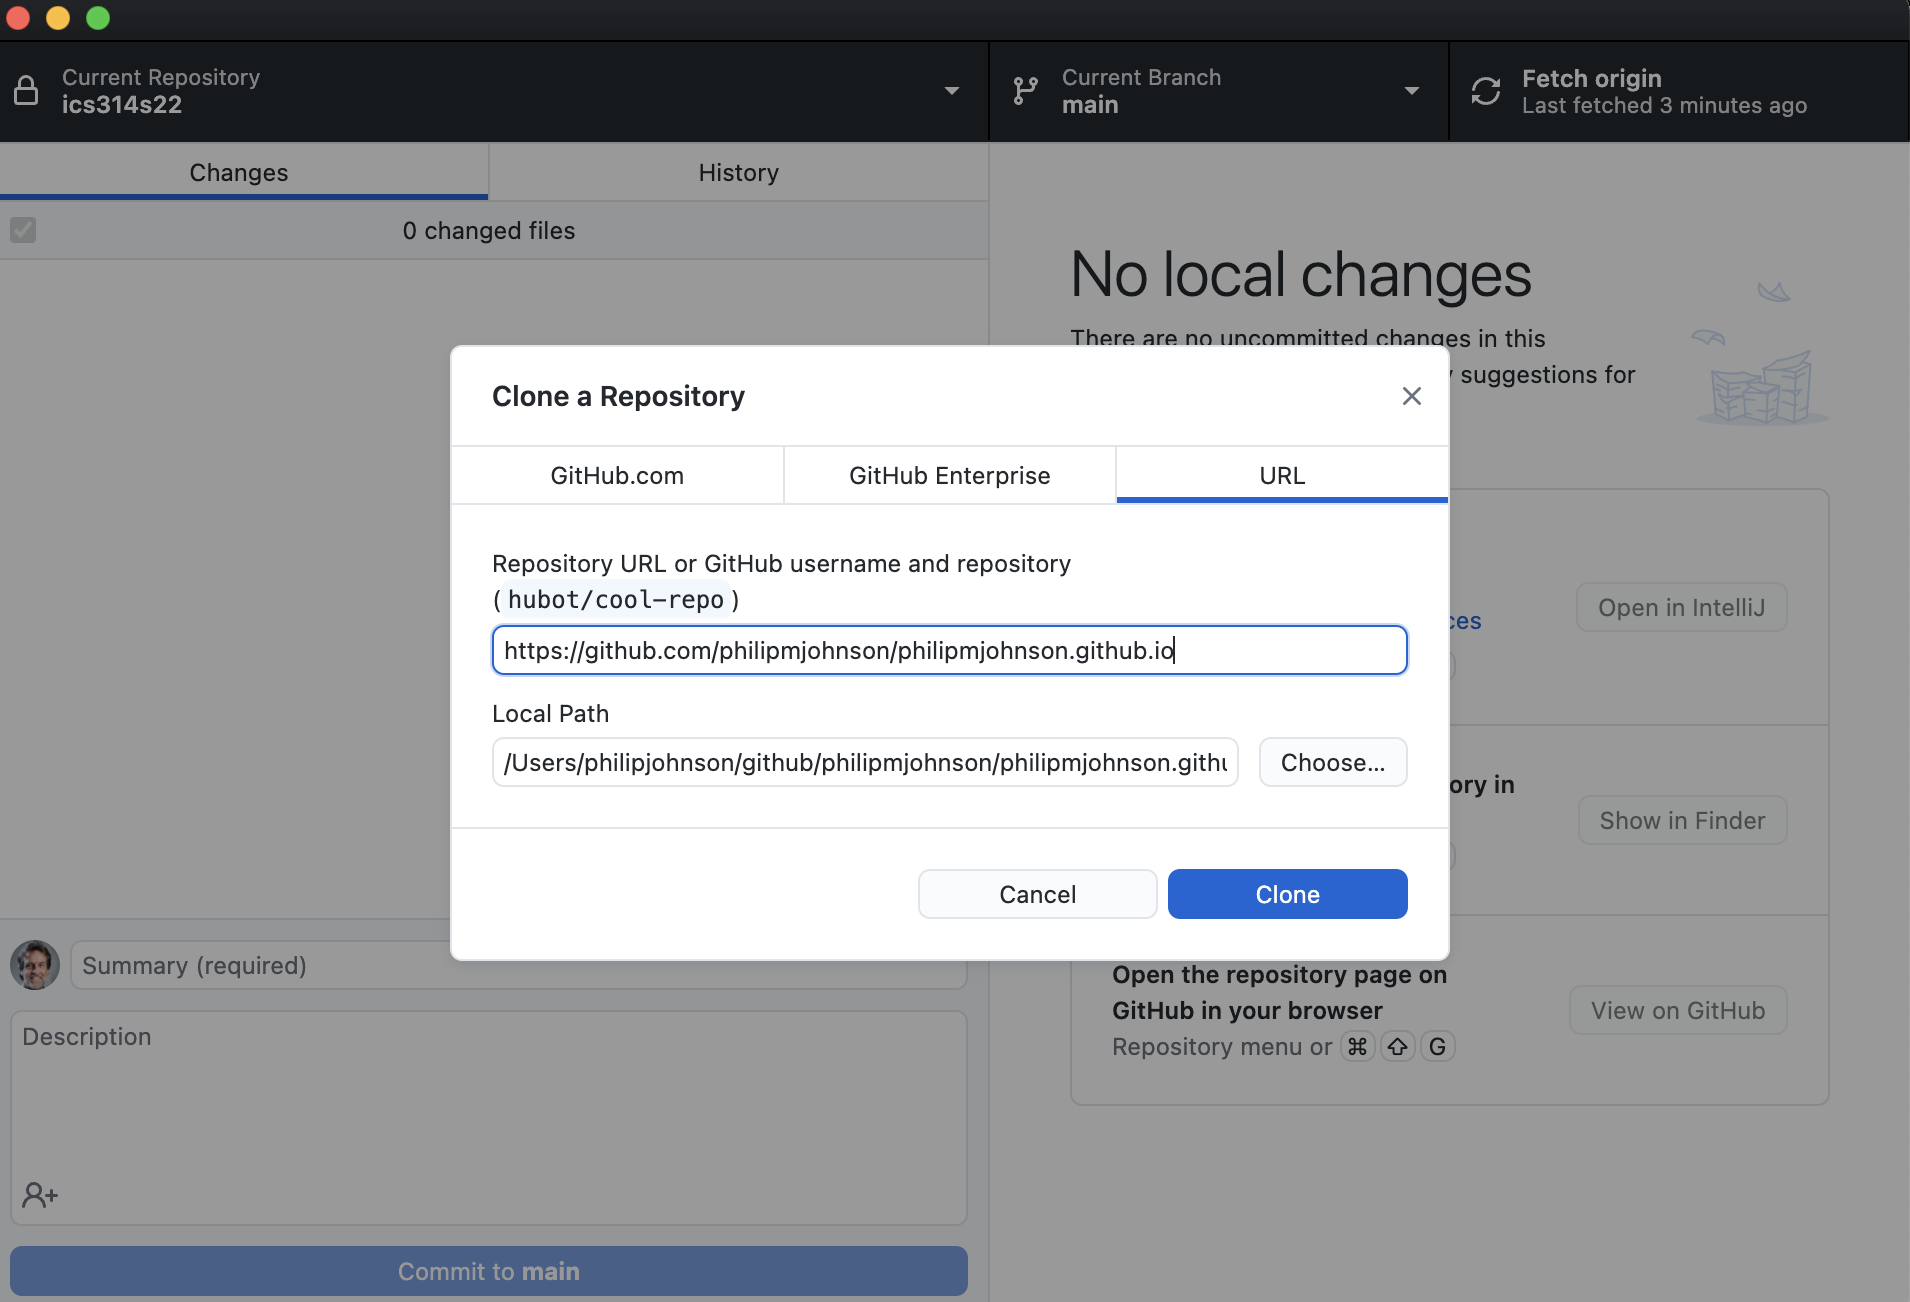
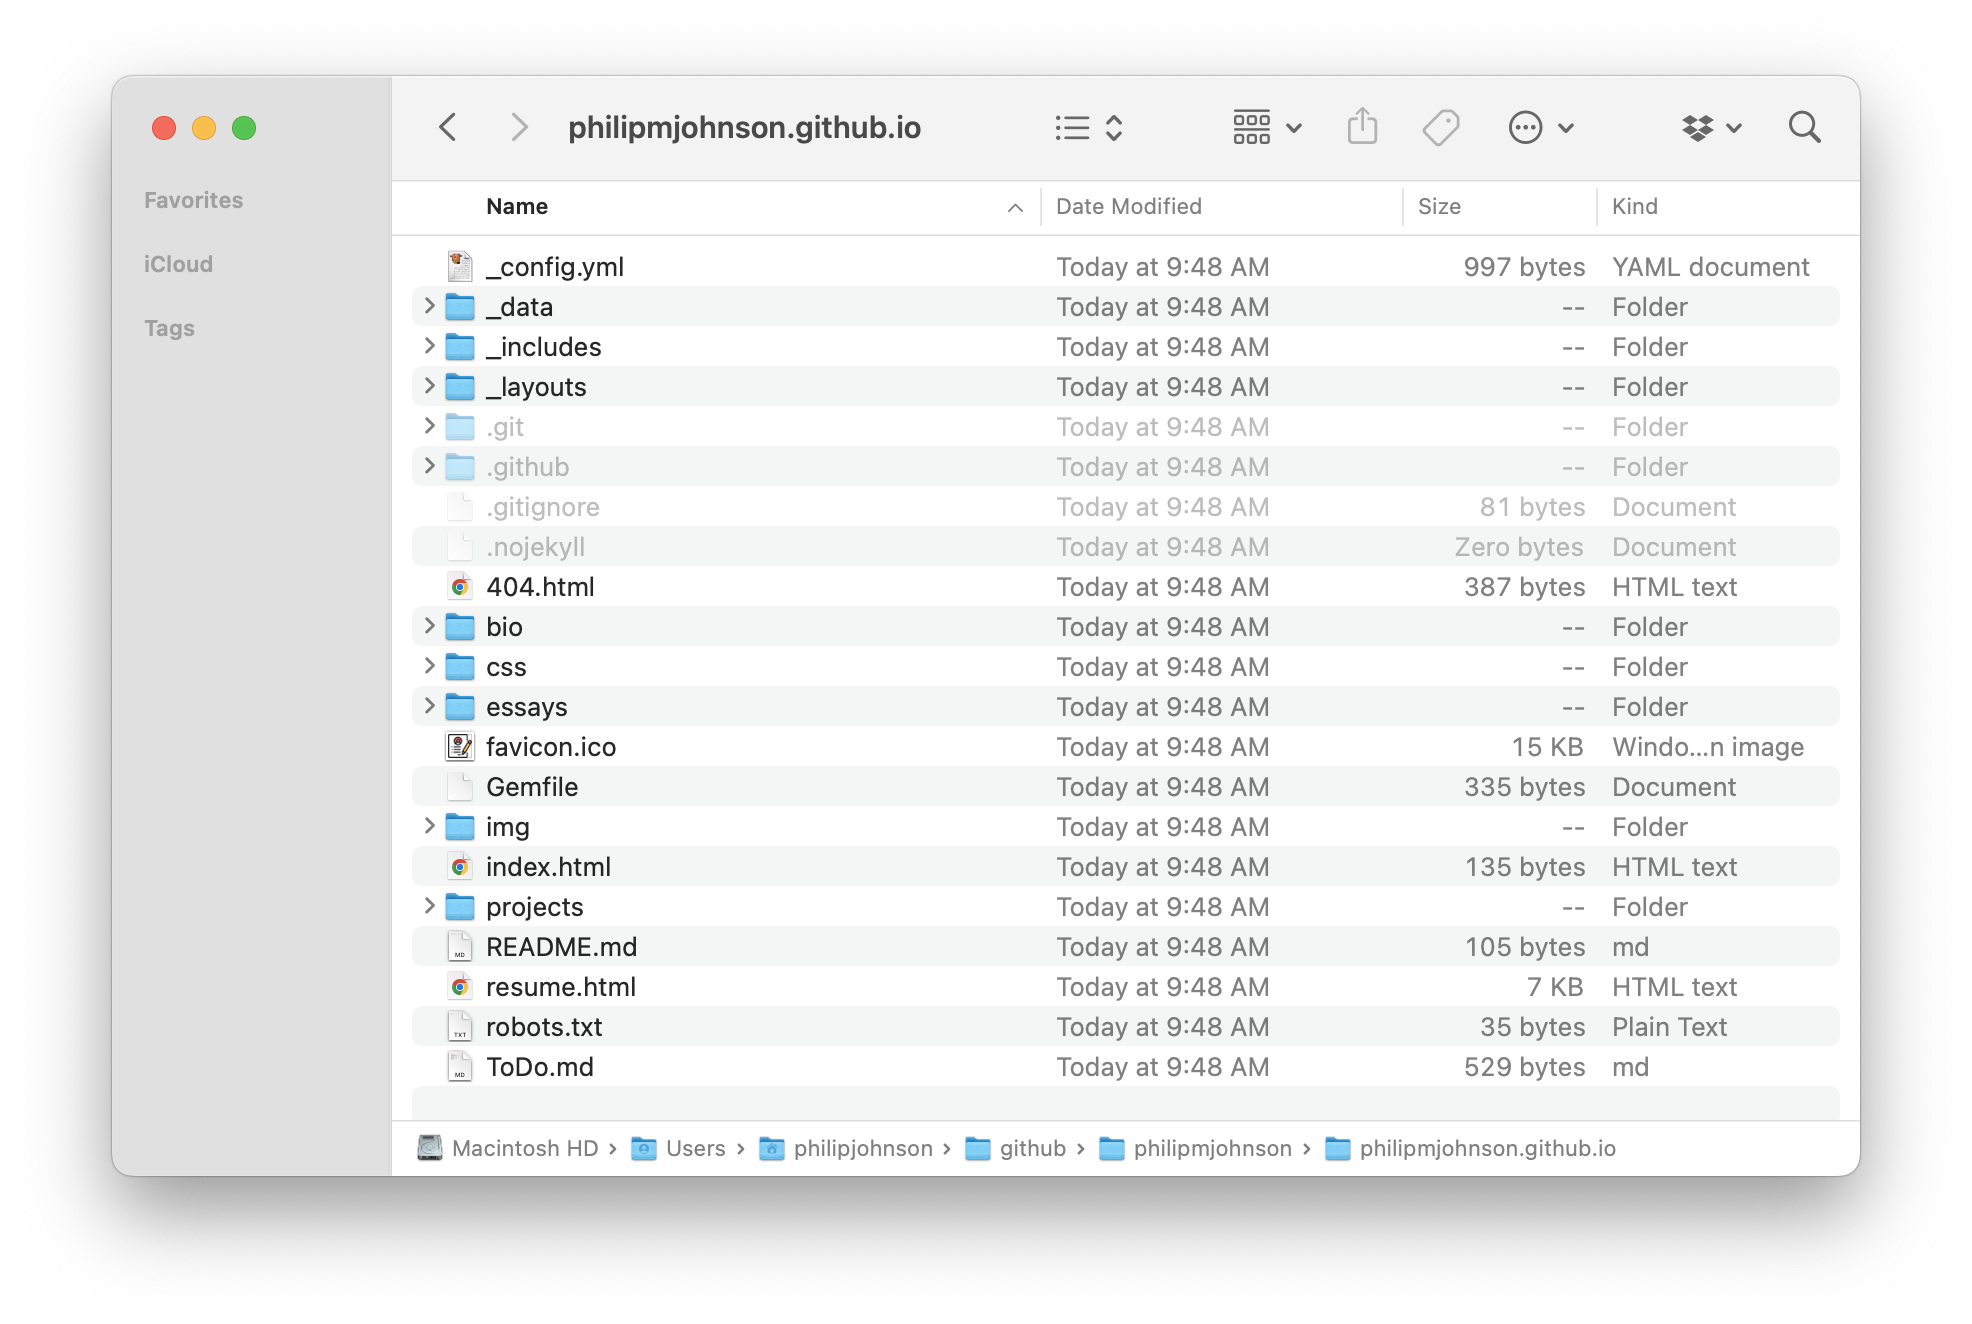
Adjust the "Local Path" to your liking, then click "Clone" to create a copy of your repository on your computer. You will now have a local directory containing files similar to this:
Install libraries
Next, you need to install the libraries associated with TechFolios. To do this, open a Terminal (or shell), change directories to your repository directory, and invoke bundle install:
$ bundle install
Fetching gem metadata from https://rubygems.org/..........
Resolving dependencies...
Using public_suffix 4.0.7
Using bundler 2.3.4
 :
 :
Using jekyll 4.2.2
Using octokit 4.24.0
Using jekyll-gist 1.5.0
Bundle complete! 7 Gemfile dependencies, 43 gems now installed.
Use `bundle info [gemname]` to see where a bundled gem is installed.
1 installed gem you directly depend on is looking for funding.
  Run `bundle fund` for details
$
Run jekyll
Now, build your professional portfolio and enable it to be displayed locally on your laptop by invoking bundle exec jekyll serve:
$ bundle exec jekyll serve
Configuration file: /Users/philipjohnson/github/philipmjohnson/philipmjohnson.github.io/_config.yml
To use retry middleware with Faraday v2.0+, install `faraday-retry` gem
            Source: /Users/philipjohnson/github/philipmjohnson/philipmjohnson.github.io
       Destination: /Users/philipjohnson/github/philipmjohnson/philipmjohnson.github.io/_site
 Incremental build: disabled. Enable with --incremental
      Generating...
                    done in 0.045 seconds.
 Auto-regeneration: enabled for '/Users/philipjohnson/github/philipmjohnson/philipmjohnson.github.io'
    Server address: http://127.0.0.1:4000/
  Server running... press ctrl-c to stop.
Now look for the "Server address:" field on the second to last line, which will usually be http://127.0.0.1:4000/. Cut and paste this url from your terminal window into a browser, and your portfolio should appear:
The huge advantage to installing these tools and cloning your portfolio repo is that you can now see almost instantly how your edits to the source files change the presentation of your portfolio.
When you edit the files at GitHub, which is what you did during the Quick Start, you had to commit your changes and wait at least a minute to see how those changes looked in your portfolio. This time lag is simply unacceptable!
The build-edit-view-deploy workflow
The most efficient way to work on your portfolio is with what we call the "build-edit-view-deploy workflow". It works like this.
Build
The first step is to build your portfolio locally. As we saw above, you do this by invoking invoking bundle exec jekyll serve.
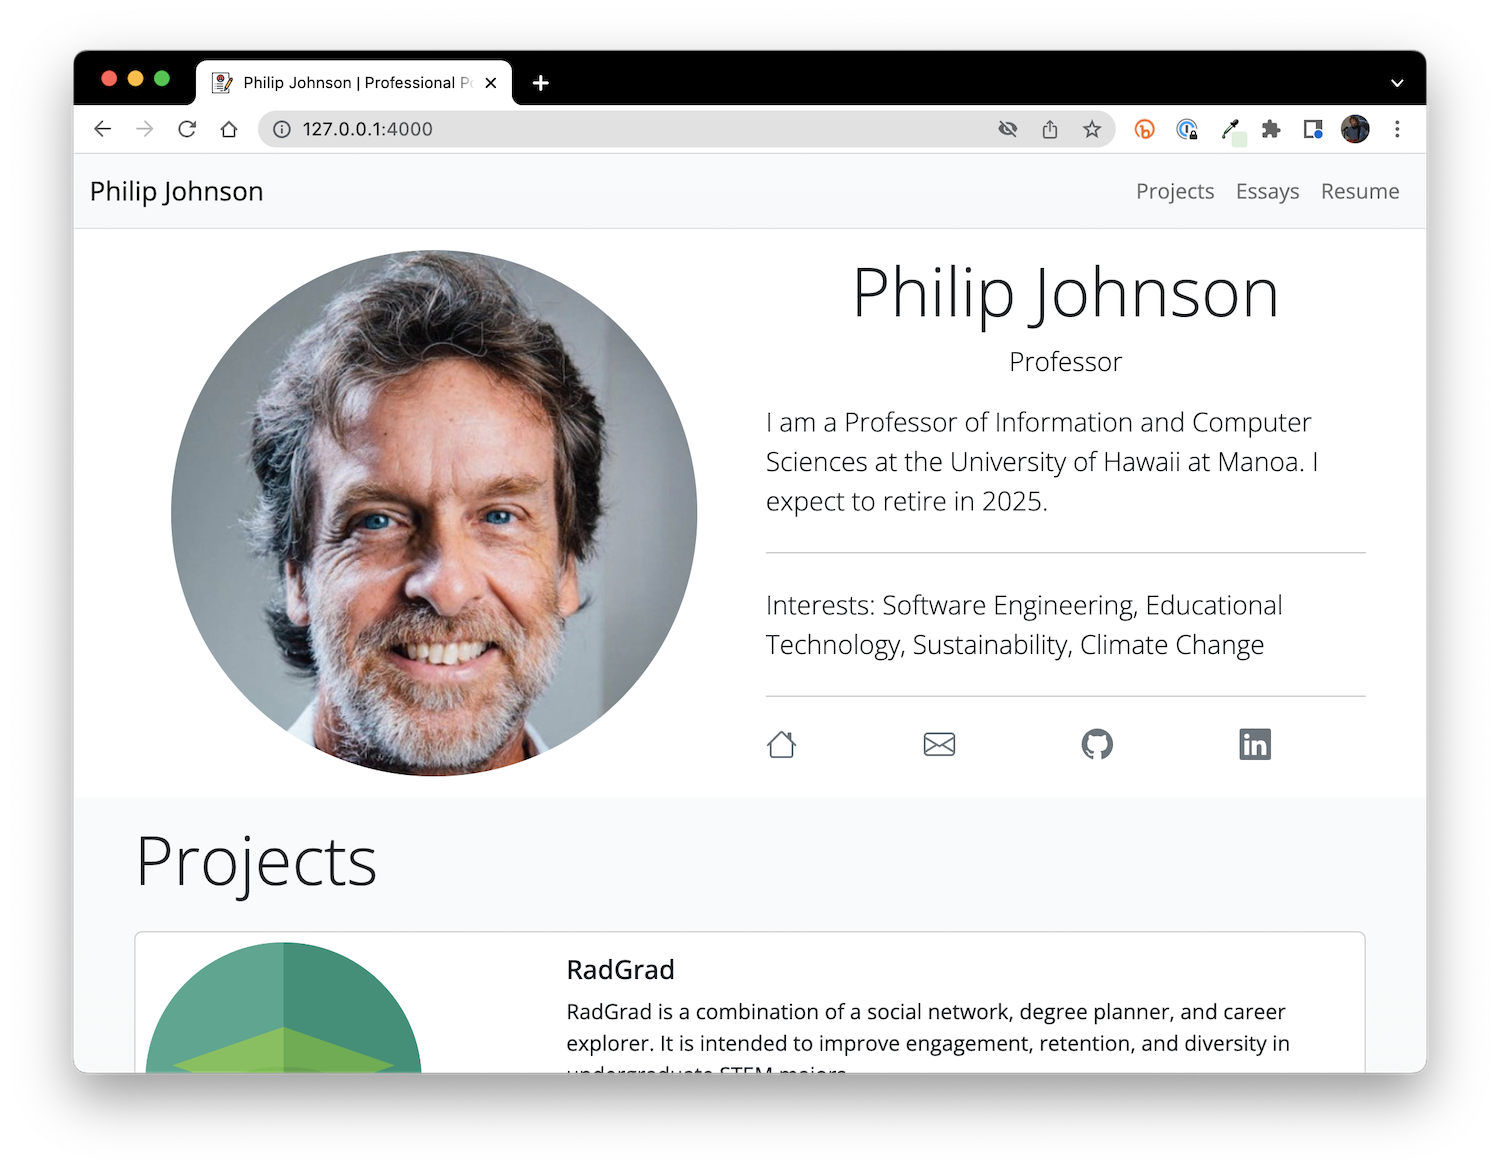
Now your portfolio is available for viewing at http://127.0.0.1:4000/.
Building your portfolio locally means changes can be seen almost instantly at that URL, which brings us to the "edit" step.
Edit
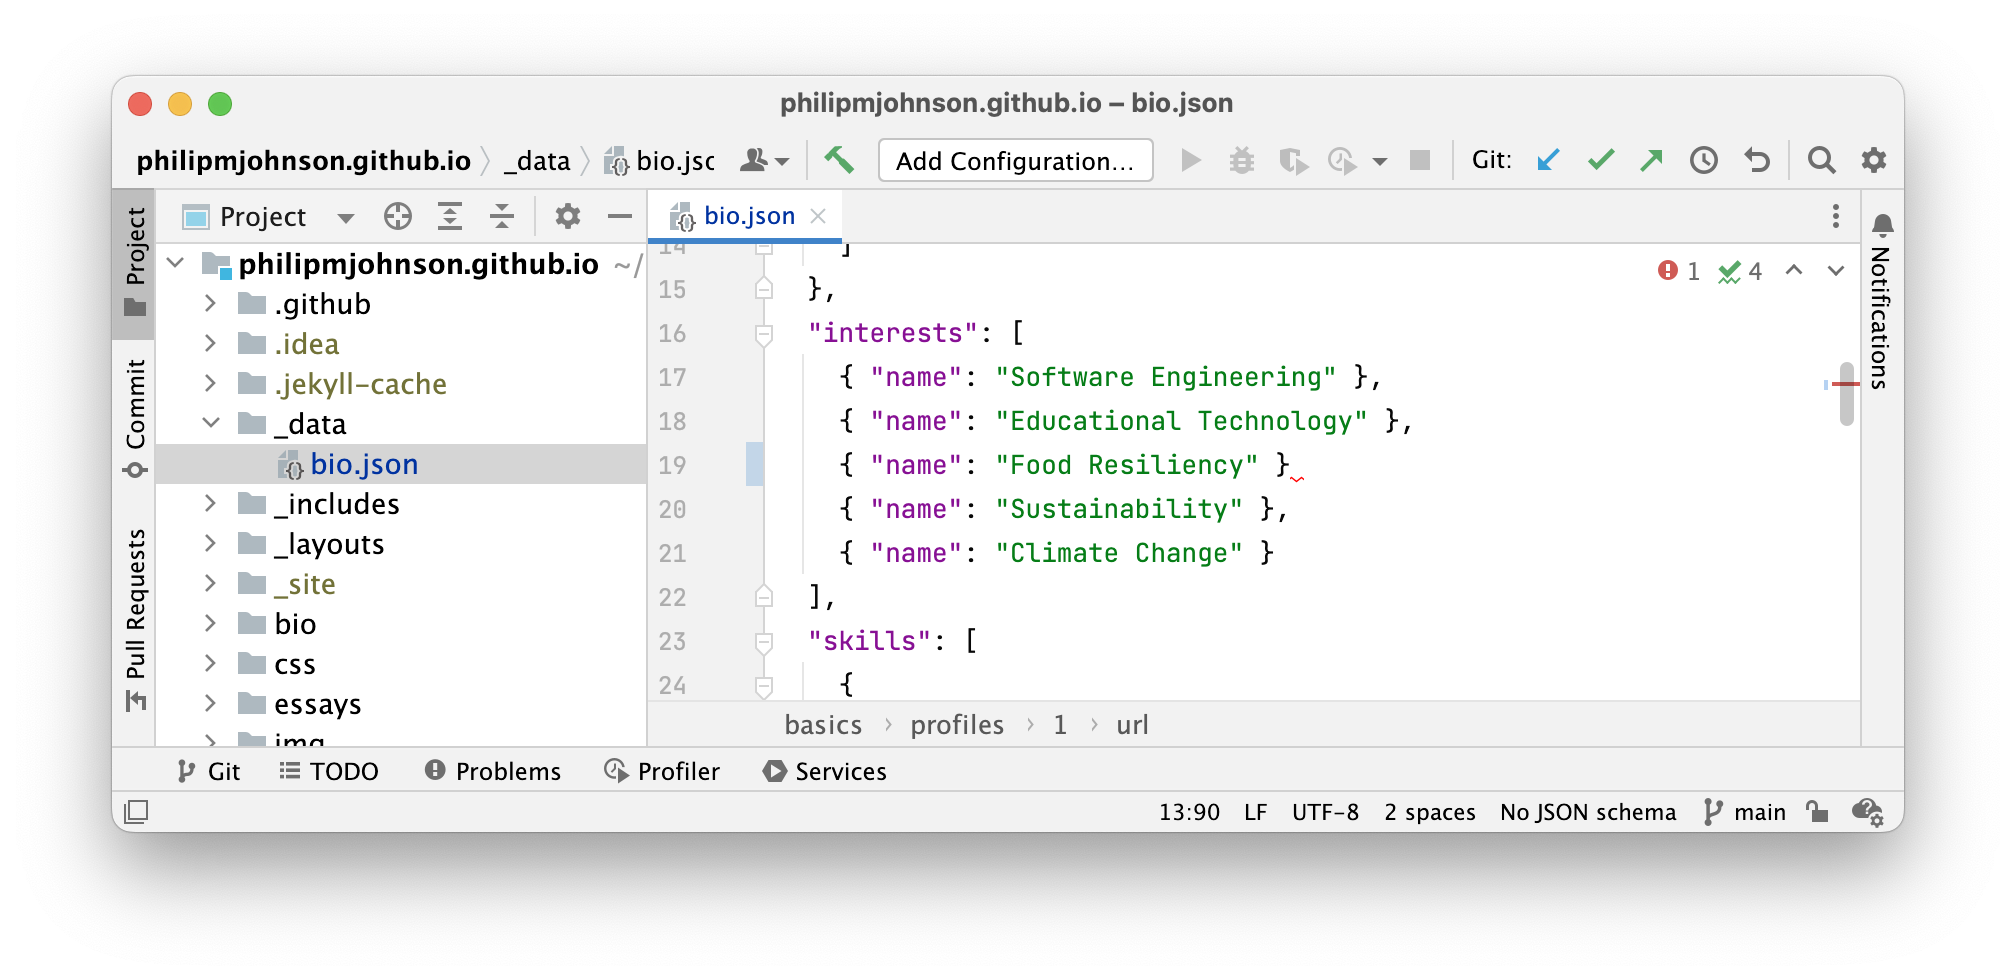
Let's say that I want to add a new interest to my portfolio called "Food Resiliency". To do this, I bring up an editor (in my case, IntelliJ IDEA), and edit my bio.json file to include this interest:
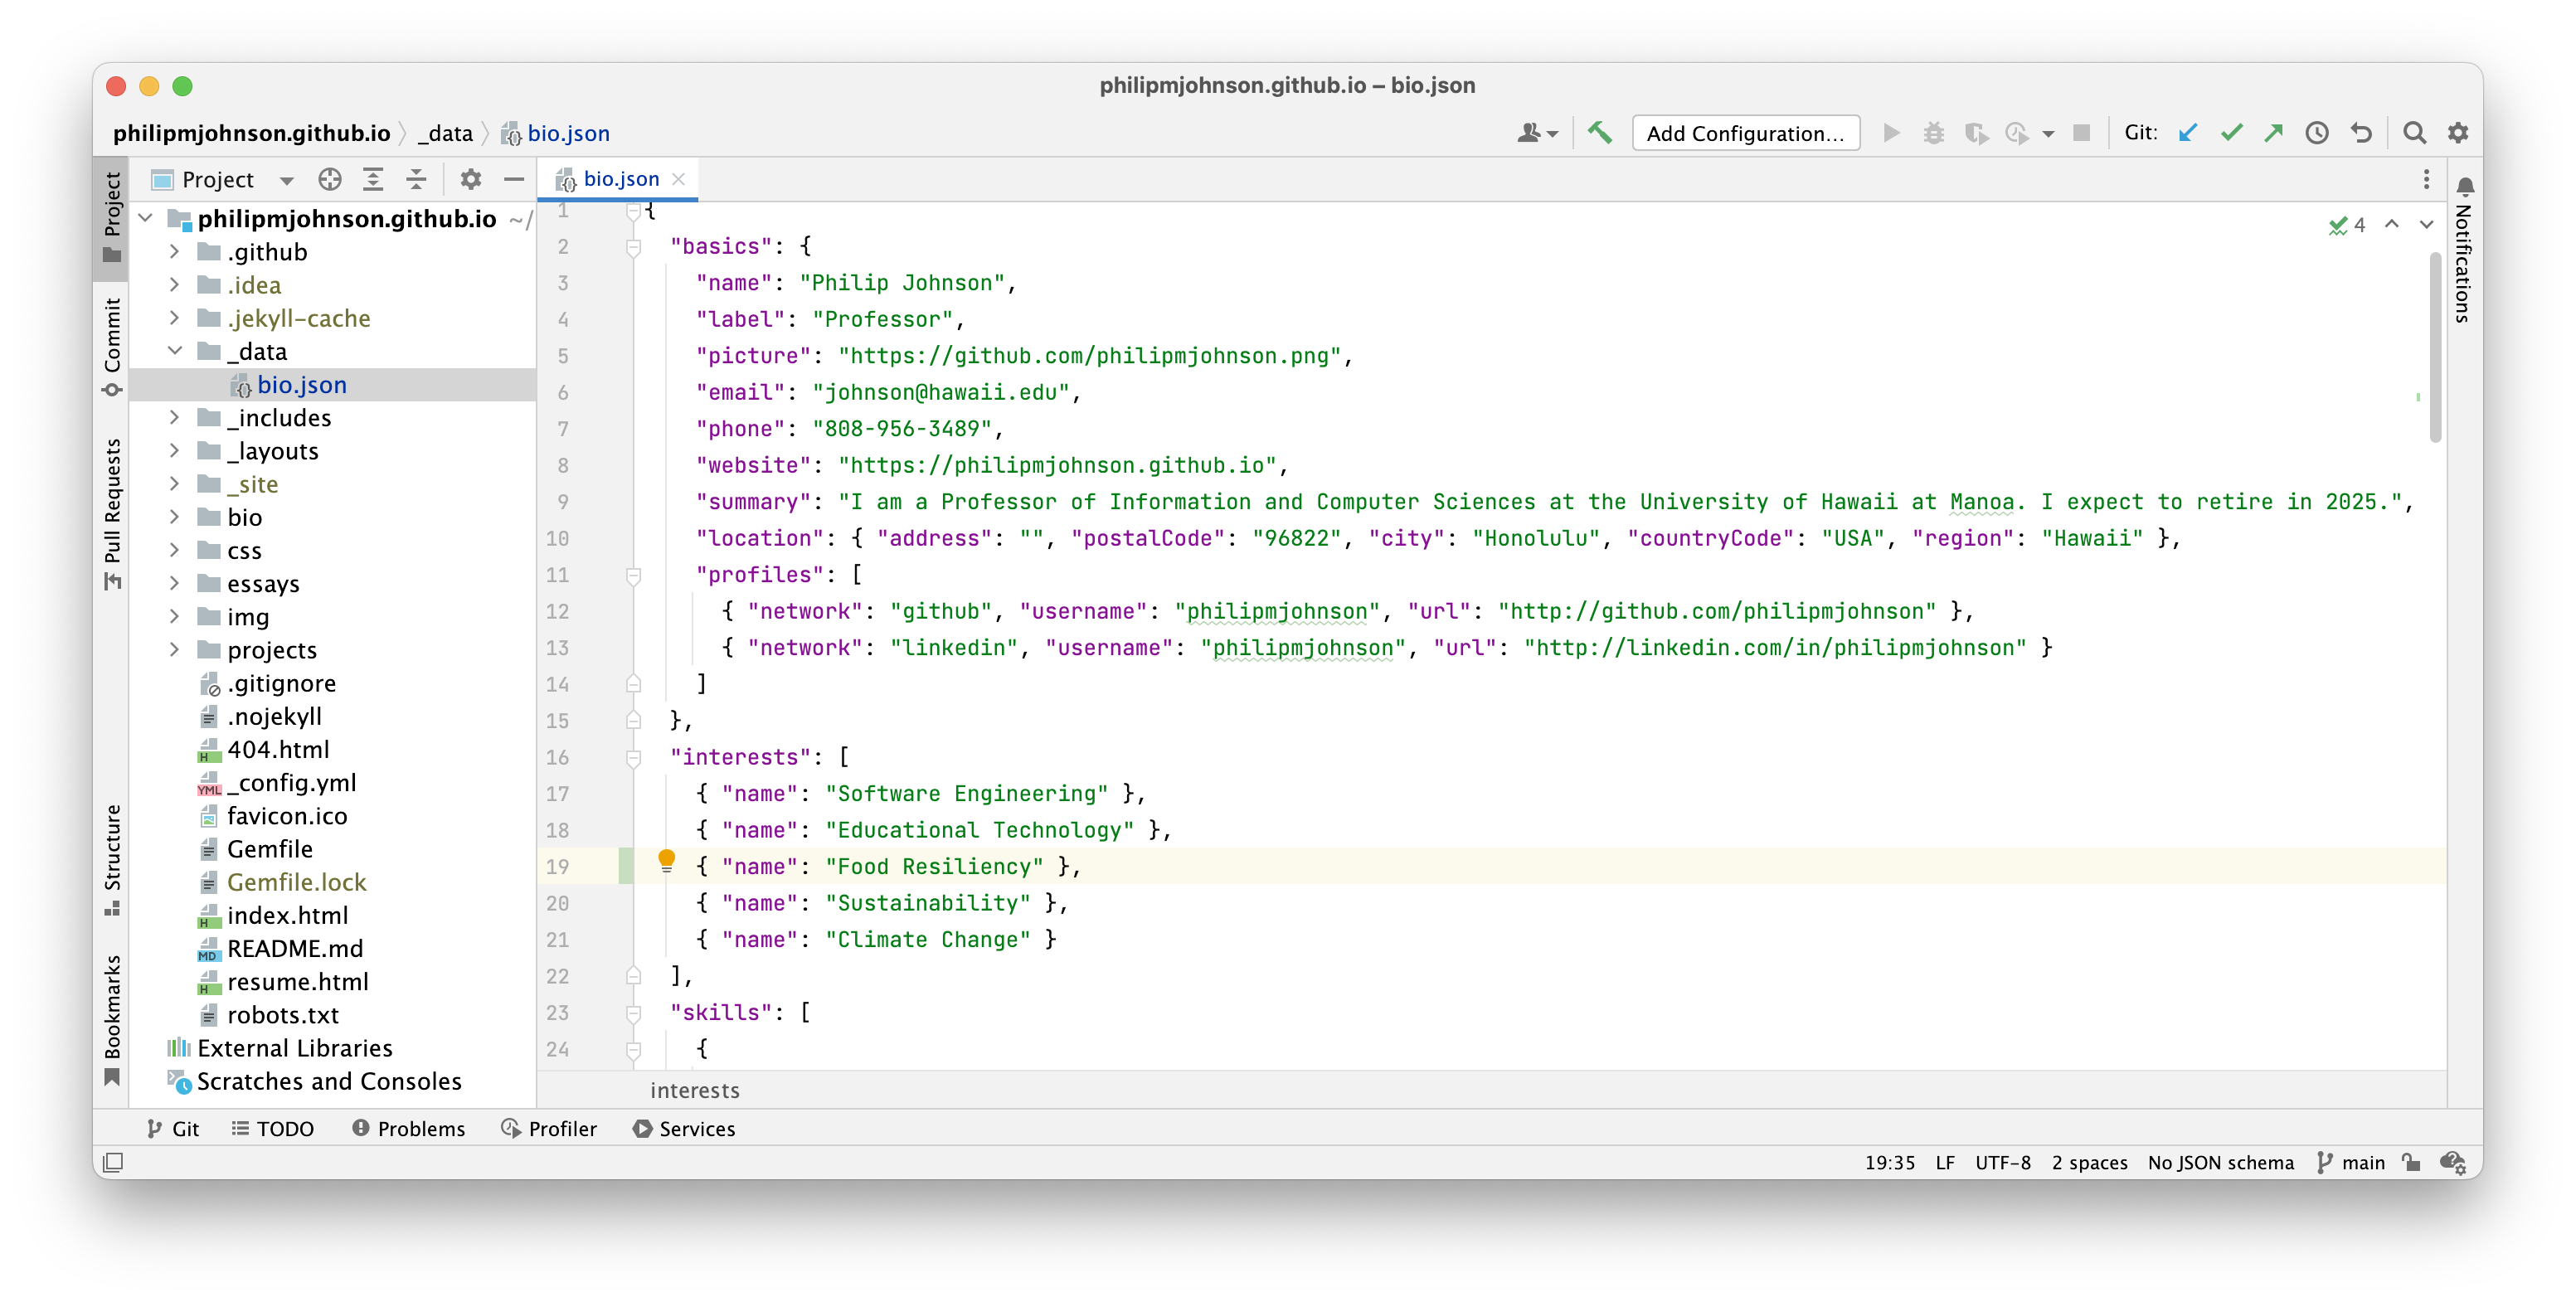
Save the file.
View
To see the impact of my edit to bio.json on my portfolio, first check the console to see that no errors were generated:
$ bundle exec jekyll serve                                         12:10:16
Configuration file: /Users/philipjohnson/github/philipmjohnson/philipmjohnson.github.io/_config.yml
To use retry middleware with Faraday v2.0+, install `faraday-retry` gem
            Source: /Users/philipjohnson/github/philipmjohnson/philipmjohnson.github.io
       Destination: /Users/philipjohnson/github/philipmjohnson/philipmjohnson.github.io/_site
 Incremental build: disabled. Enable with --incremental
      Generating...
                    done in 0.045 seconds.
 Auto-regeneration: enabled for '/Users/philipjohnson/github/philipmjohnson/philipmjohnson.github.io'
    Server address: http://127.0.0.1:4000/
  Server running... press ctrl-c to stop.

      Regenerating: 1 file(s) changed at 2022-06-08 12:12:11
                    _data/bio.json
                    ...done in 0.018813 seconds.
Now refresh the browser window displaying http://127.0.0.1:4000/ to see the change:
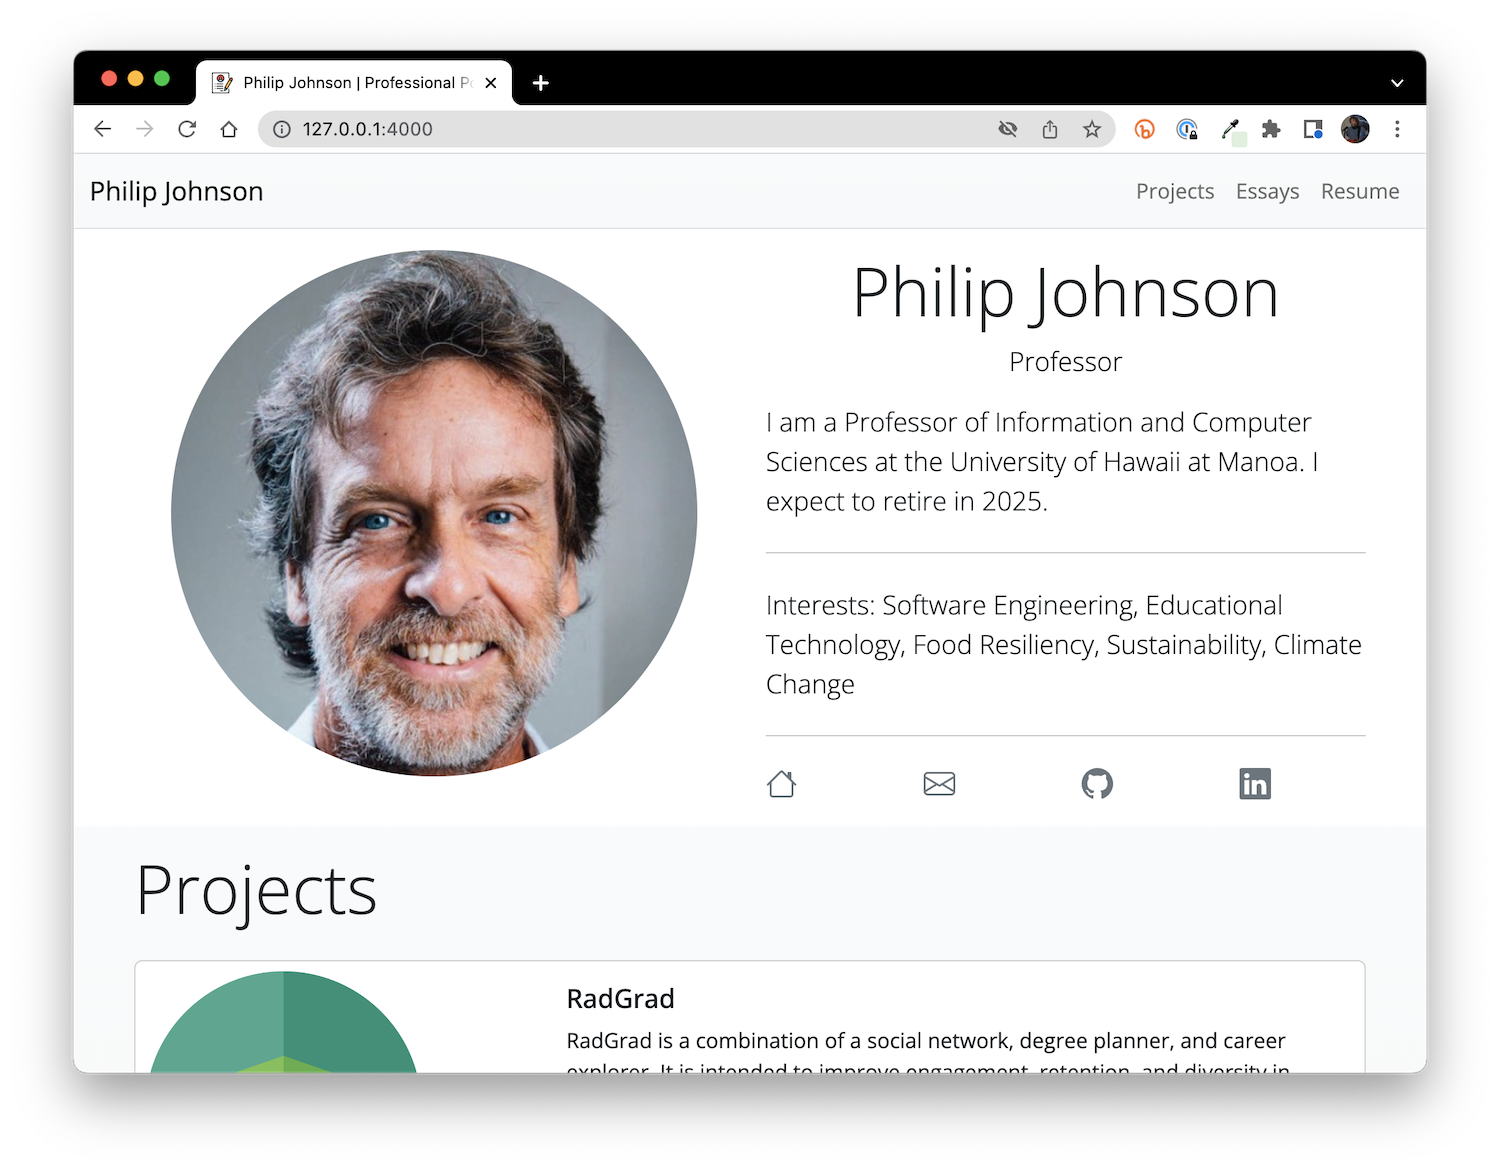
As you can see, "Food Resiliency" is now listed as an interest.
Deploy
So, my local copy of my professional portfolio is now updated, but how do I publish this change for all the world to see?
That's simple: just bring up GitHub Desktop, which shows that you've made a change to your local clone of the repo:
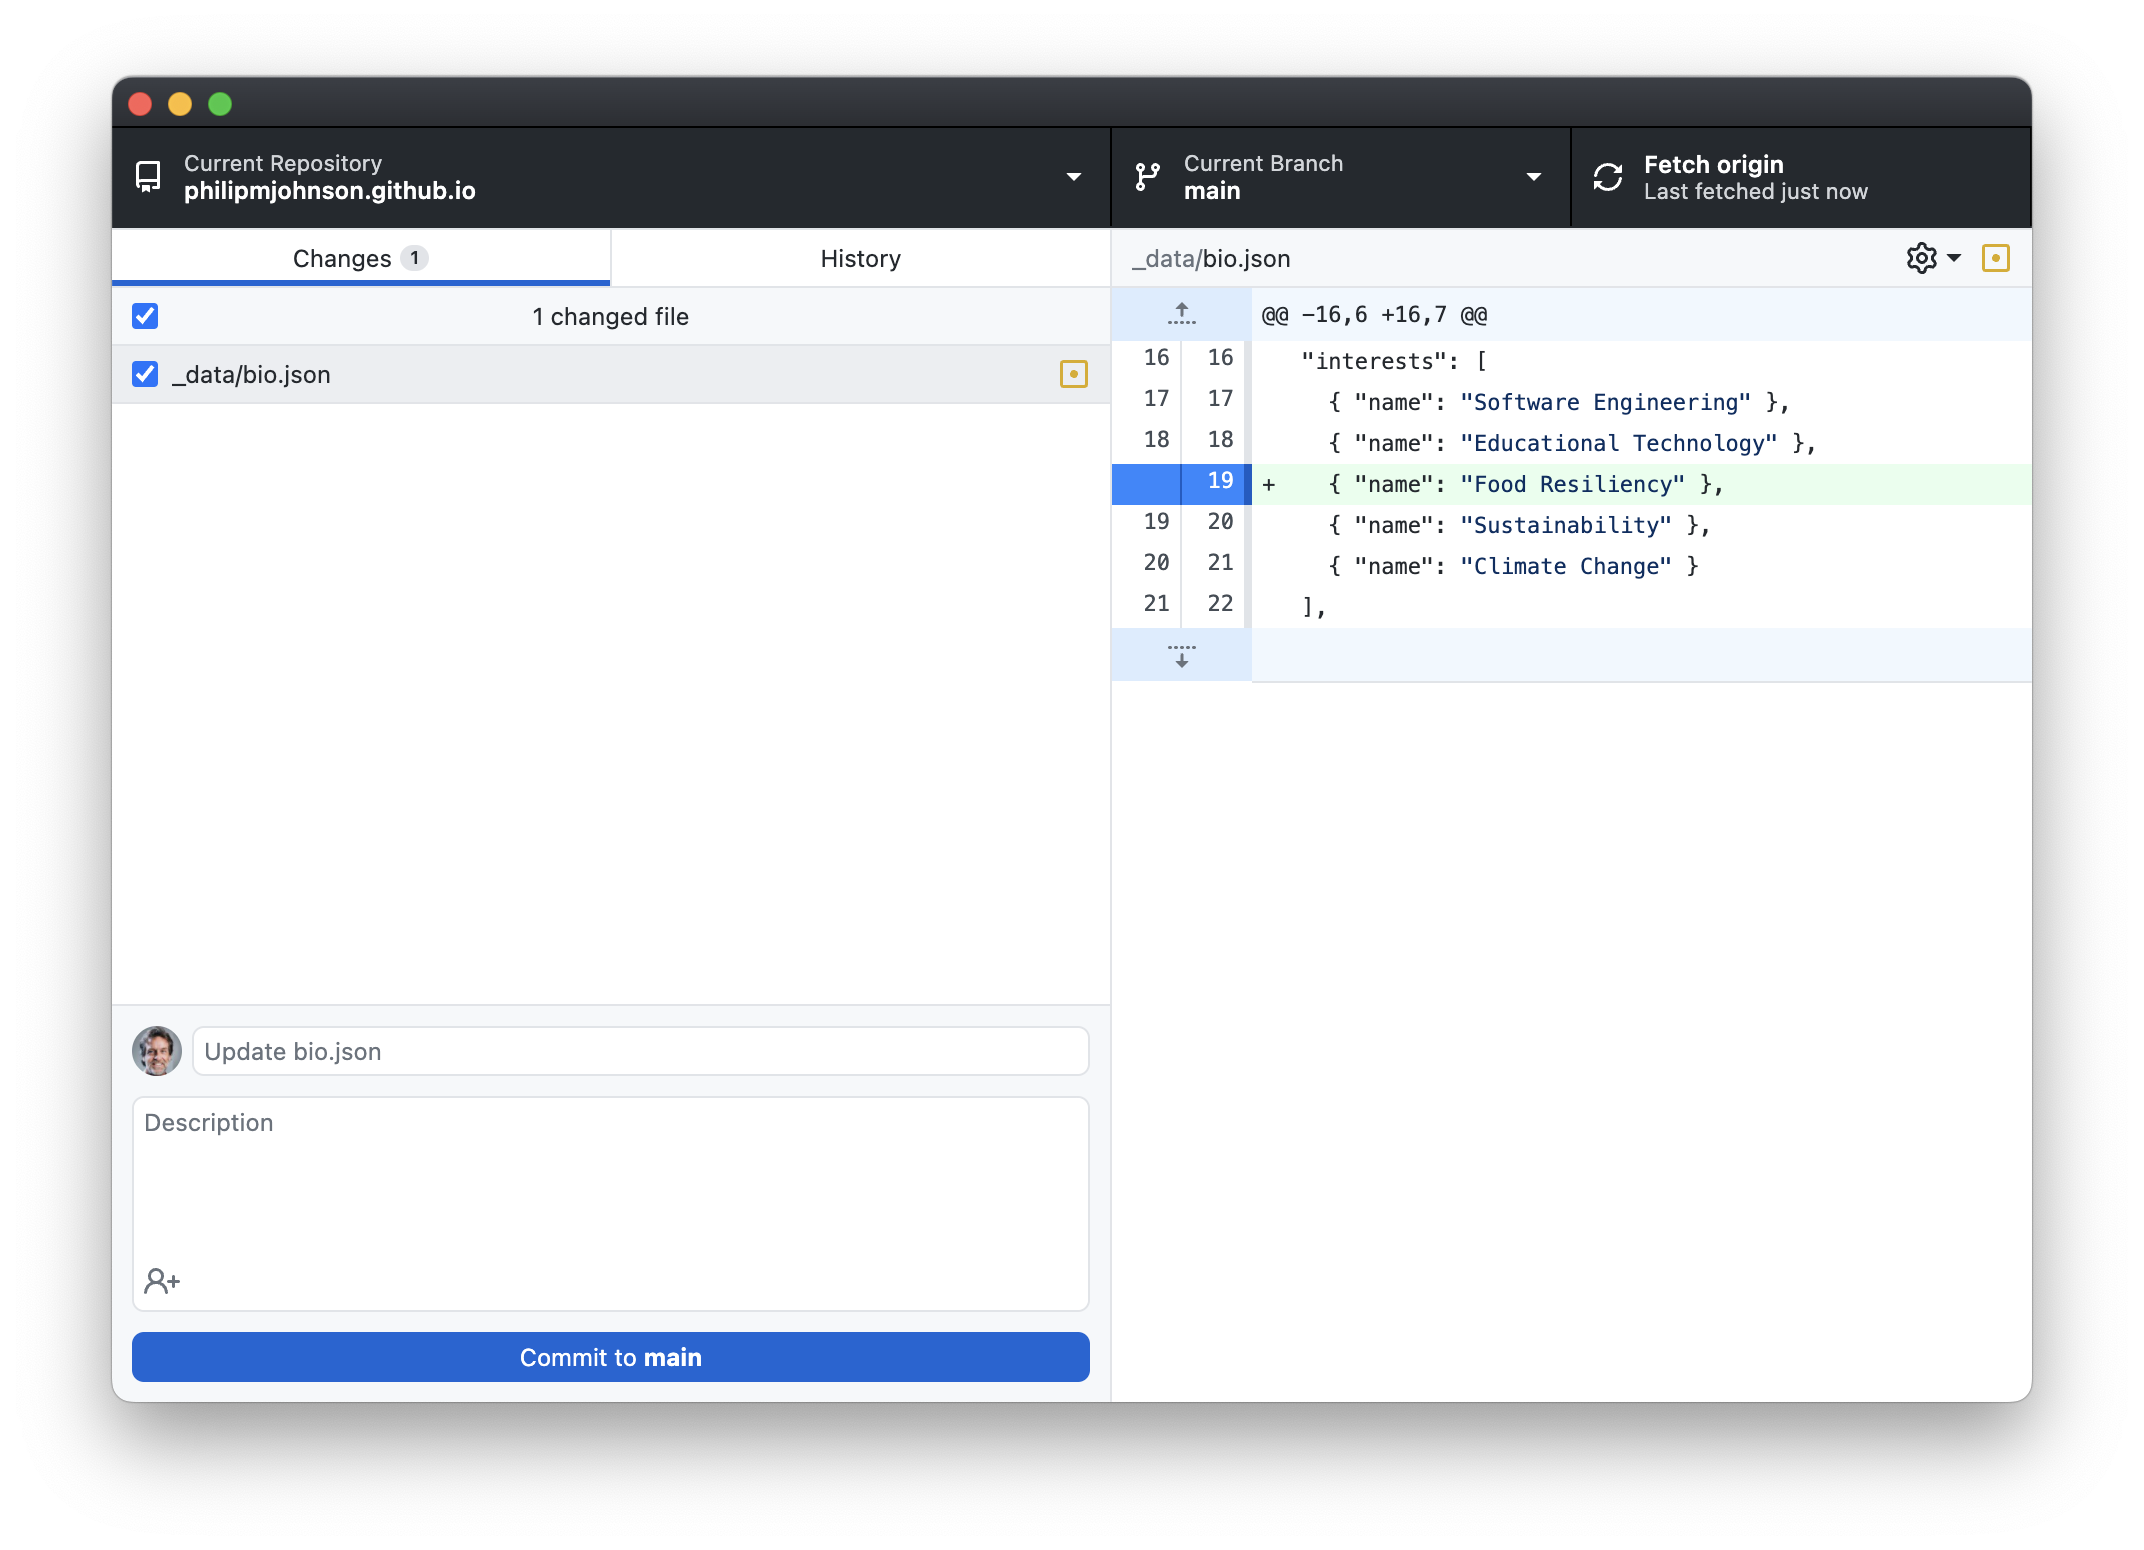
Type in a commit comment, then click "Commit to main" to commit these changes locally. Afterwards, GitHub Desktop will look like this:
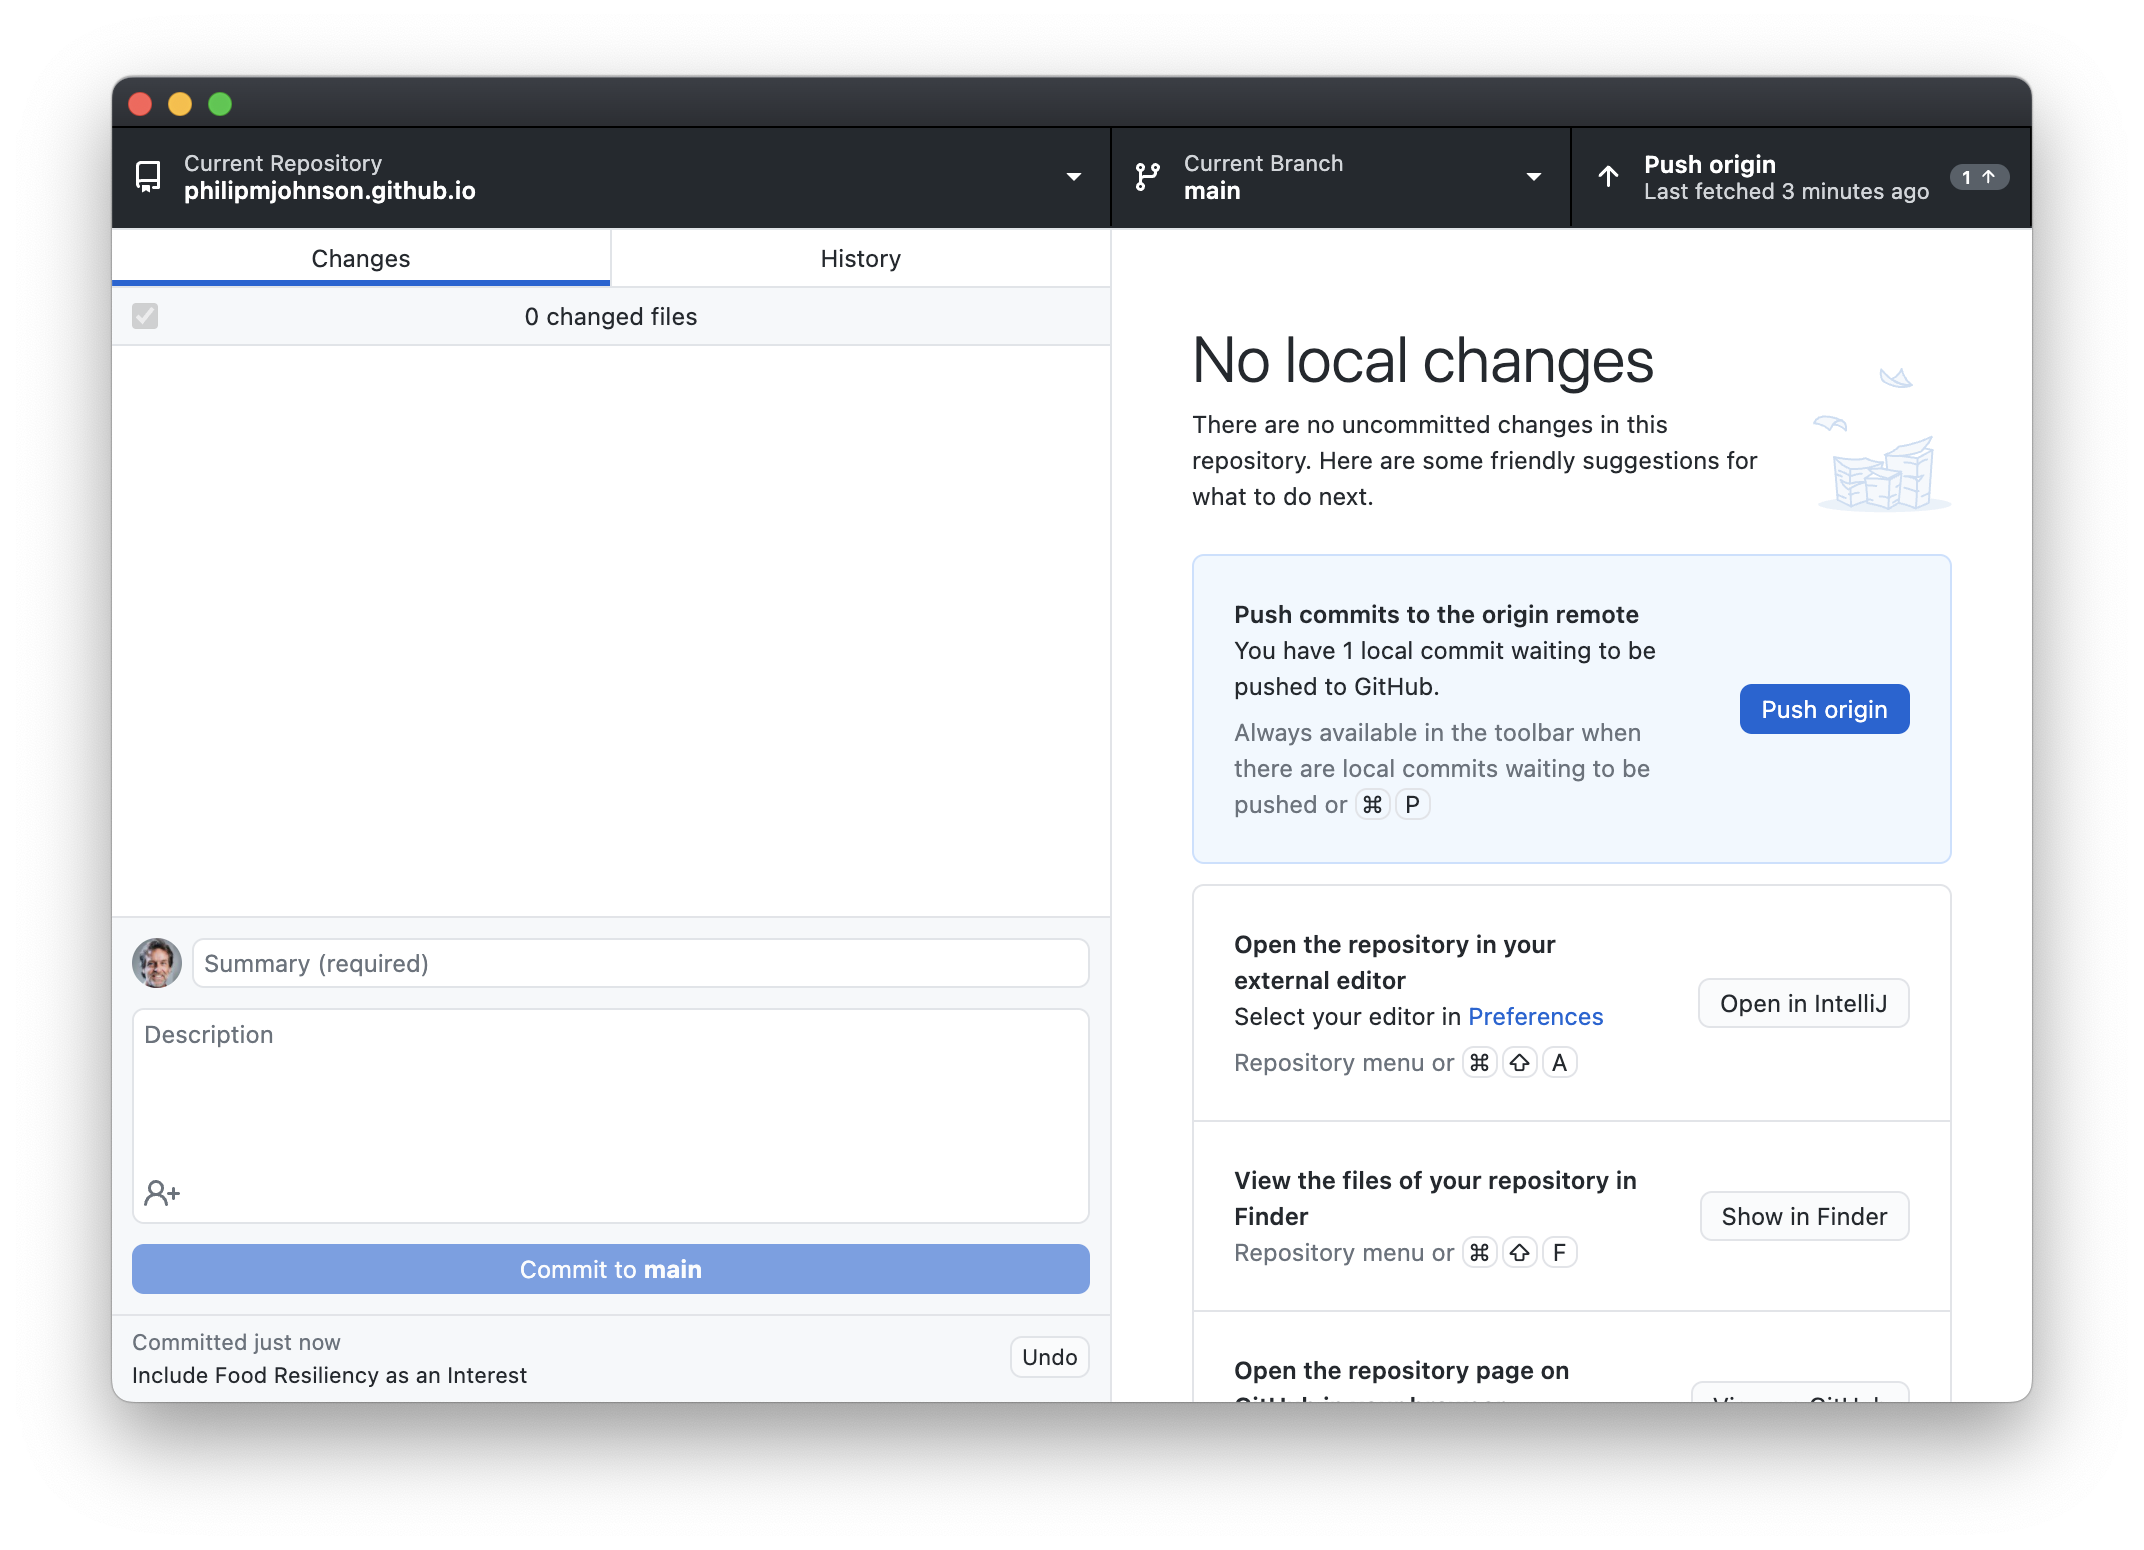
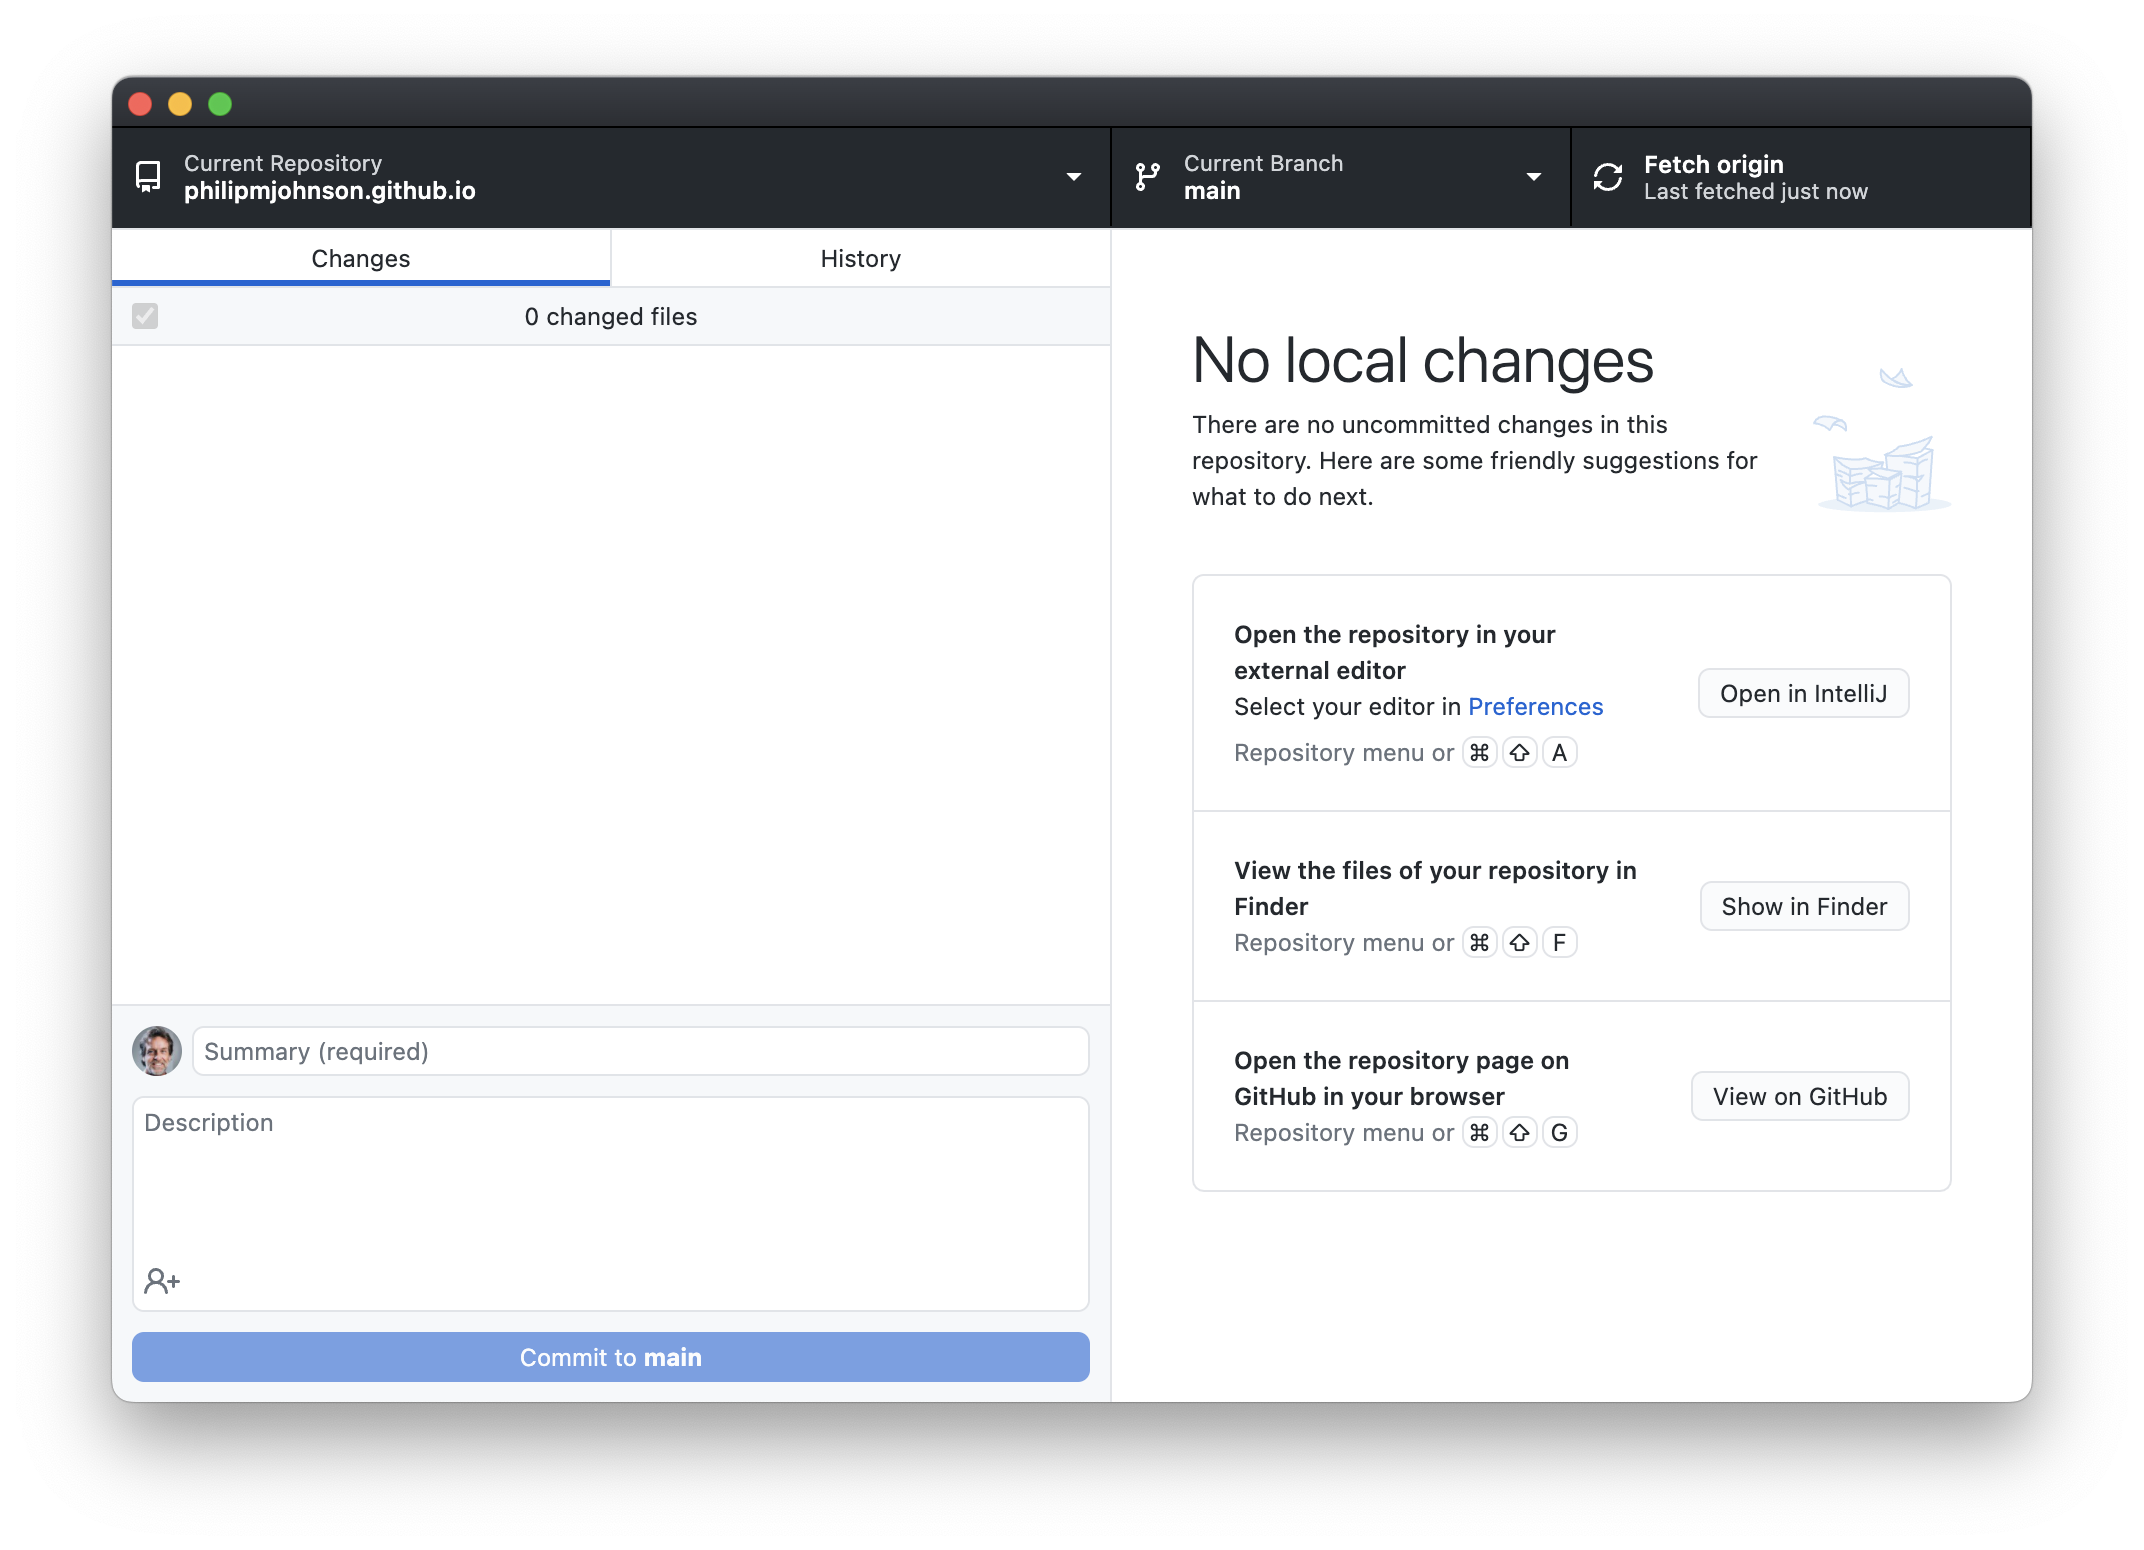
Now press the "Push origin" button in the upper right corner to push your local changes to the copy of your repository located at GitHub. Afterwards, GitHub Desktop will look like this:
This change to the contents of your professional portfolio repository at GitHub triggers a new build of your professional portfolio using GitHub Actions. You can see the progress by clicking on the Actions tab of your GitHub portfolio home page:
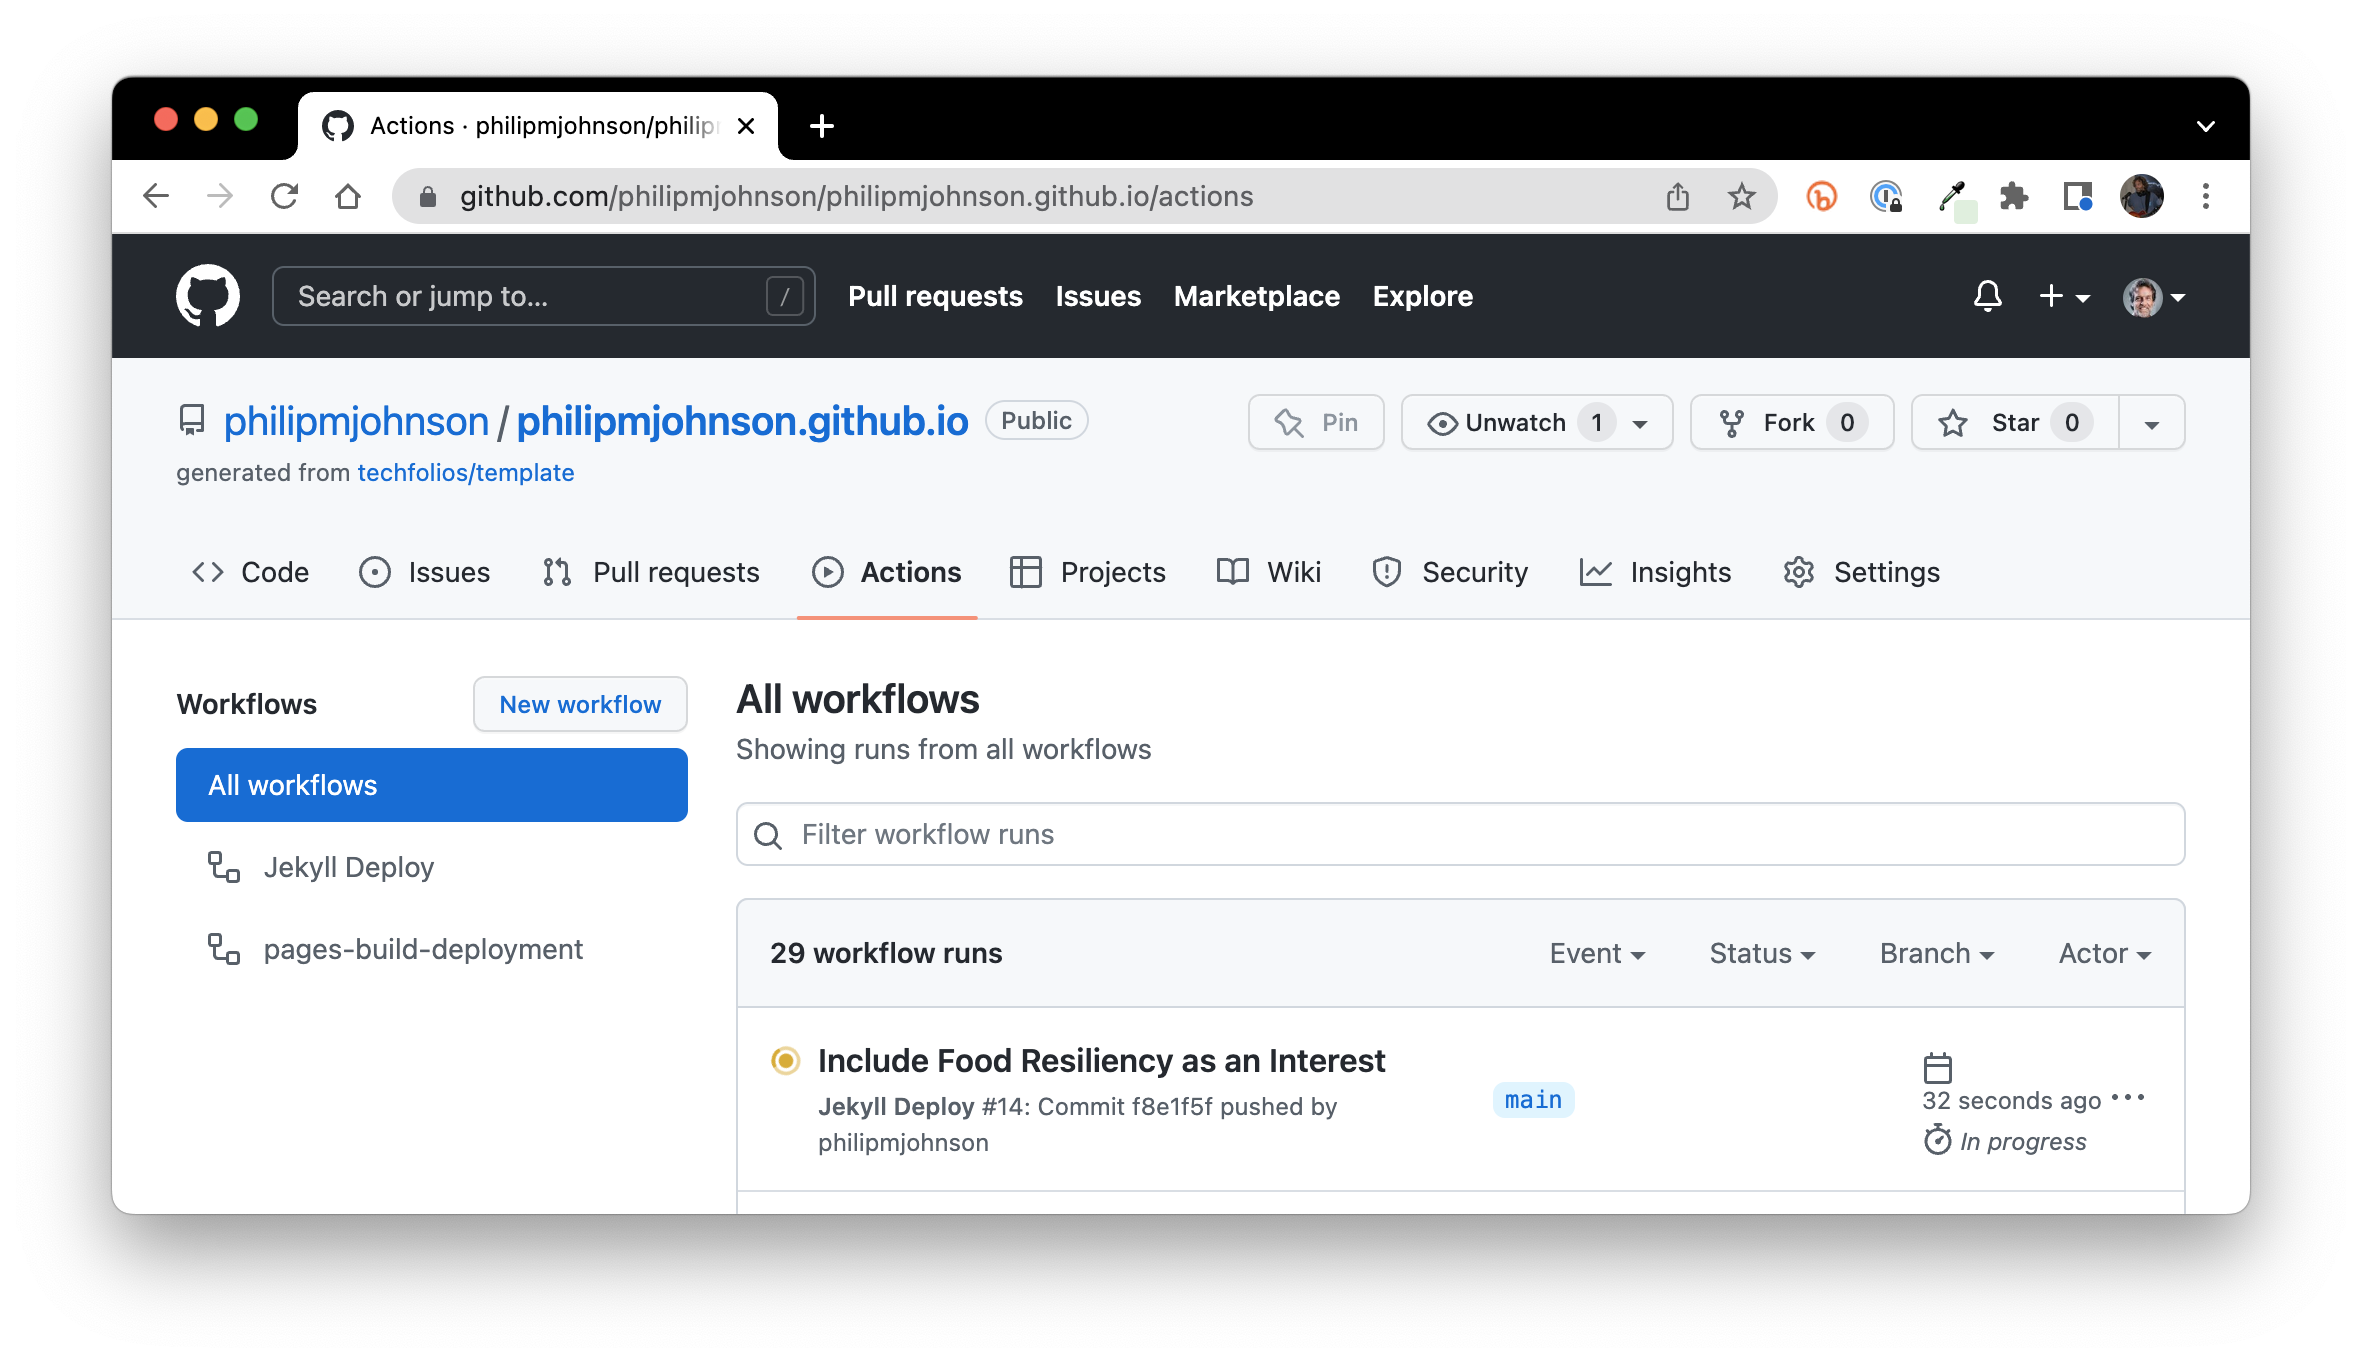
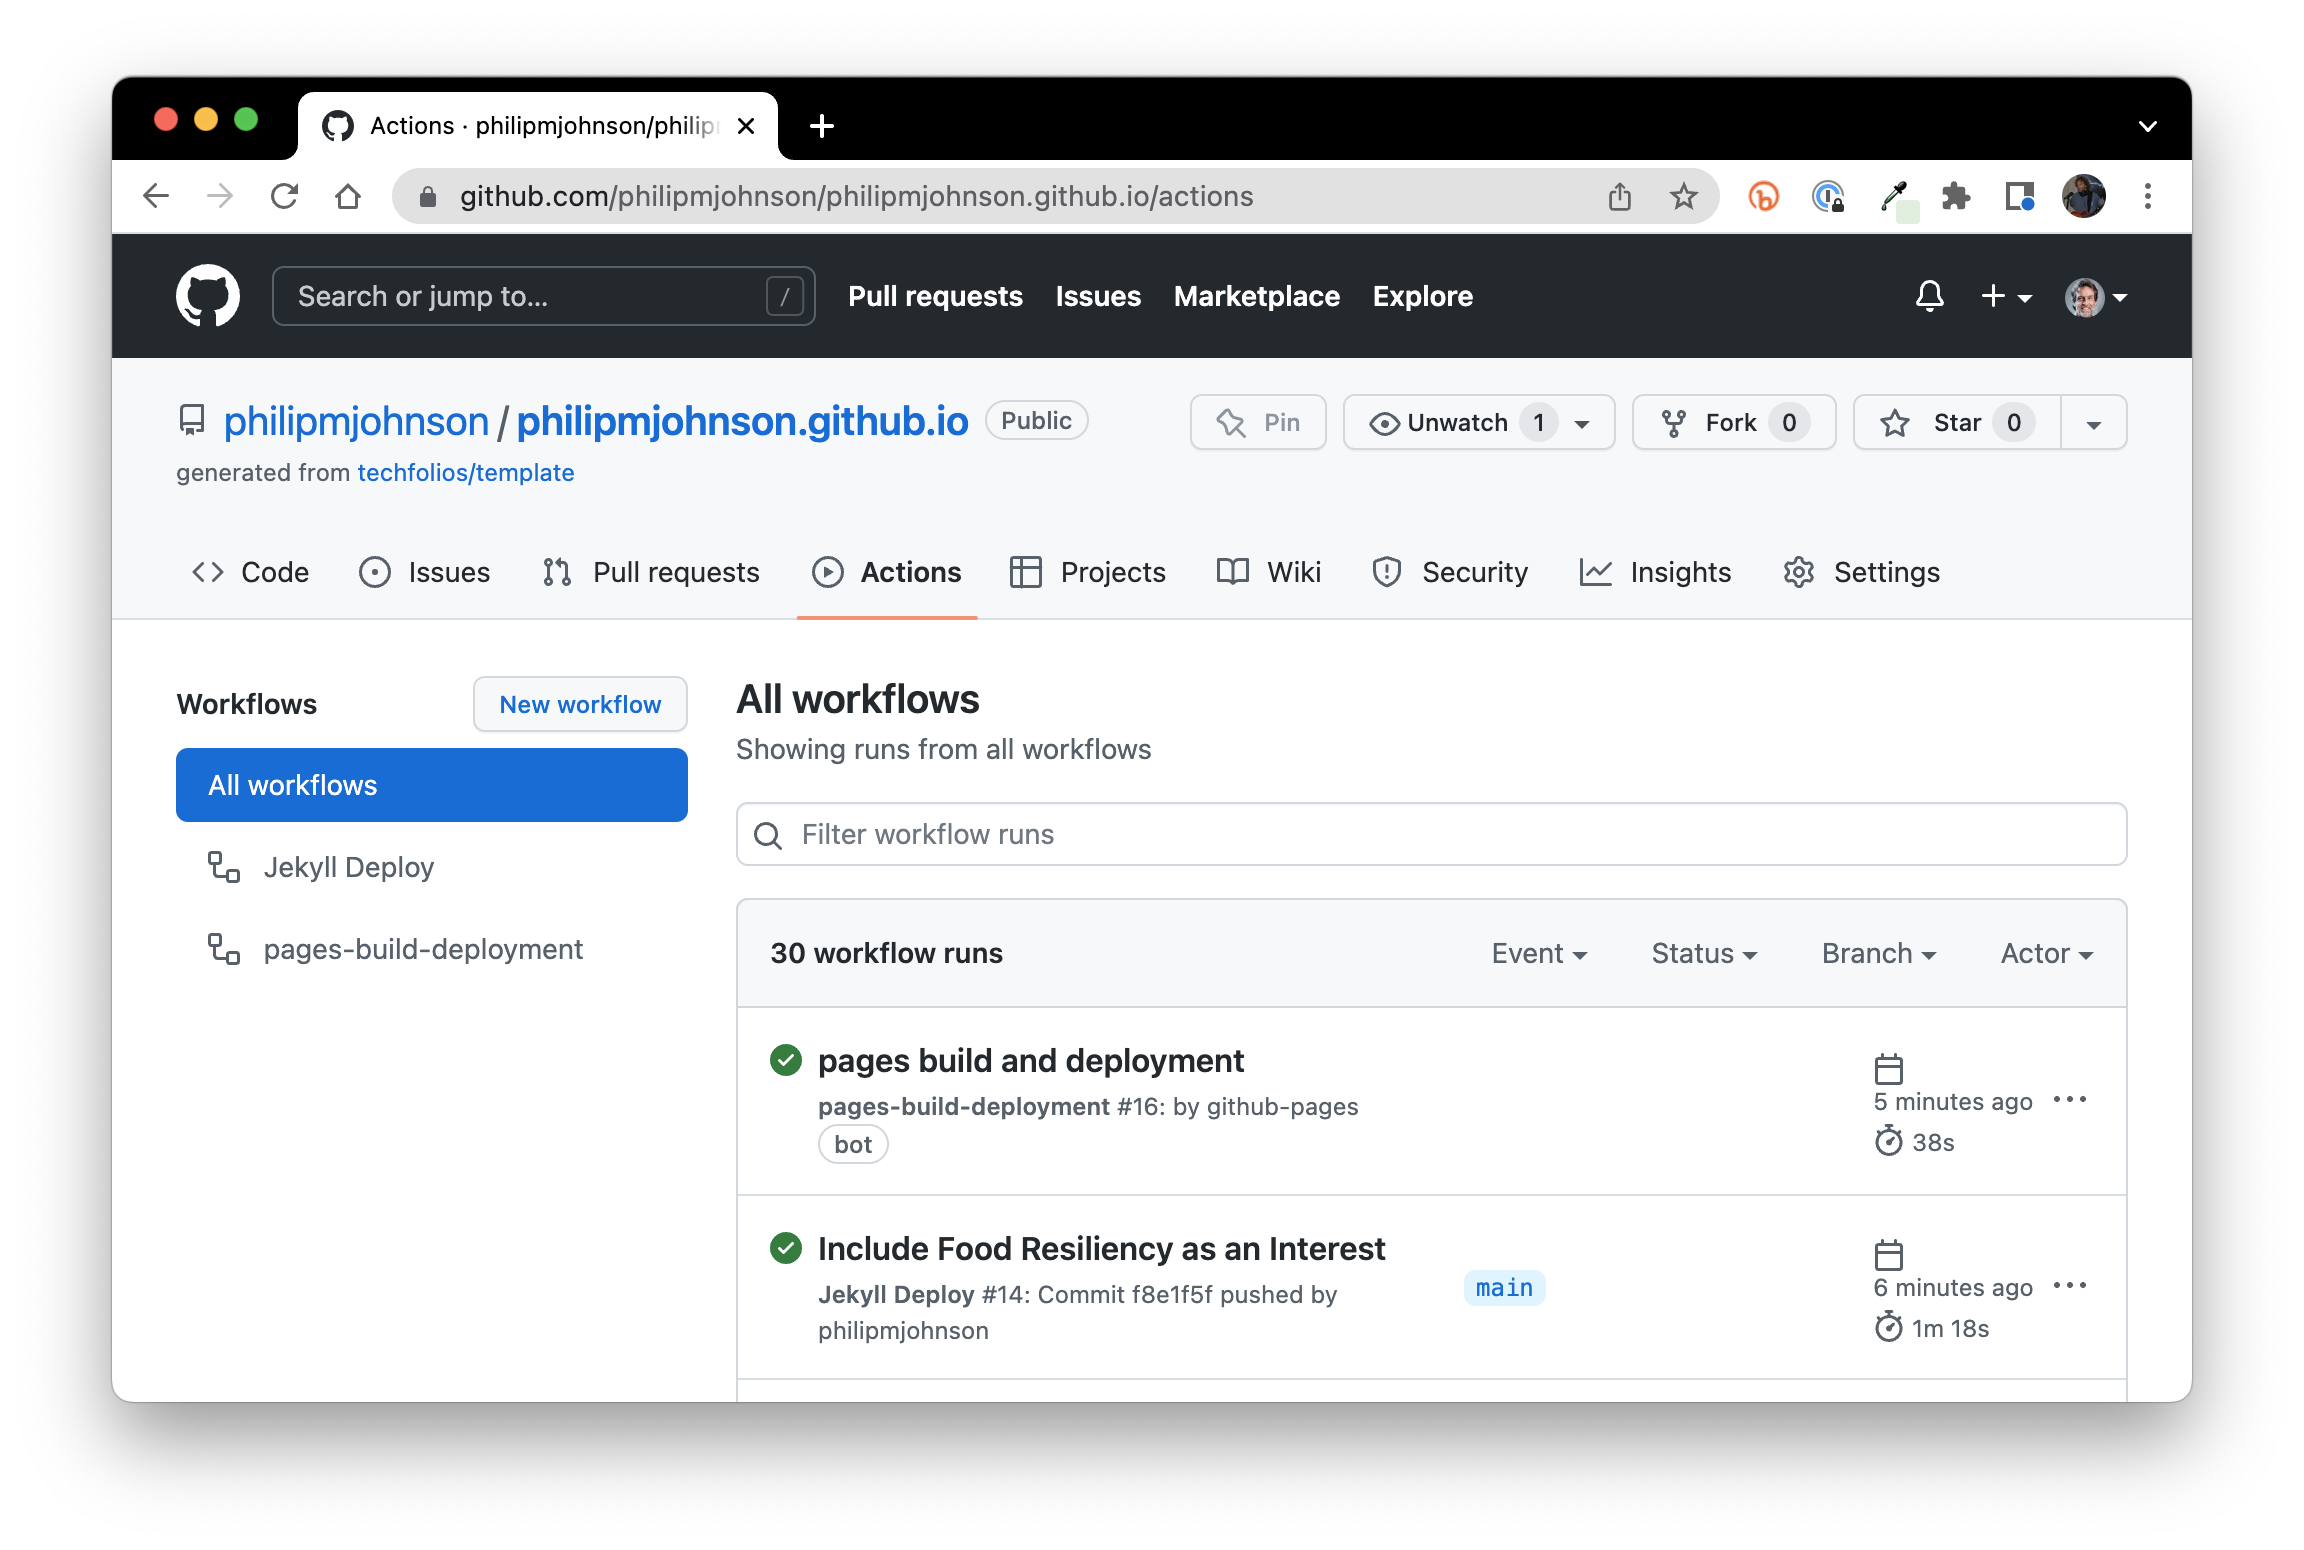
Within a couple of minutes, this action and the following one to build and deploy should finish successfully:
Once those actions are done, you can now see the deployed version of your portfolio, in my case https://philipmjohnson.github.io:

As you can see, my new "Food Resiliency" interest now appears in the published version of my portfolio.
Making mistakes
Life would be so much better if we never made mistakes. Let's see what happens when we make one.
Let's say that I forgot to put a comma at the end of the line specifying my new Food Resiliency interest:
What happens in this case is that http://127.0.0.1:4000/ will not update to display the new interest, which is confusing. To understand that there's a problem, you need to look at the shell window, which in this case displays the following:
Error: (/Users/philipjohnson/github/philipmjohnson/philipmjohnson.github.io/_data/bio.json):
did not find expected ',' or ']' while parsing a flow sequence at line 16 column 16
The error message isn't perfect: the actual problem is on line 19, not line 16, but it does tell you that the JSON parser expected a "," and didn't find one.
This is why it's very important to monitor the shell output while you do local development---if you make a mistake, the shell will often let you know.
If you look closely at the editor window above, you'll see that there is a red squiggly line at the end of line 19, and if you hover over it, the editor will tell you that you're missing a comma!
Moral of the story: use a good editor, they'll save you a lot of time.
Try it yourself
Now that you've seen how to build, edit, view, and deploy a portfolio, go ahead and use this process to make a very simple change to your own portfolio. That will get you ready for making more complicated improvements, as we'll describe in the next section.